homeassistant

11213 readers
37 users here now

Home Assistant is open source home automation that puts local control and privacy first. Powered by a worldwide community of tinkerers and DIY enthusiasts. Perfect to run on a Raspberry Pi or a local server. Available for free at home-assistant.io

founded 1 year ago
MODERATORS
1


"Hur Hur that's what a timer on your phone is for dude"

Yeah but this was a smart plug that was going dusty in a drawer!

Anyway it's not the notification that makes my brain tickle in that special way, but the fact that my HA takes note of who was in the kitchen when the air fryer was started and only notifies the floor with that person on when it's done.

Now I've worked that logic out with a silly Air Fryer notification I can reuse it in all my other automations.

2
1
submitted 6 months ago* (last edited 6 months ago) by [email protected] to c/[email protected]


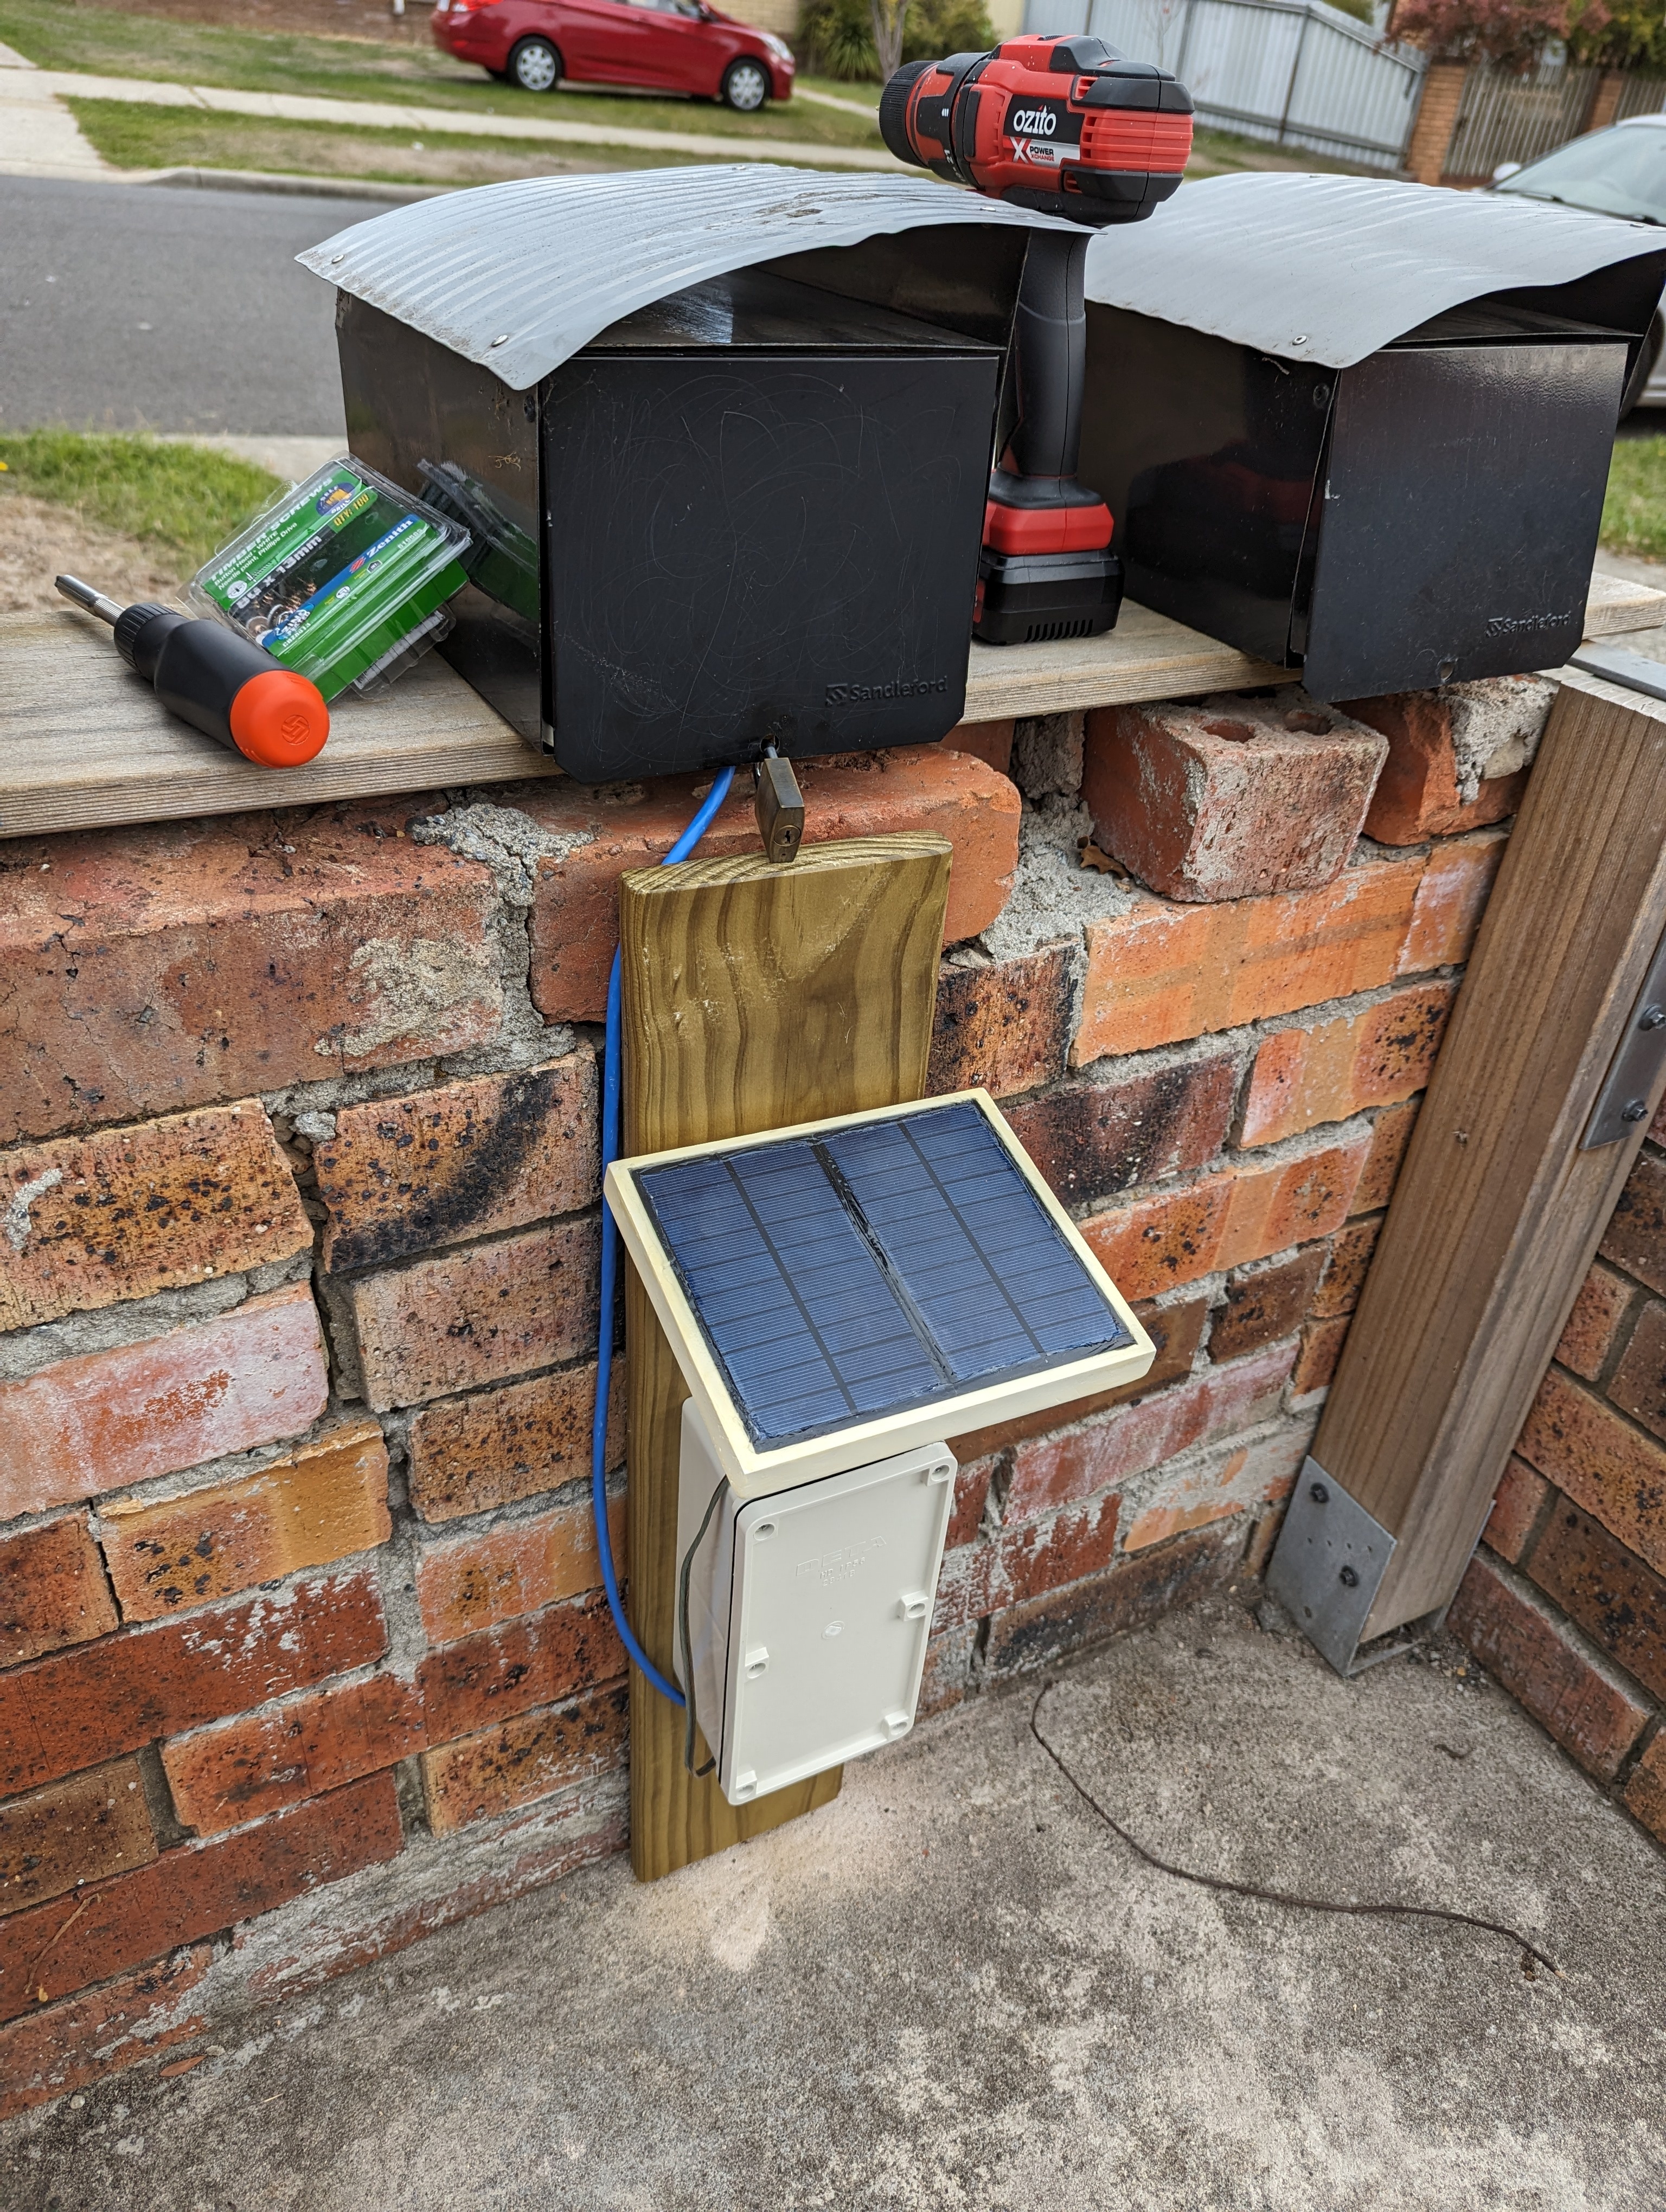
It was a long running project, but I finally did it. I built what I'm calling a smart mailbox that communicates locally with Home Assistant via ESPHome.

Parts:

Tools:

  • Soldering iron
  • Router for cutting grooves in wood
  • Drill and hole saw bits
  • Various files and sandpaper

For a start, I followed this guide to get me started on the power delivery portion, but I ended up using much higher valued resistors since I found that I was losing more battery charge through the voltage divider than I was from the ESP32 or proximity sensors.

Once I'd tested the concept with the parts just laying in a jumble on the table, it was time to get to work.

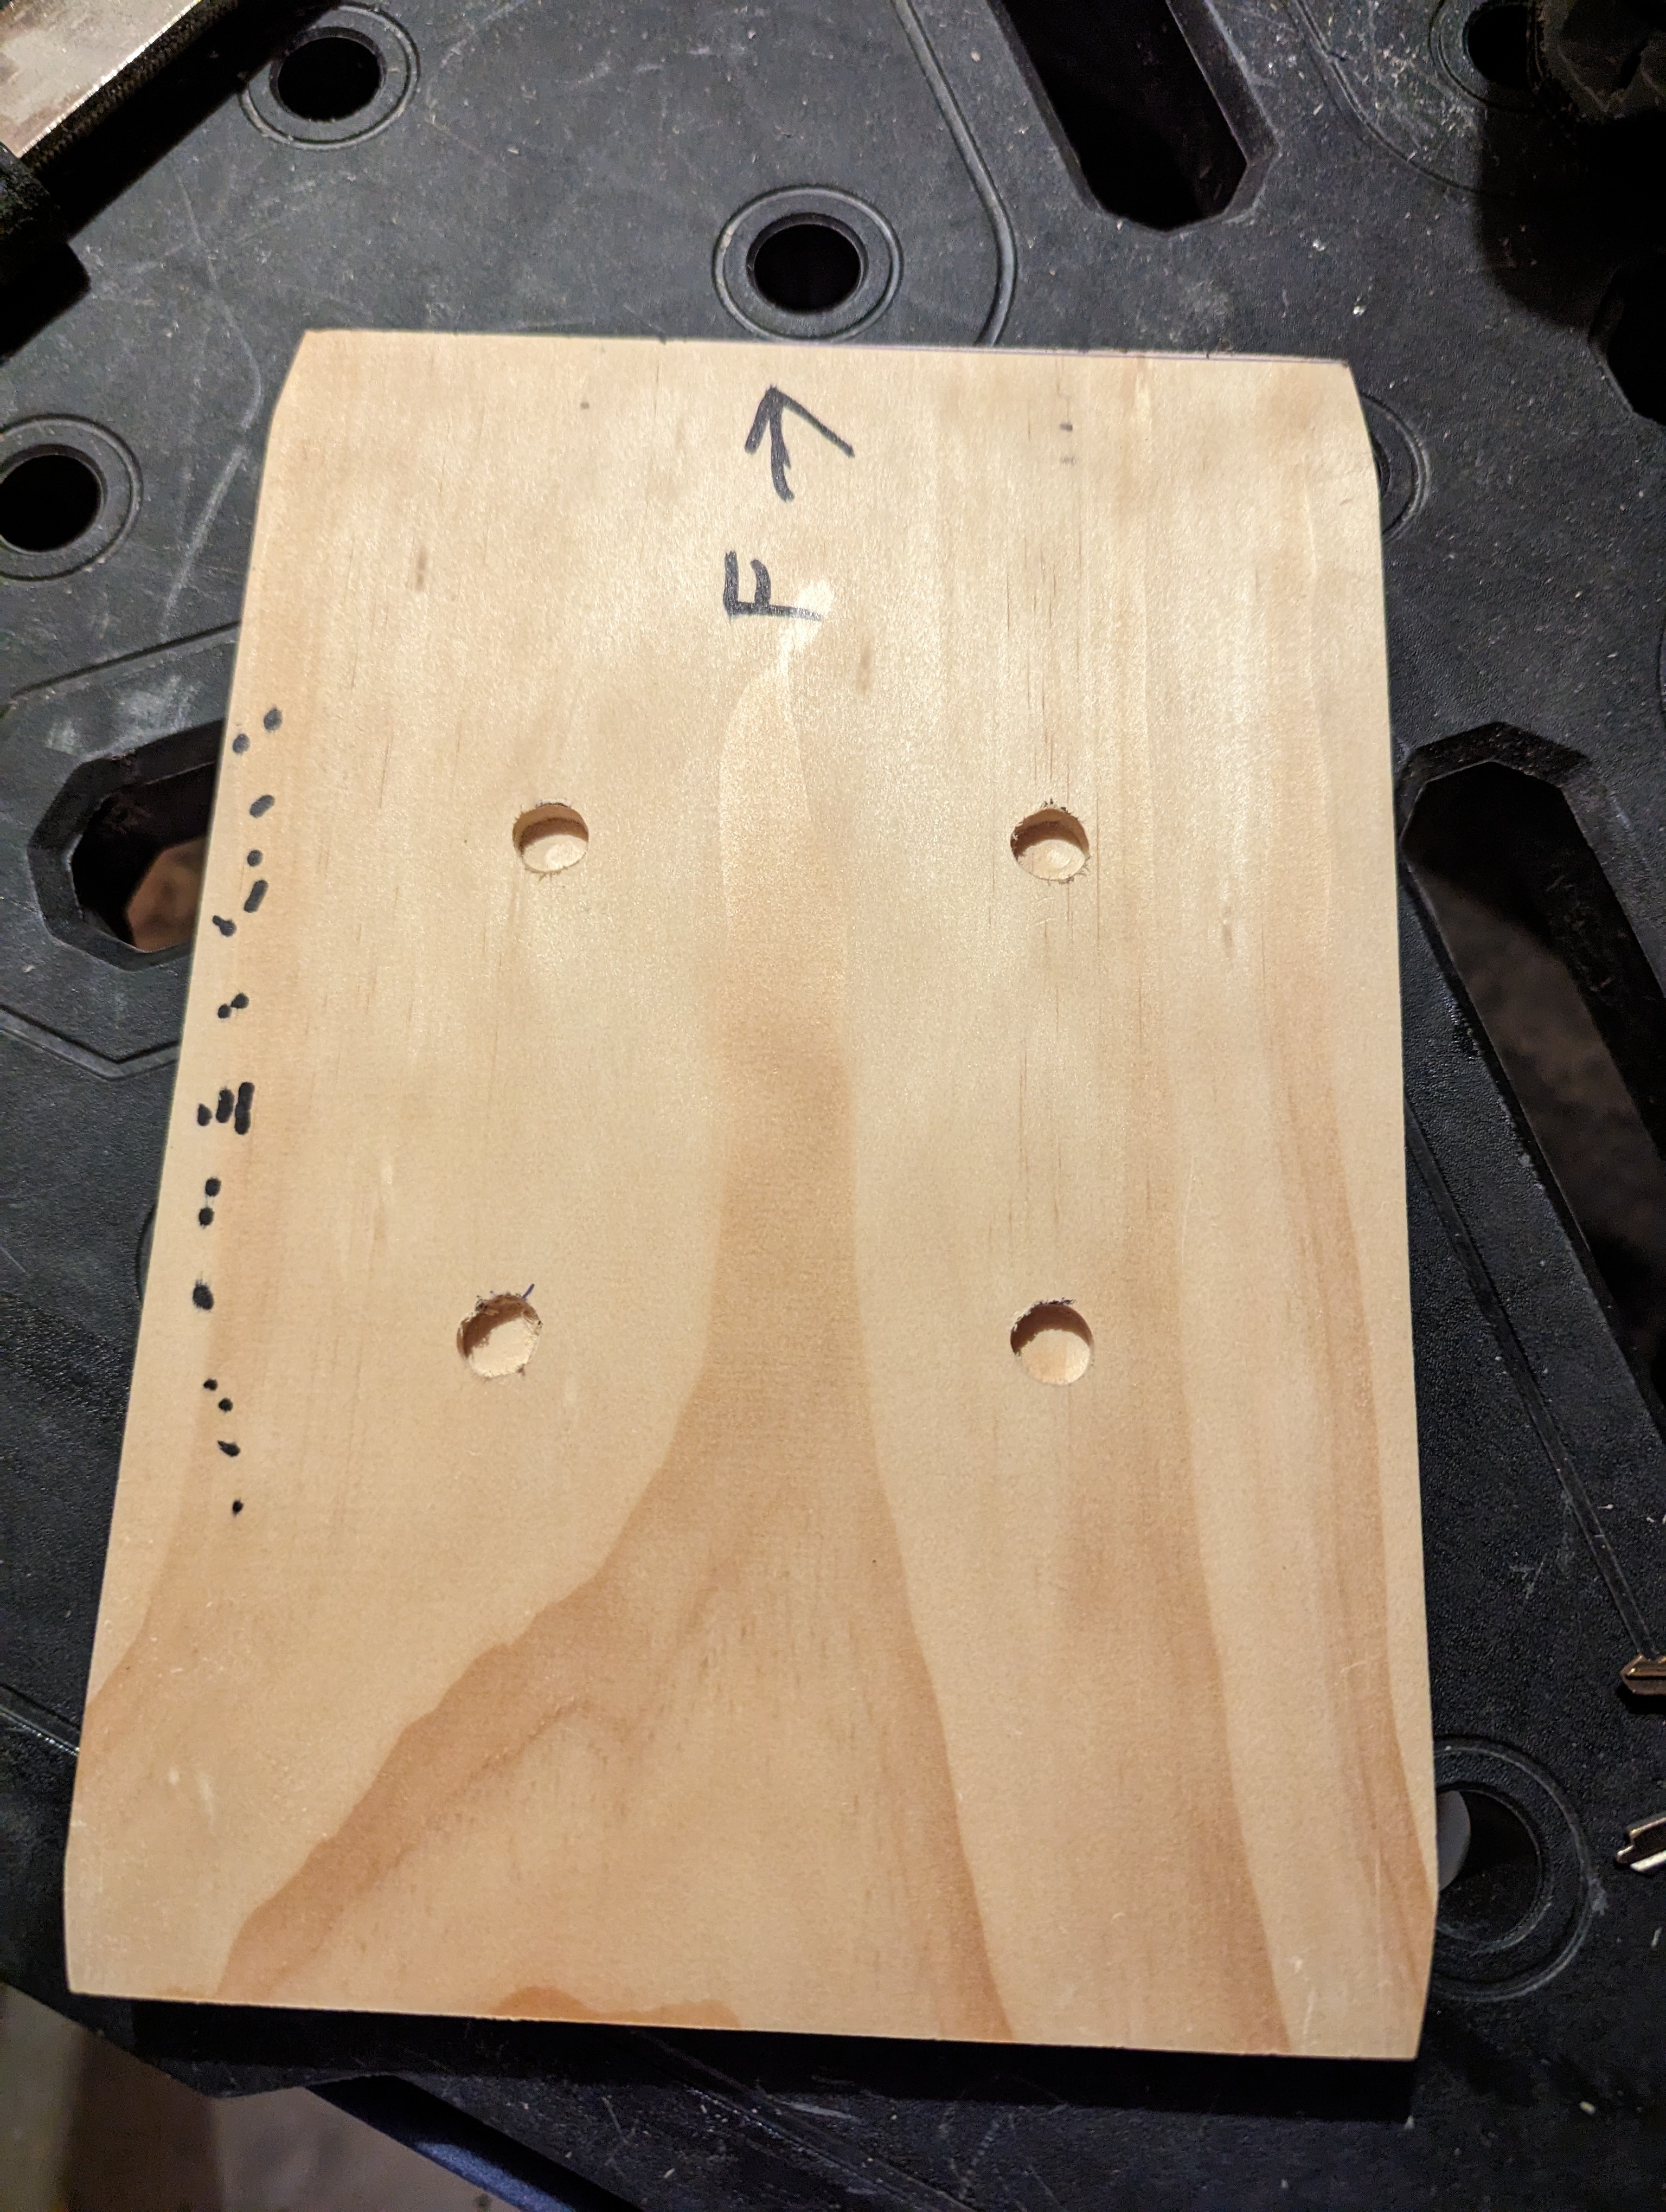
I started by cutting a plank of pine to fit my mailbox, chamfering the ends to make space for the metal joins. I routed out some spaces for the tops of the bolts that hold the mailbox down.
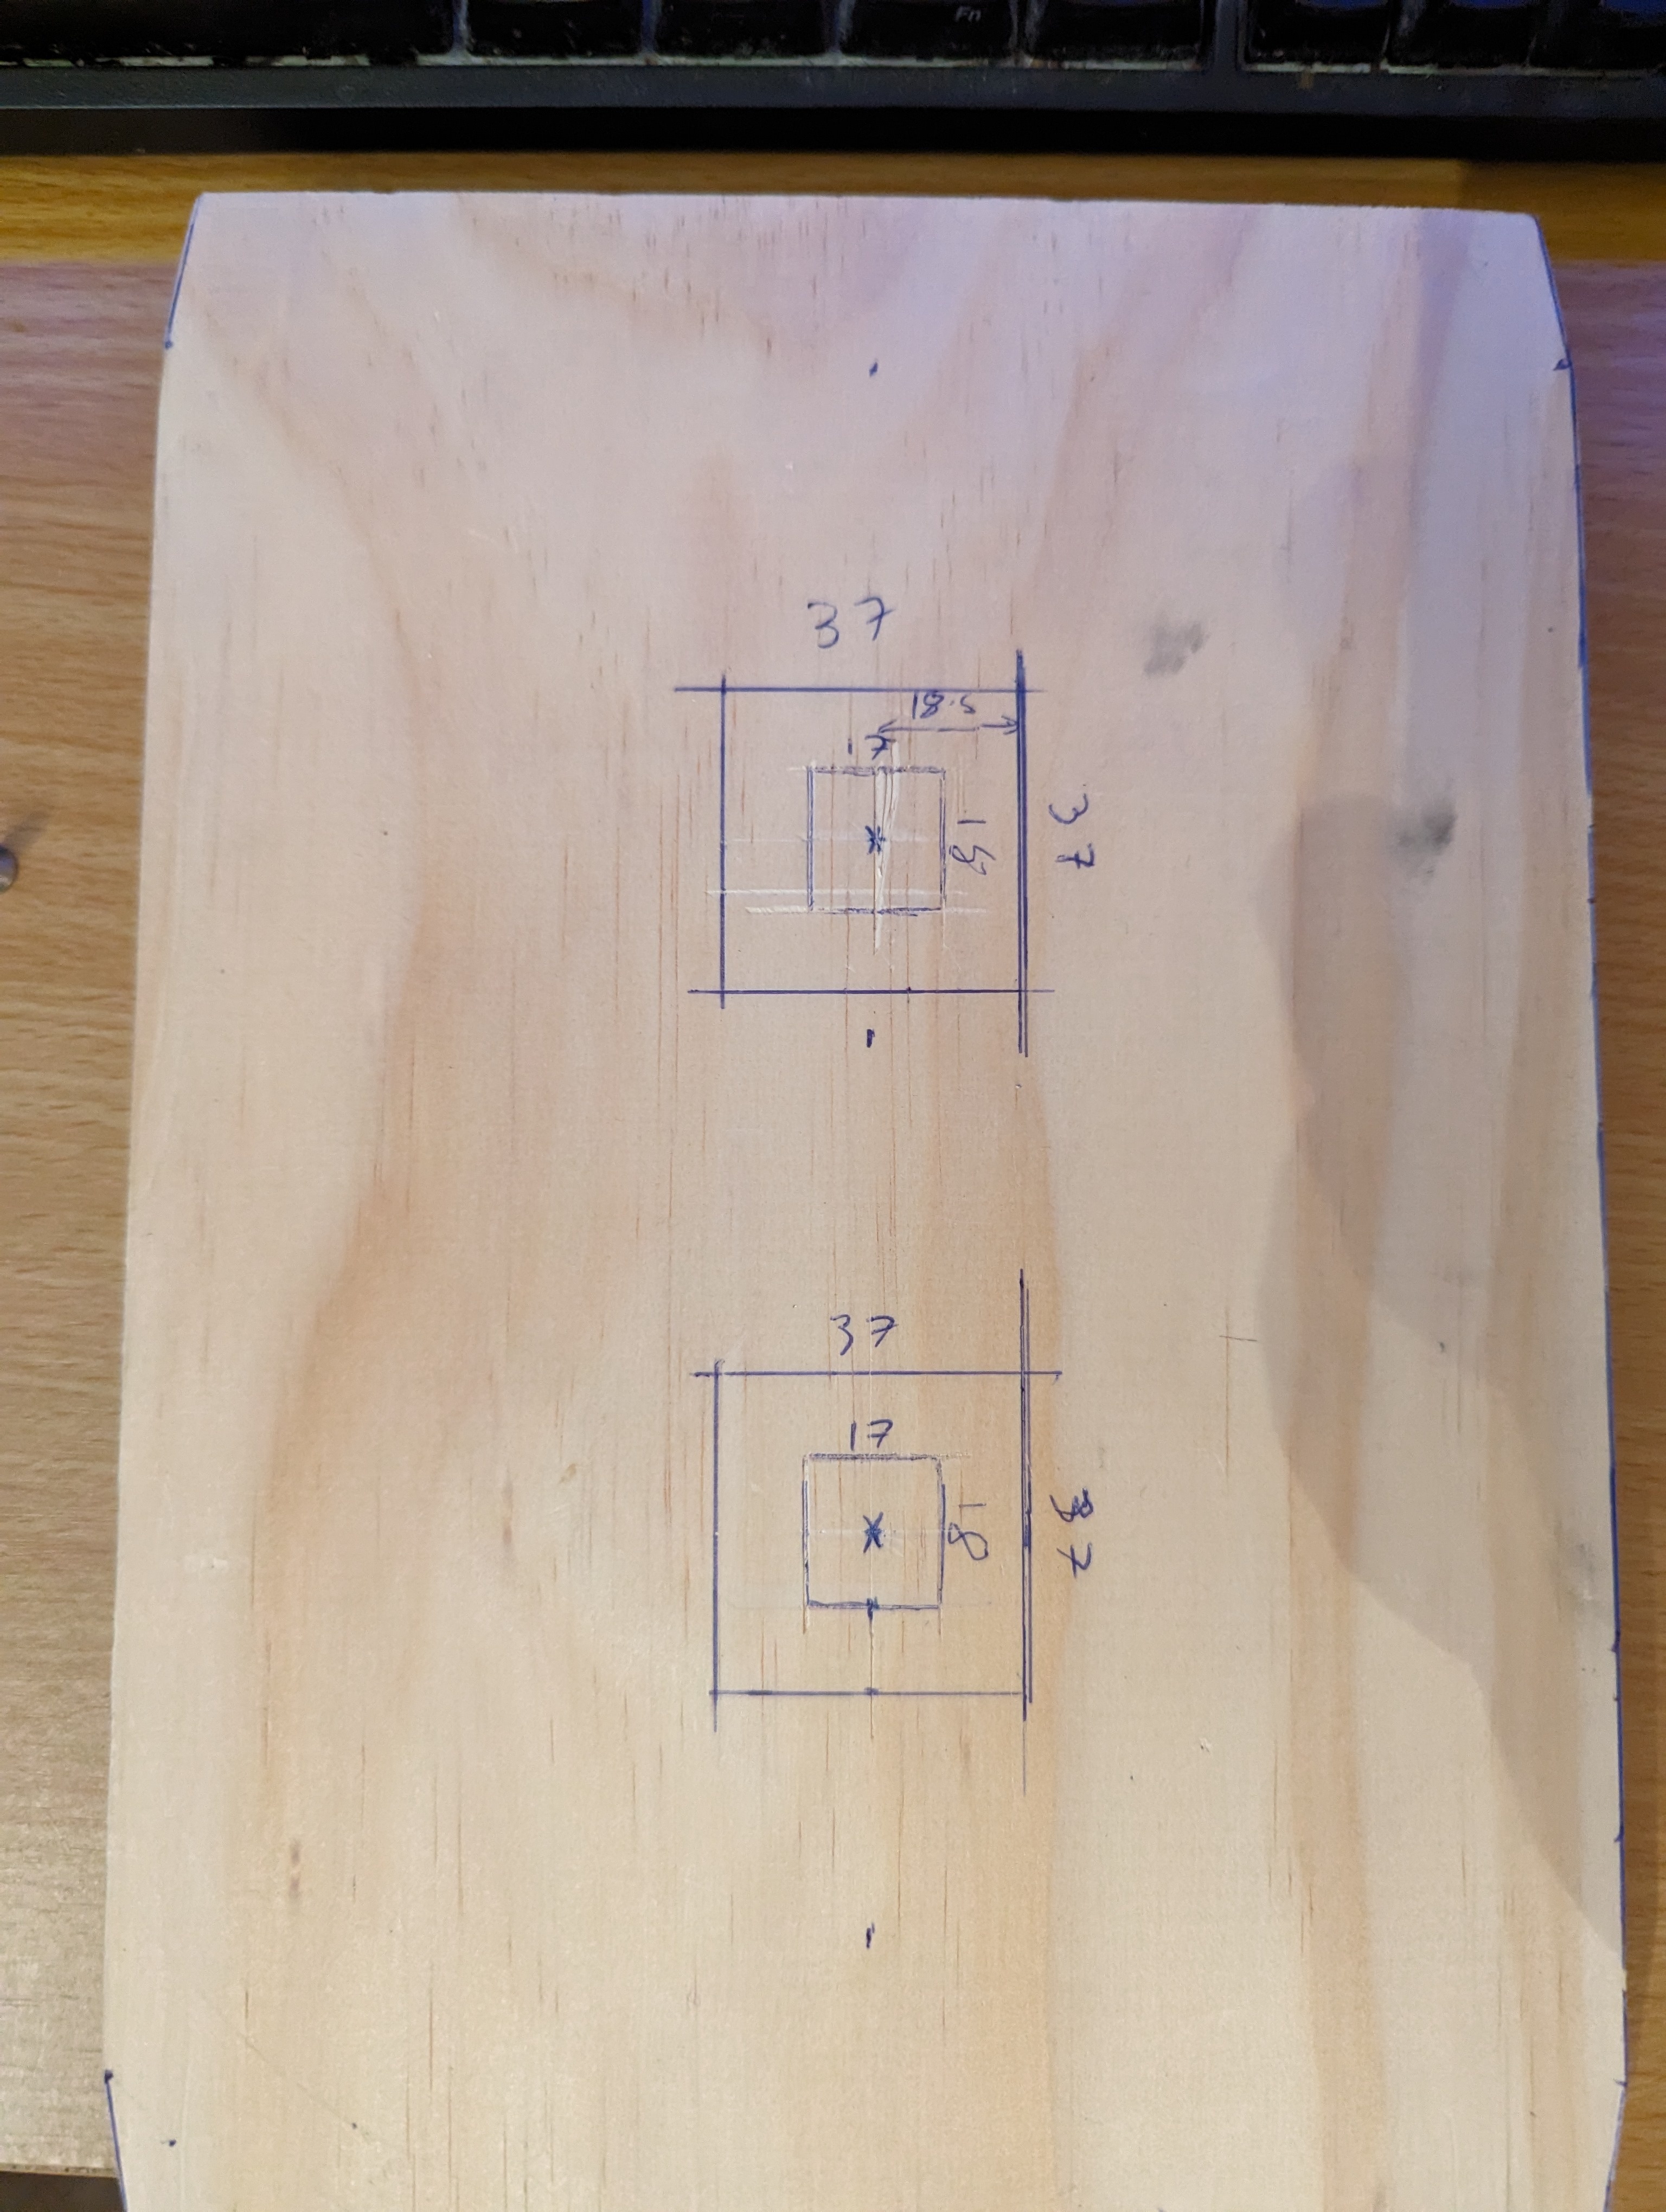
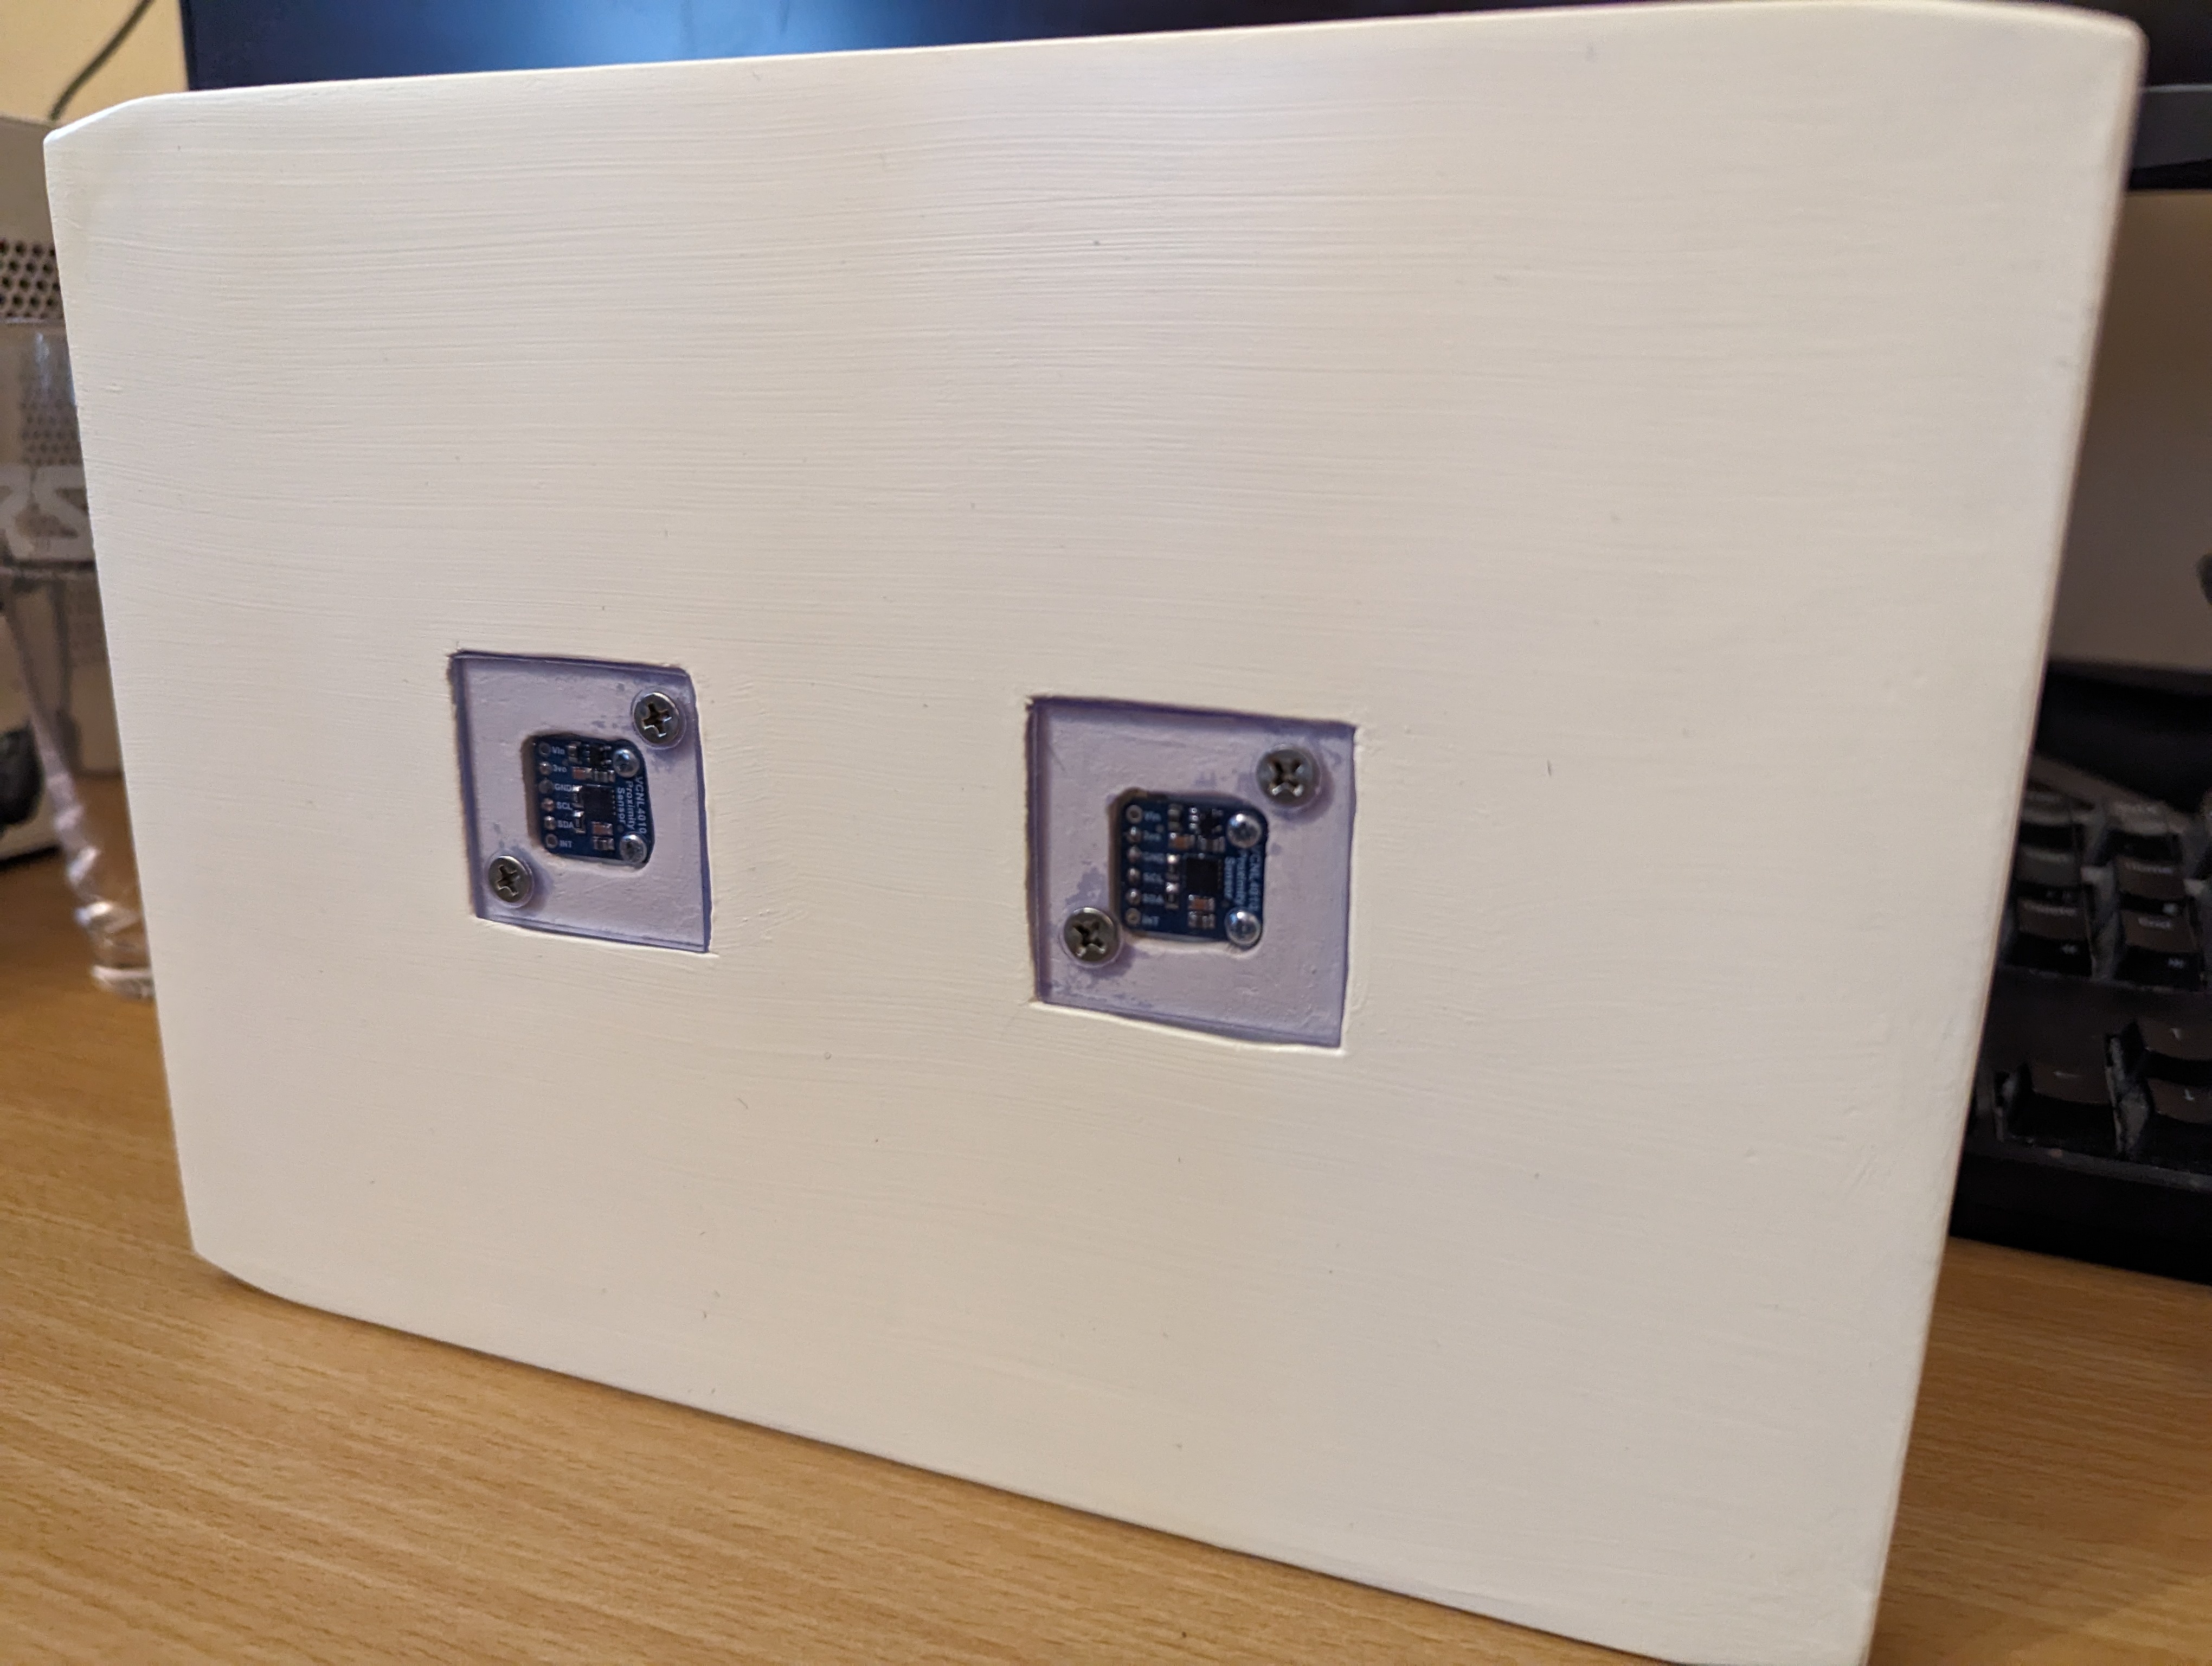
Measured out where the sensors should go, along with a surrounding space to screw down some little perspex windows to cover them. The idea I wanted was for the mail to be able to slide over the sensors without getting caught on them, as well as to protect them from dust.
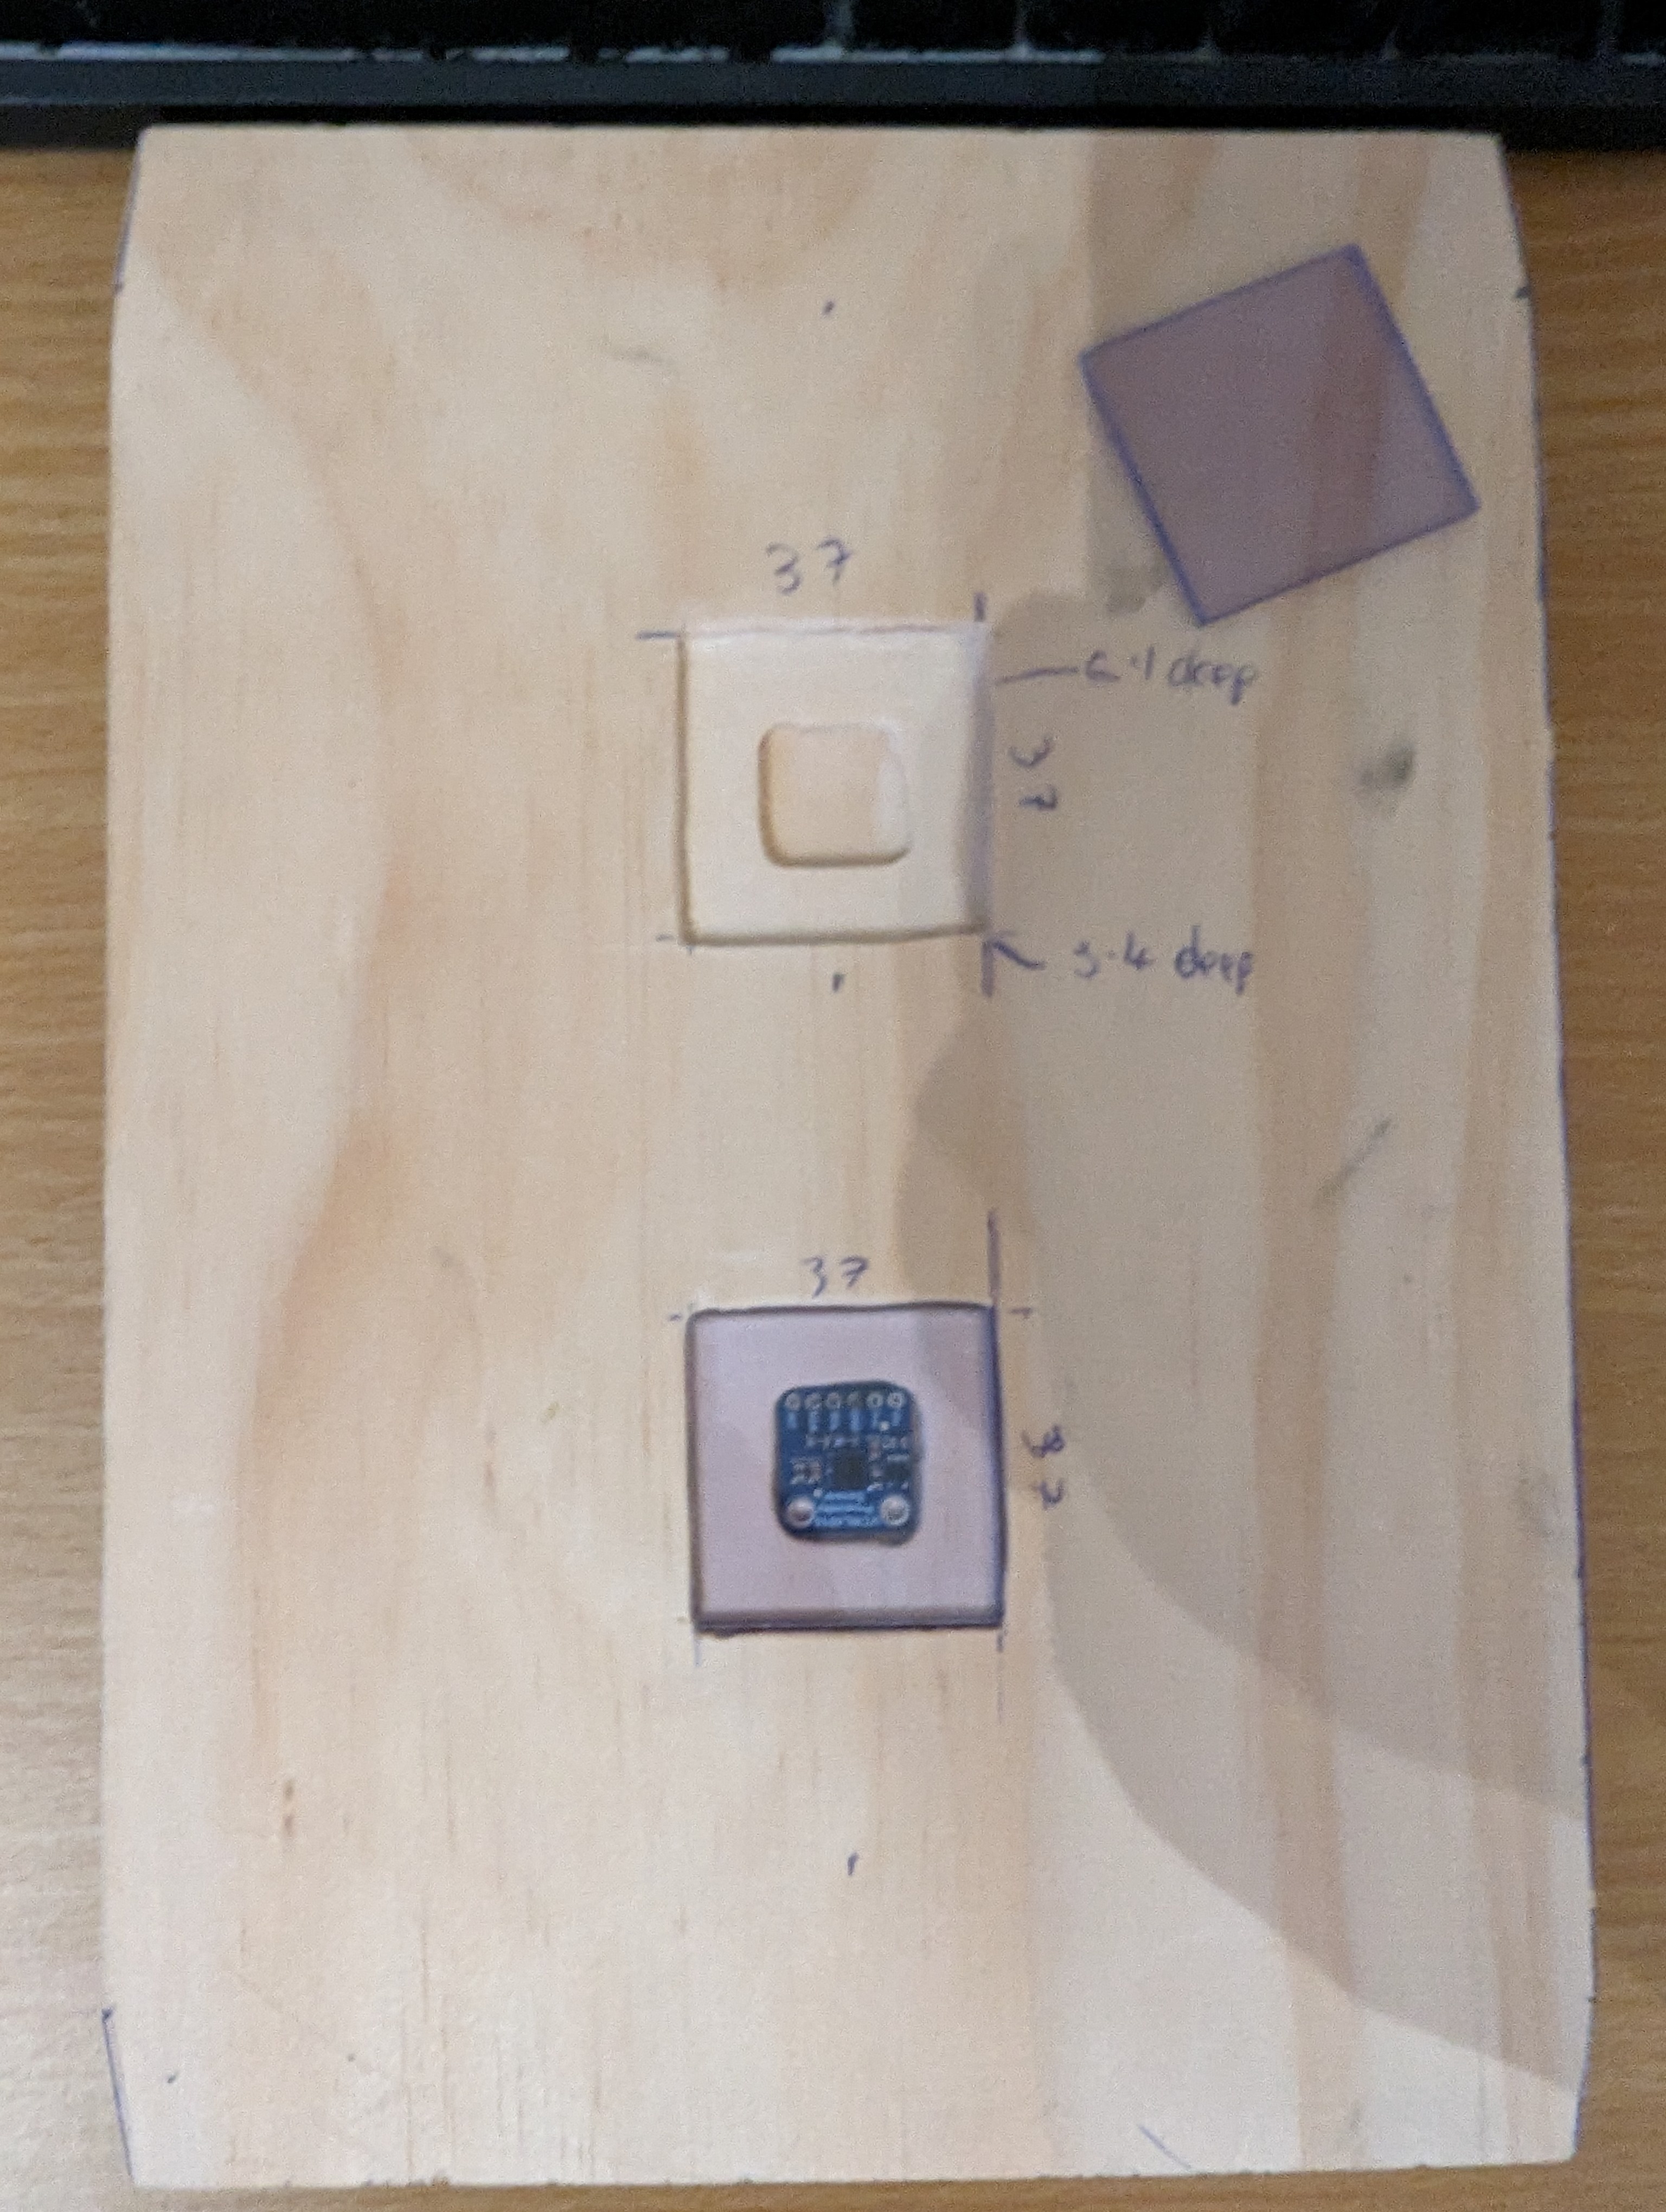
Routed out the dents and cleaned them up with a chisel and sandpaper. Cut the perspex to shape for a test fit.
On the other side, I routed out a notch for the cable to access the sensors.
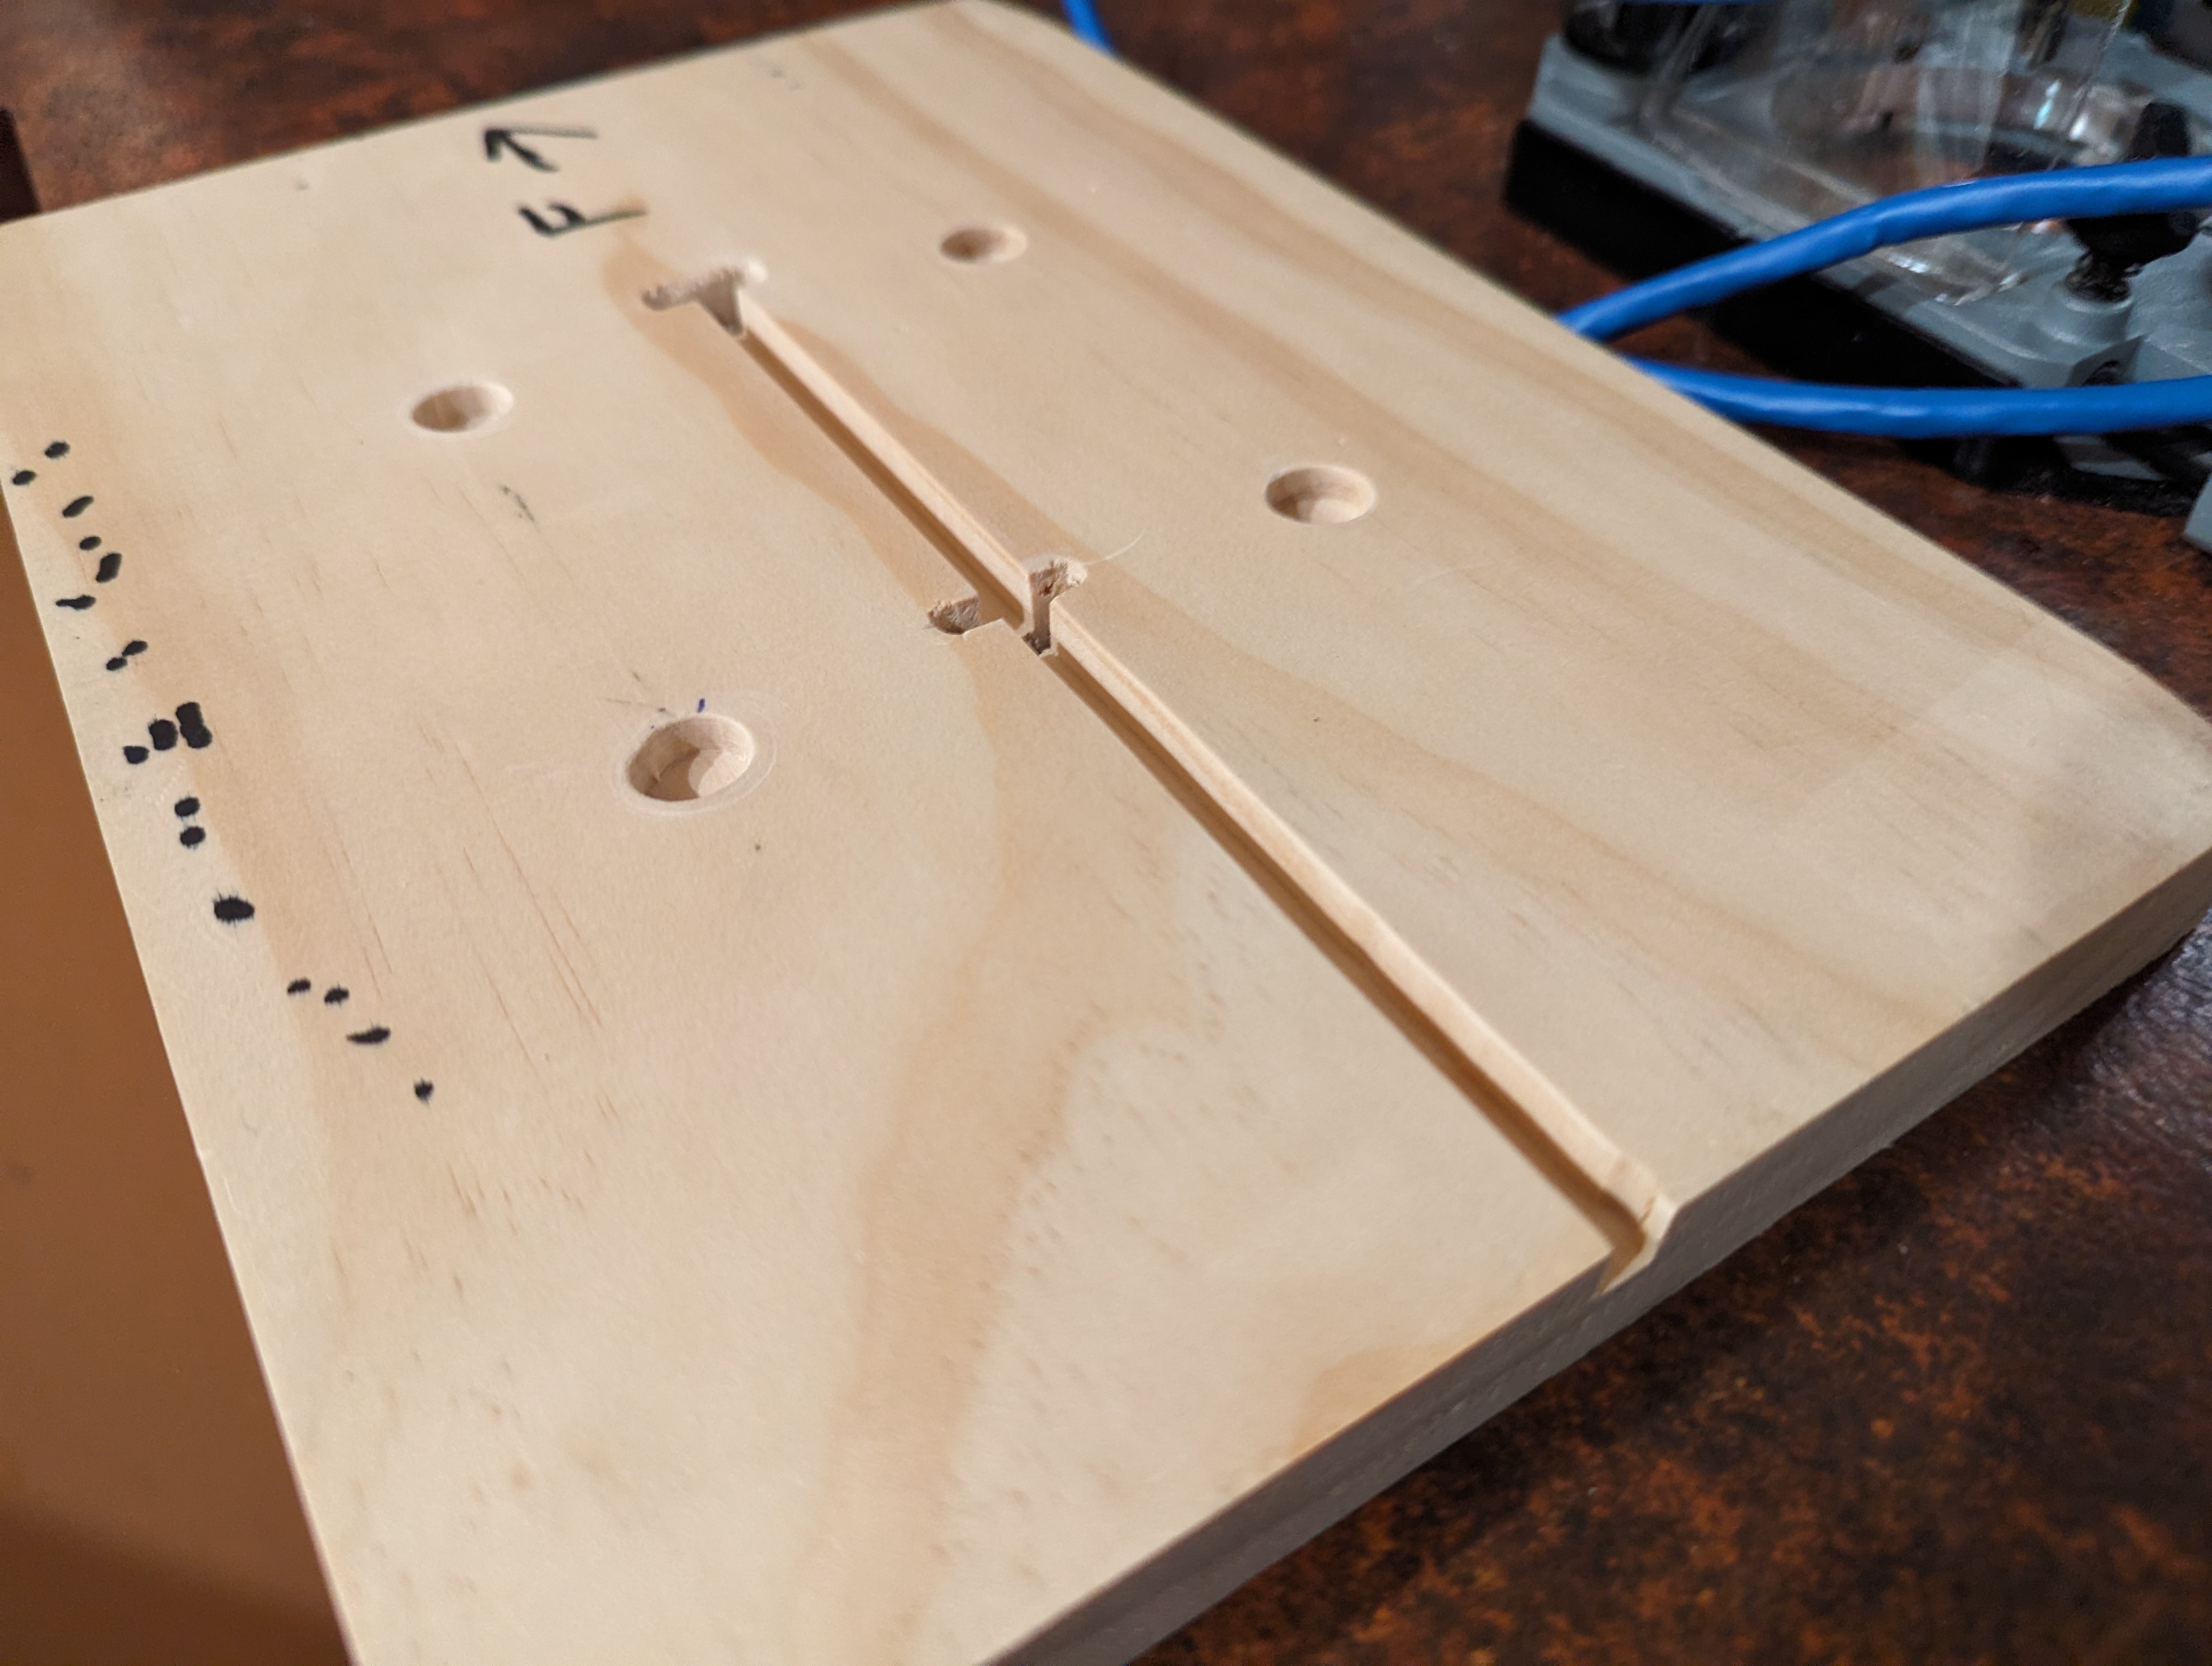
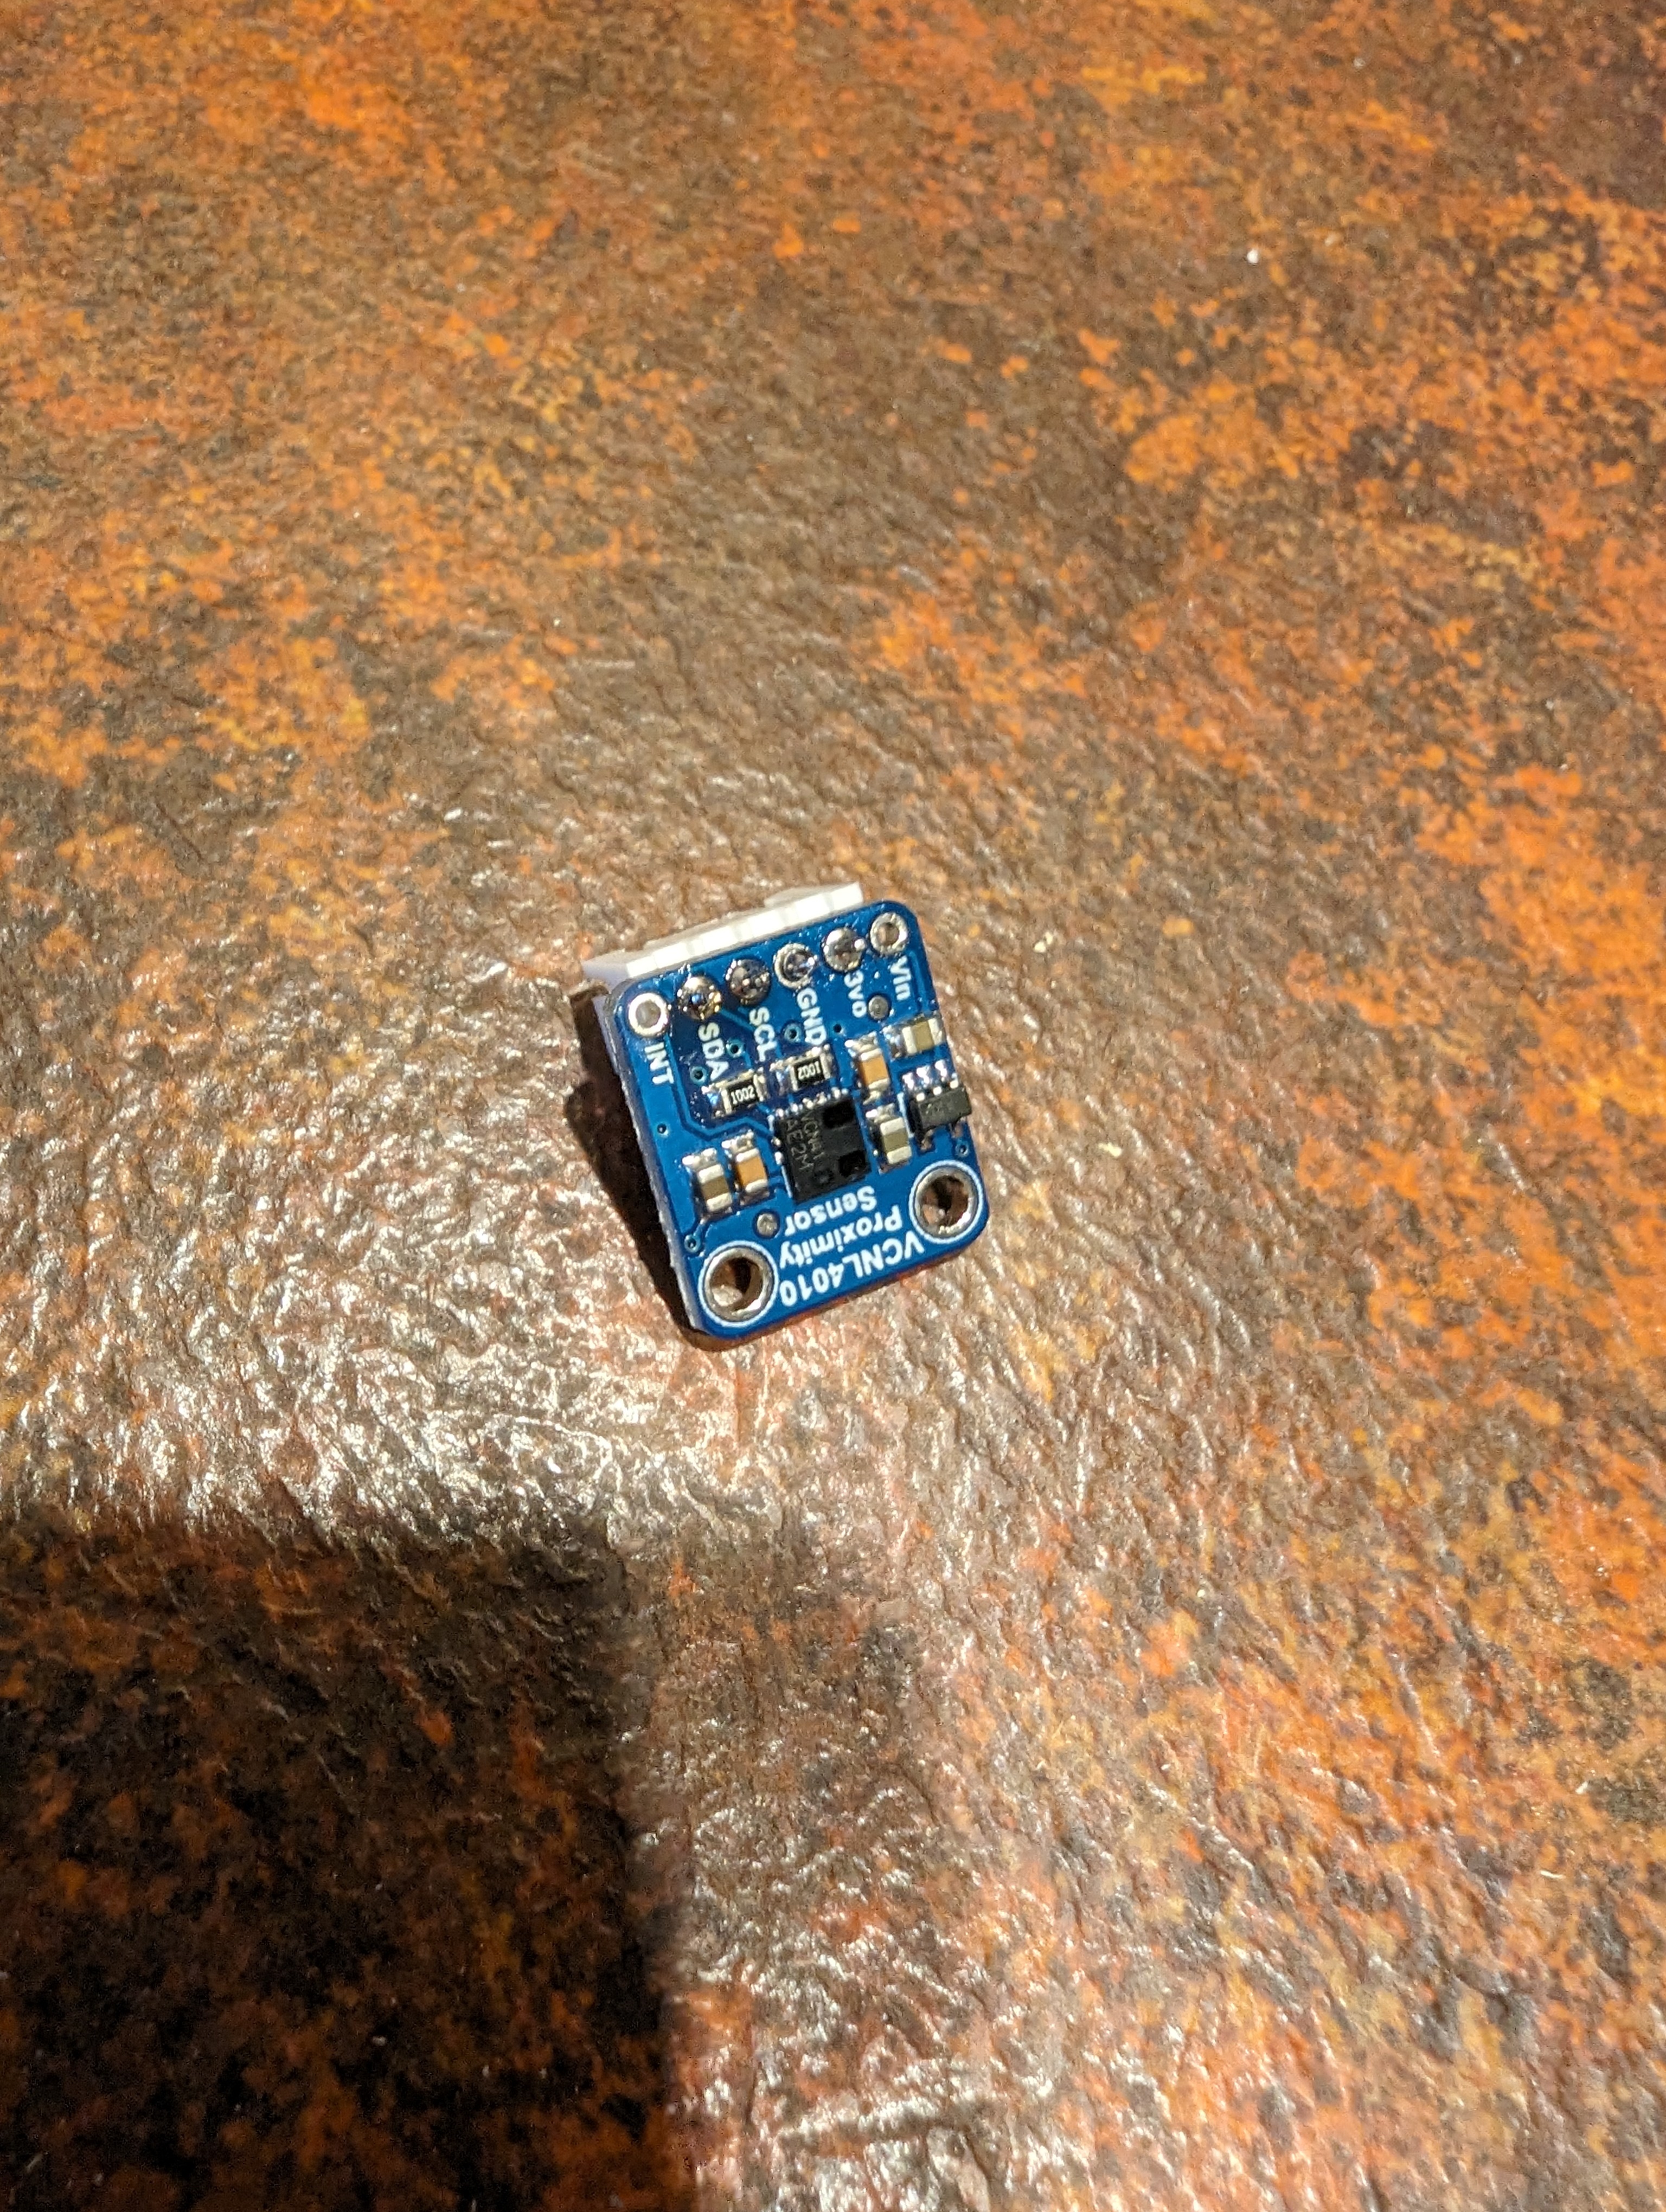
I had originally planned to just solder wires into the sensors, but then I realised JST connectors would fit perfectly into the sensors. This meant I had to widen the holes somewhat, which I did with a small chisel and file.
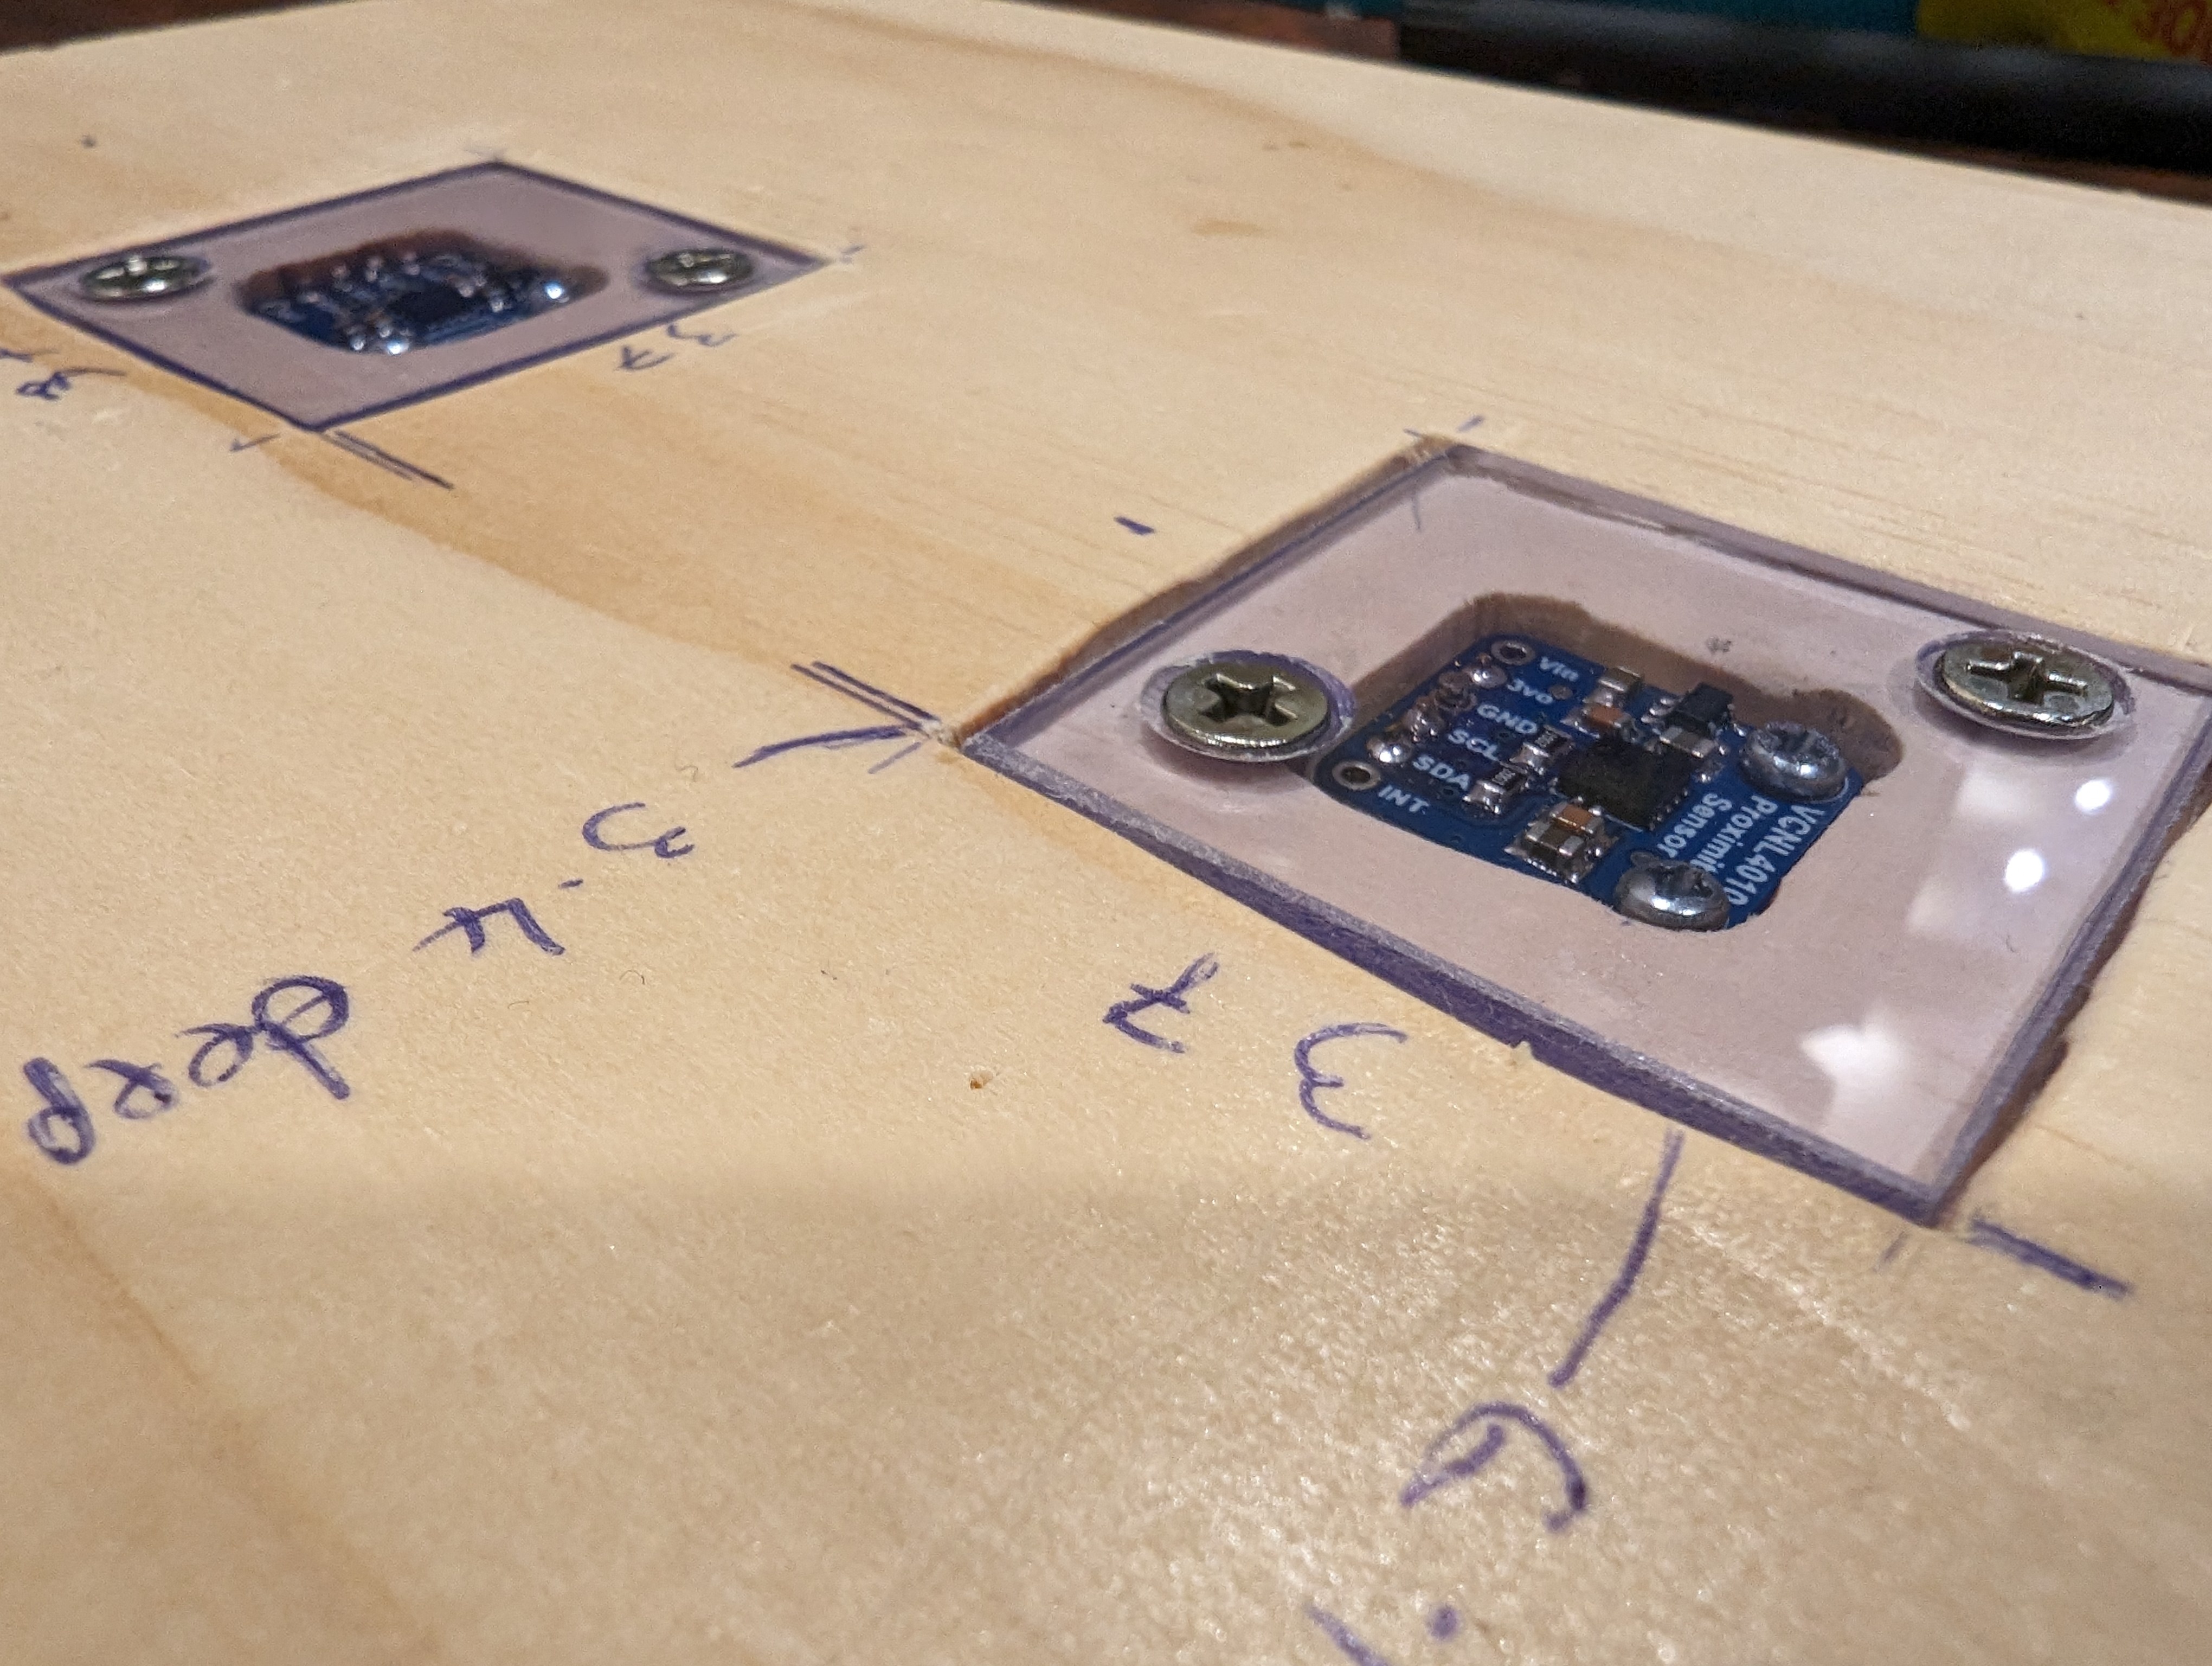
I got a bit lazy with making screw holes to hold down the perspex, so they're not in as neat a place as I'd like. If I did this again I'd measure properly for their placement. Still, with countersinking they hold down the perspex well and nothing sticks up for mail to get caught on.
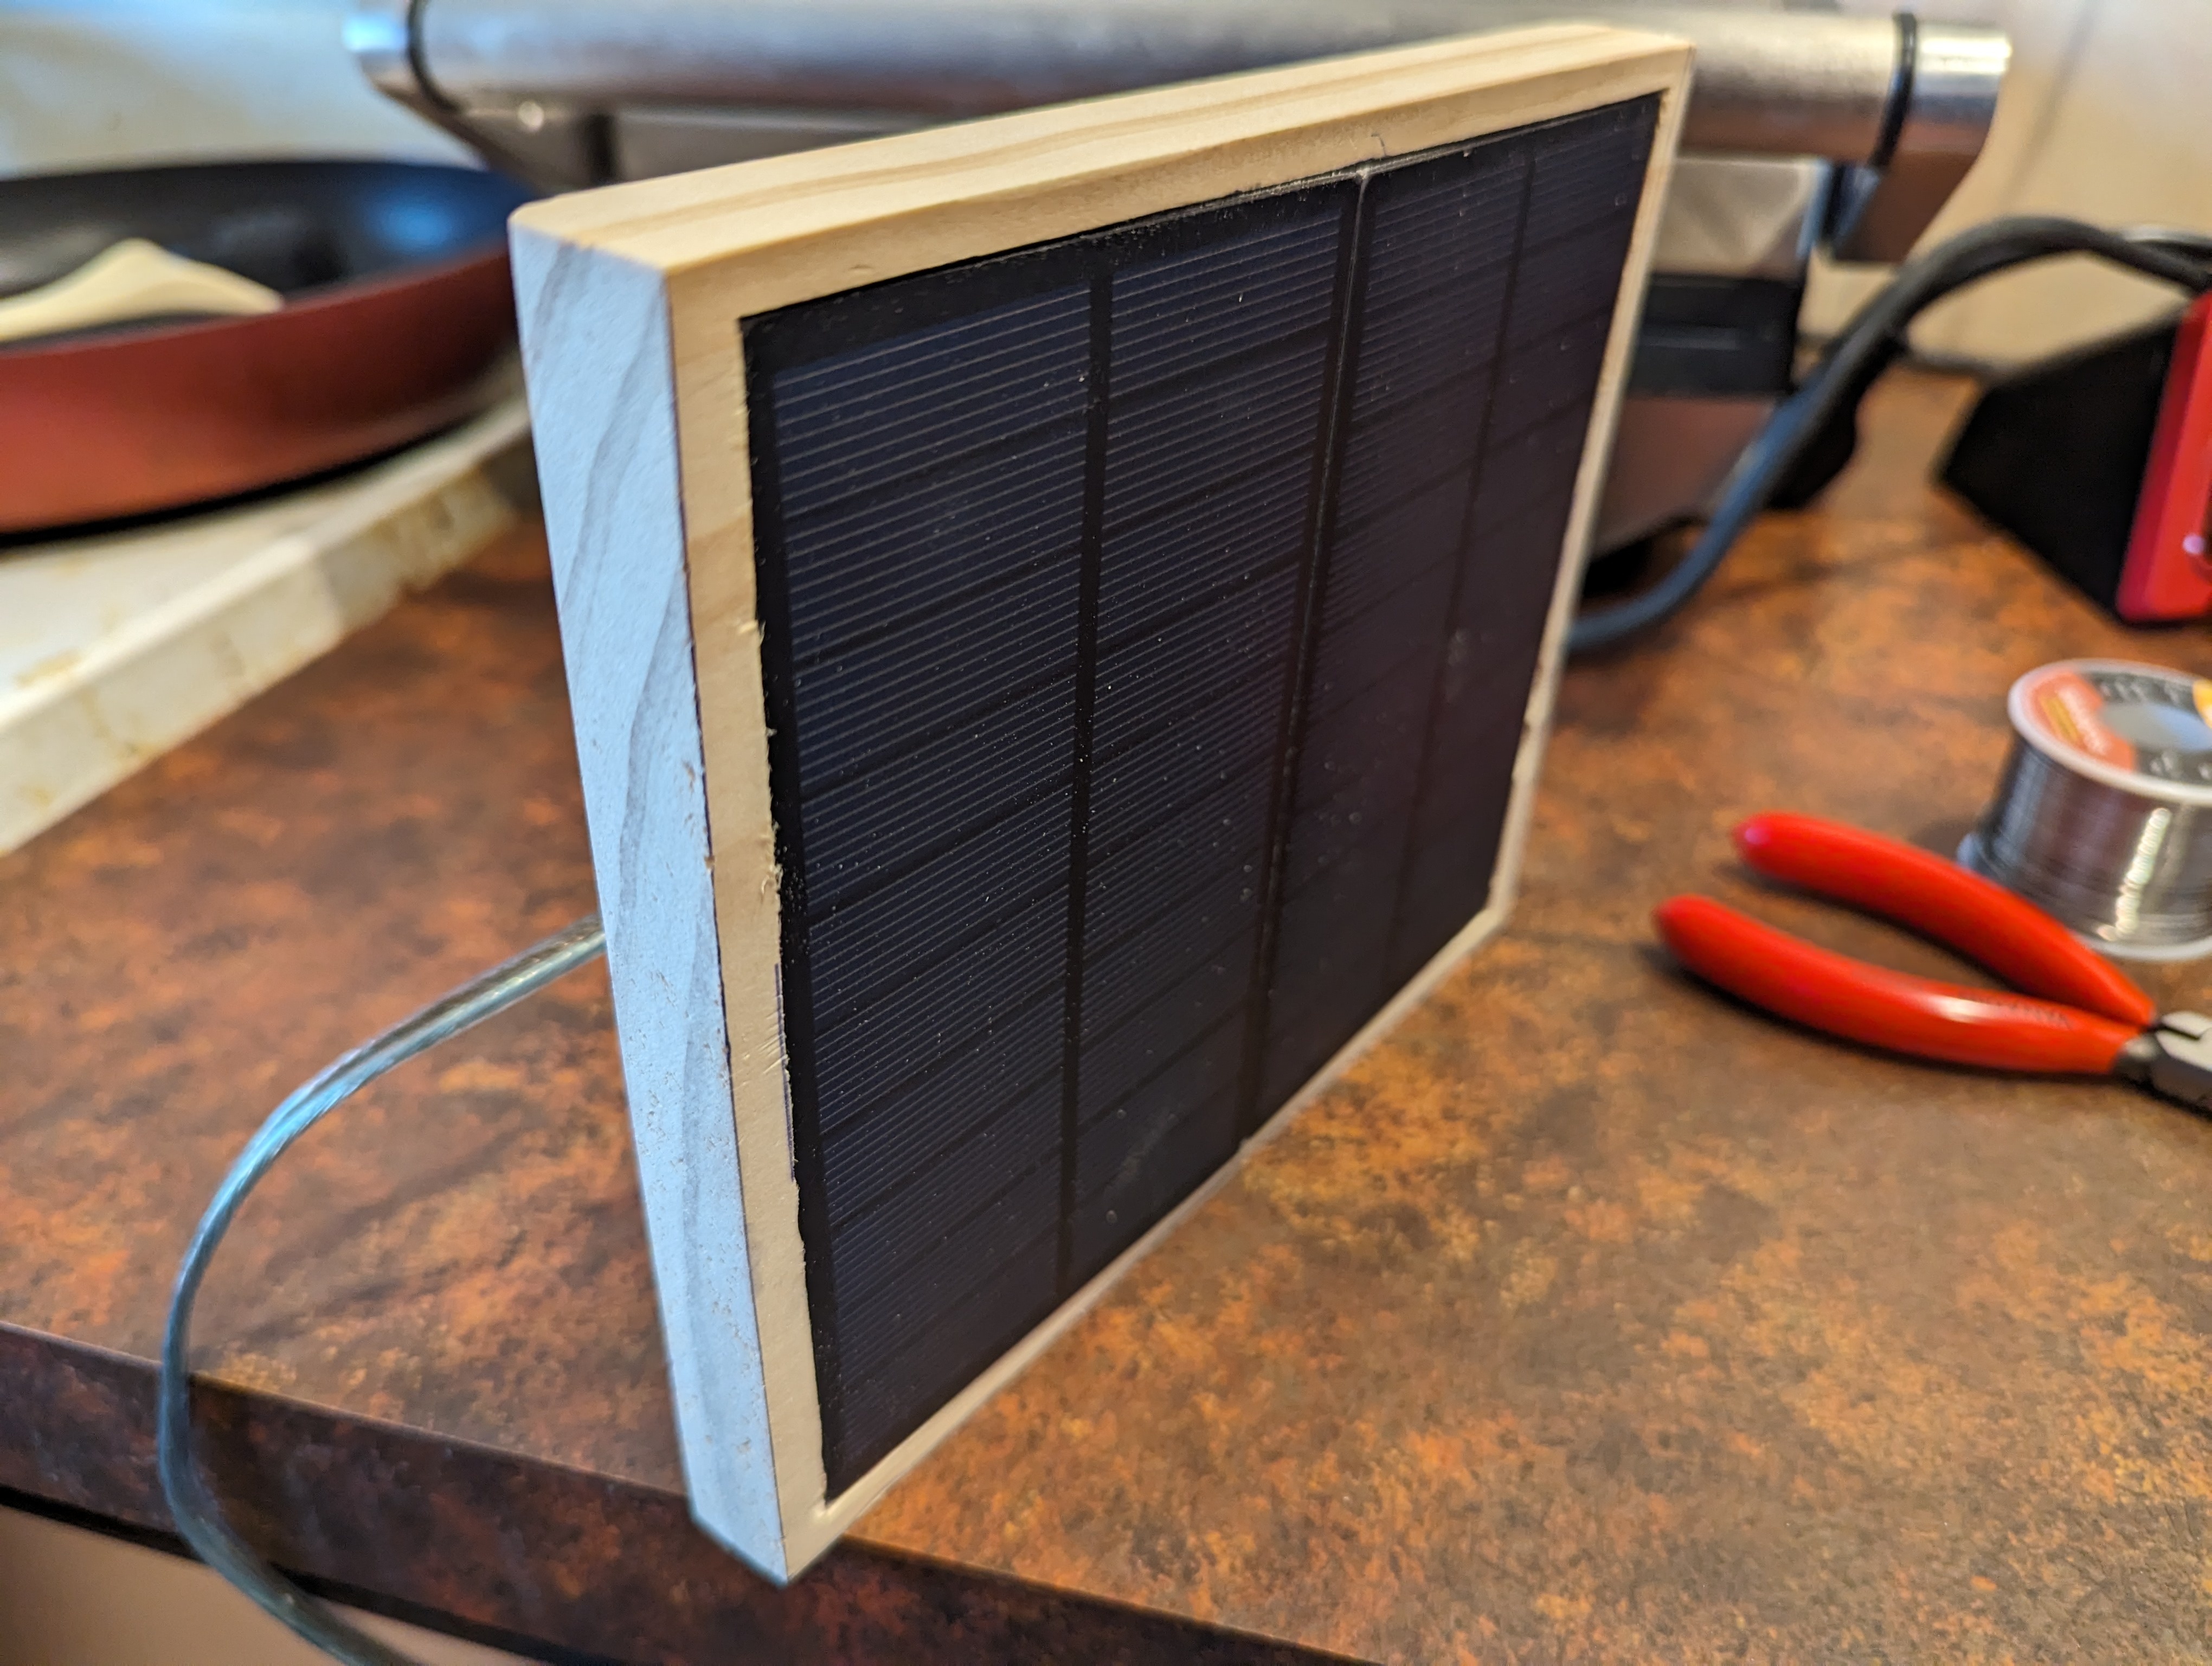
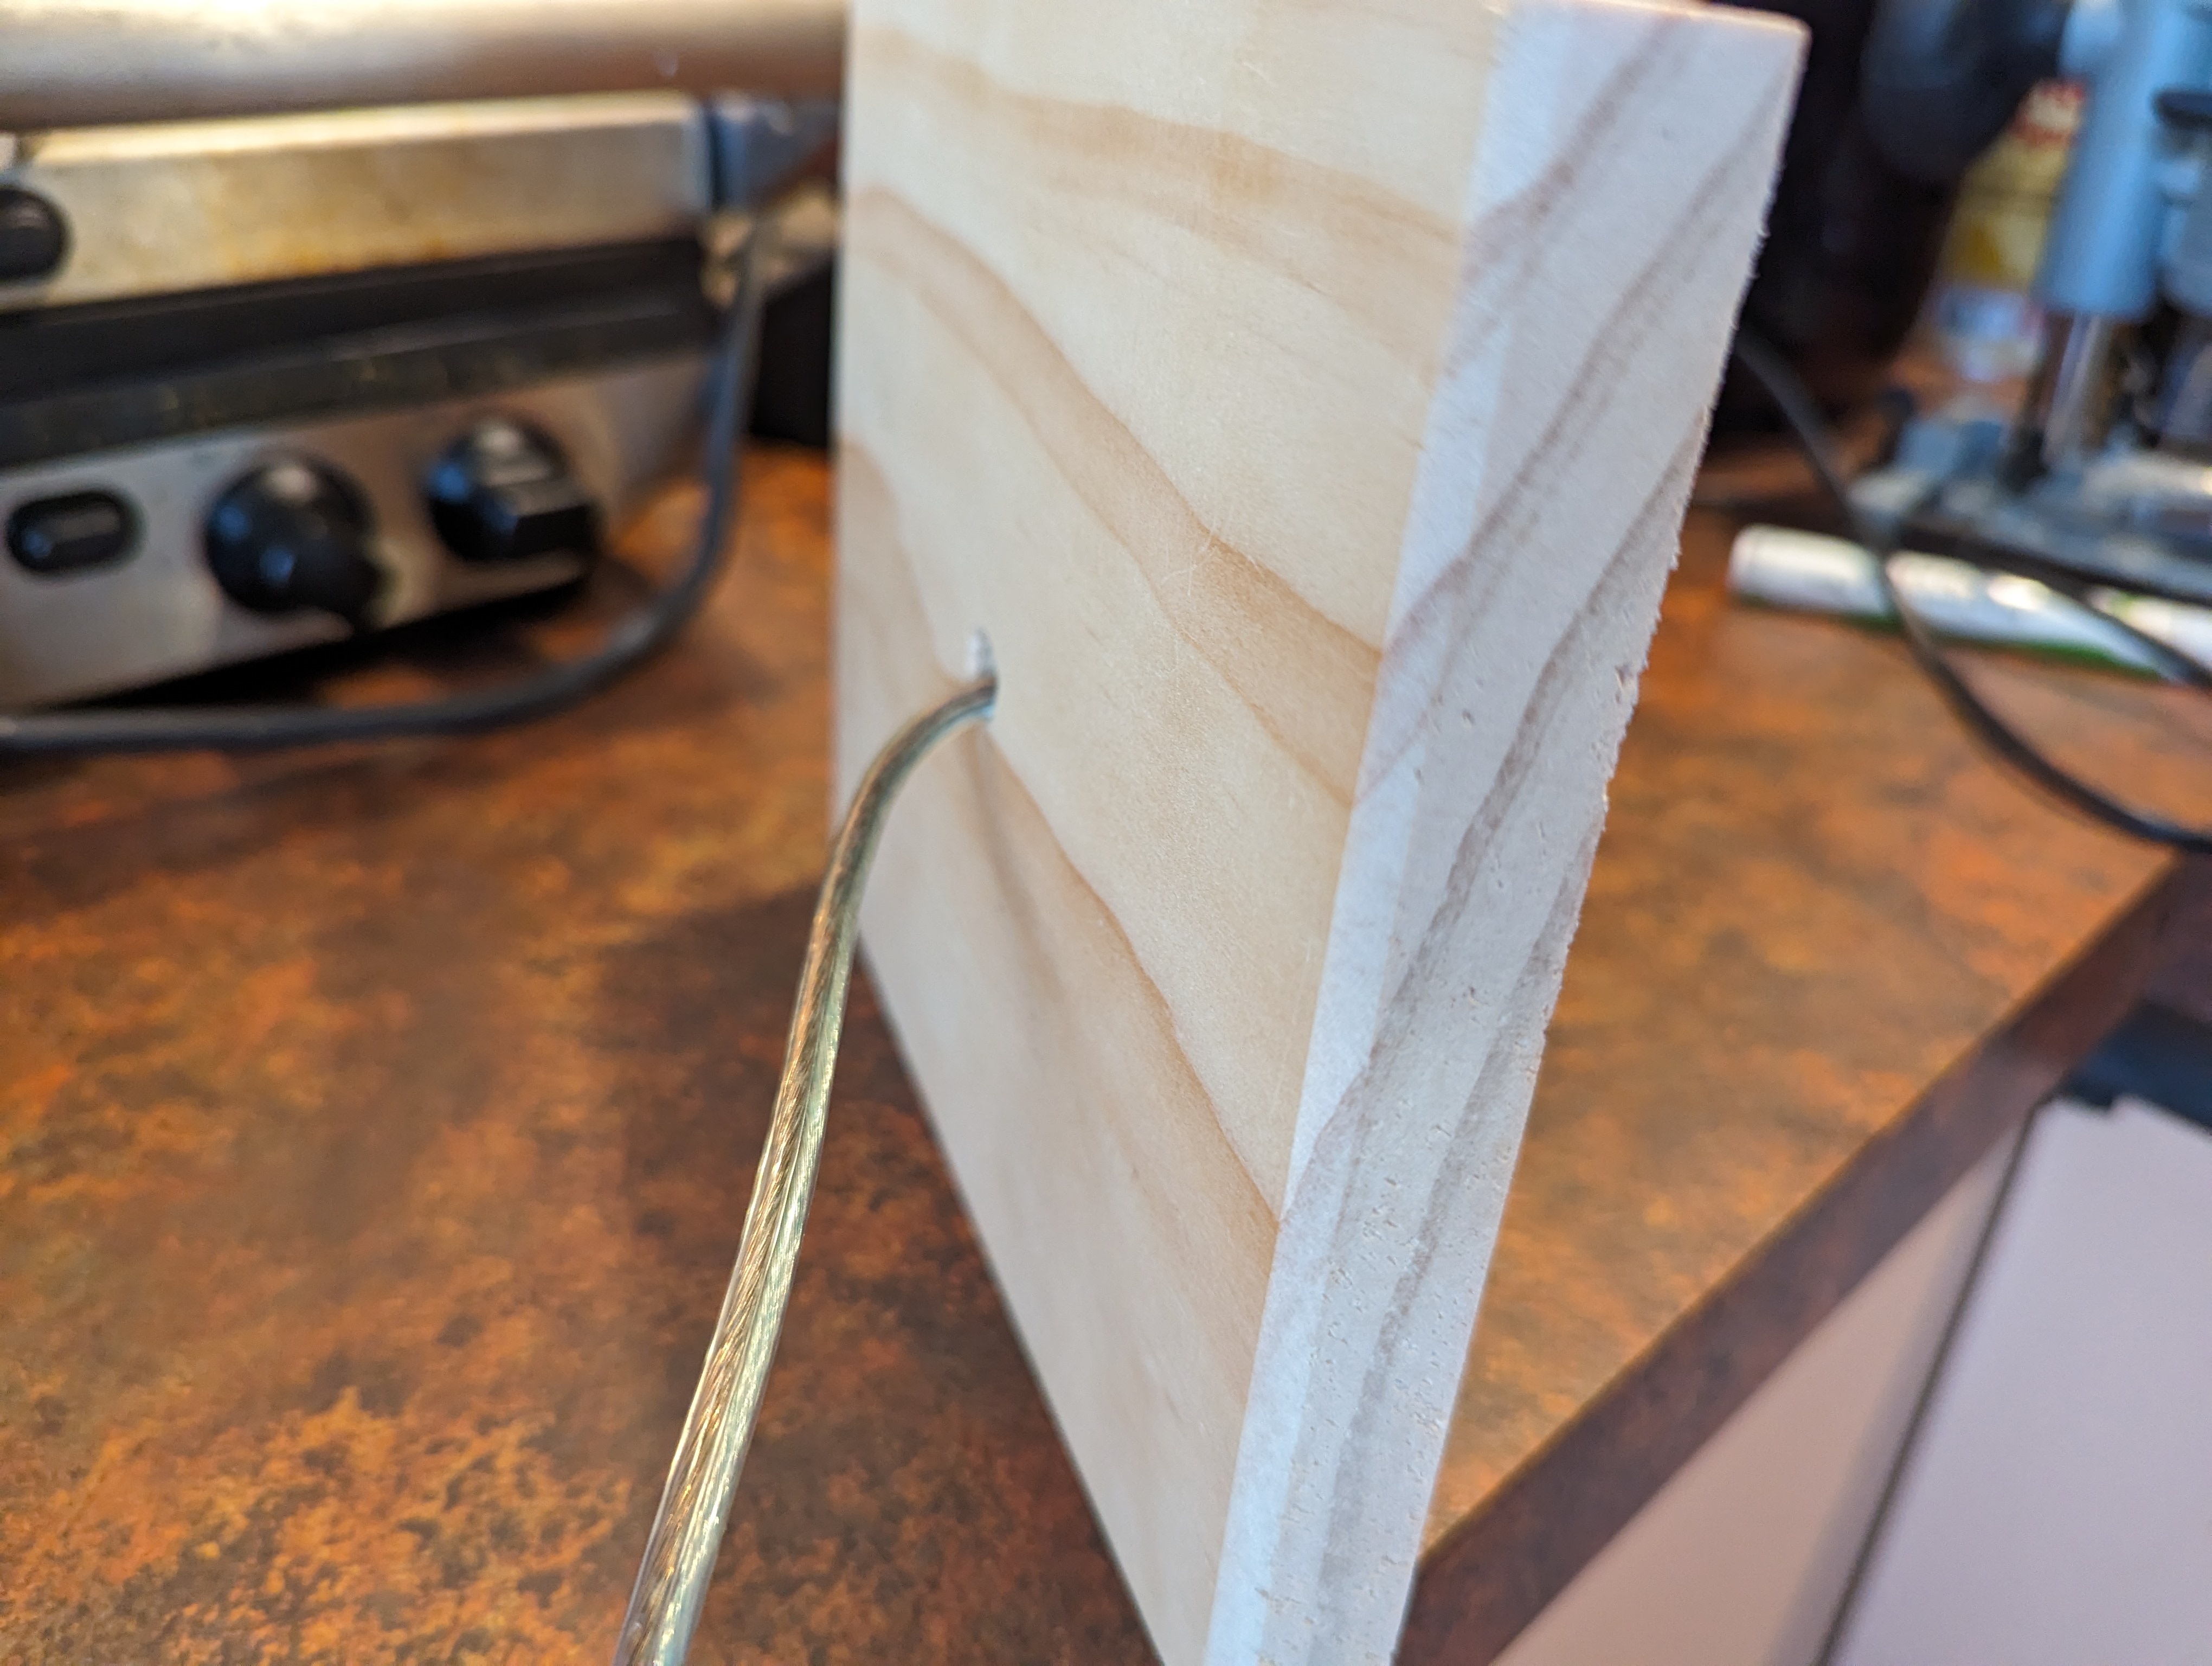
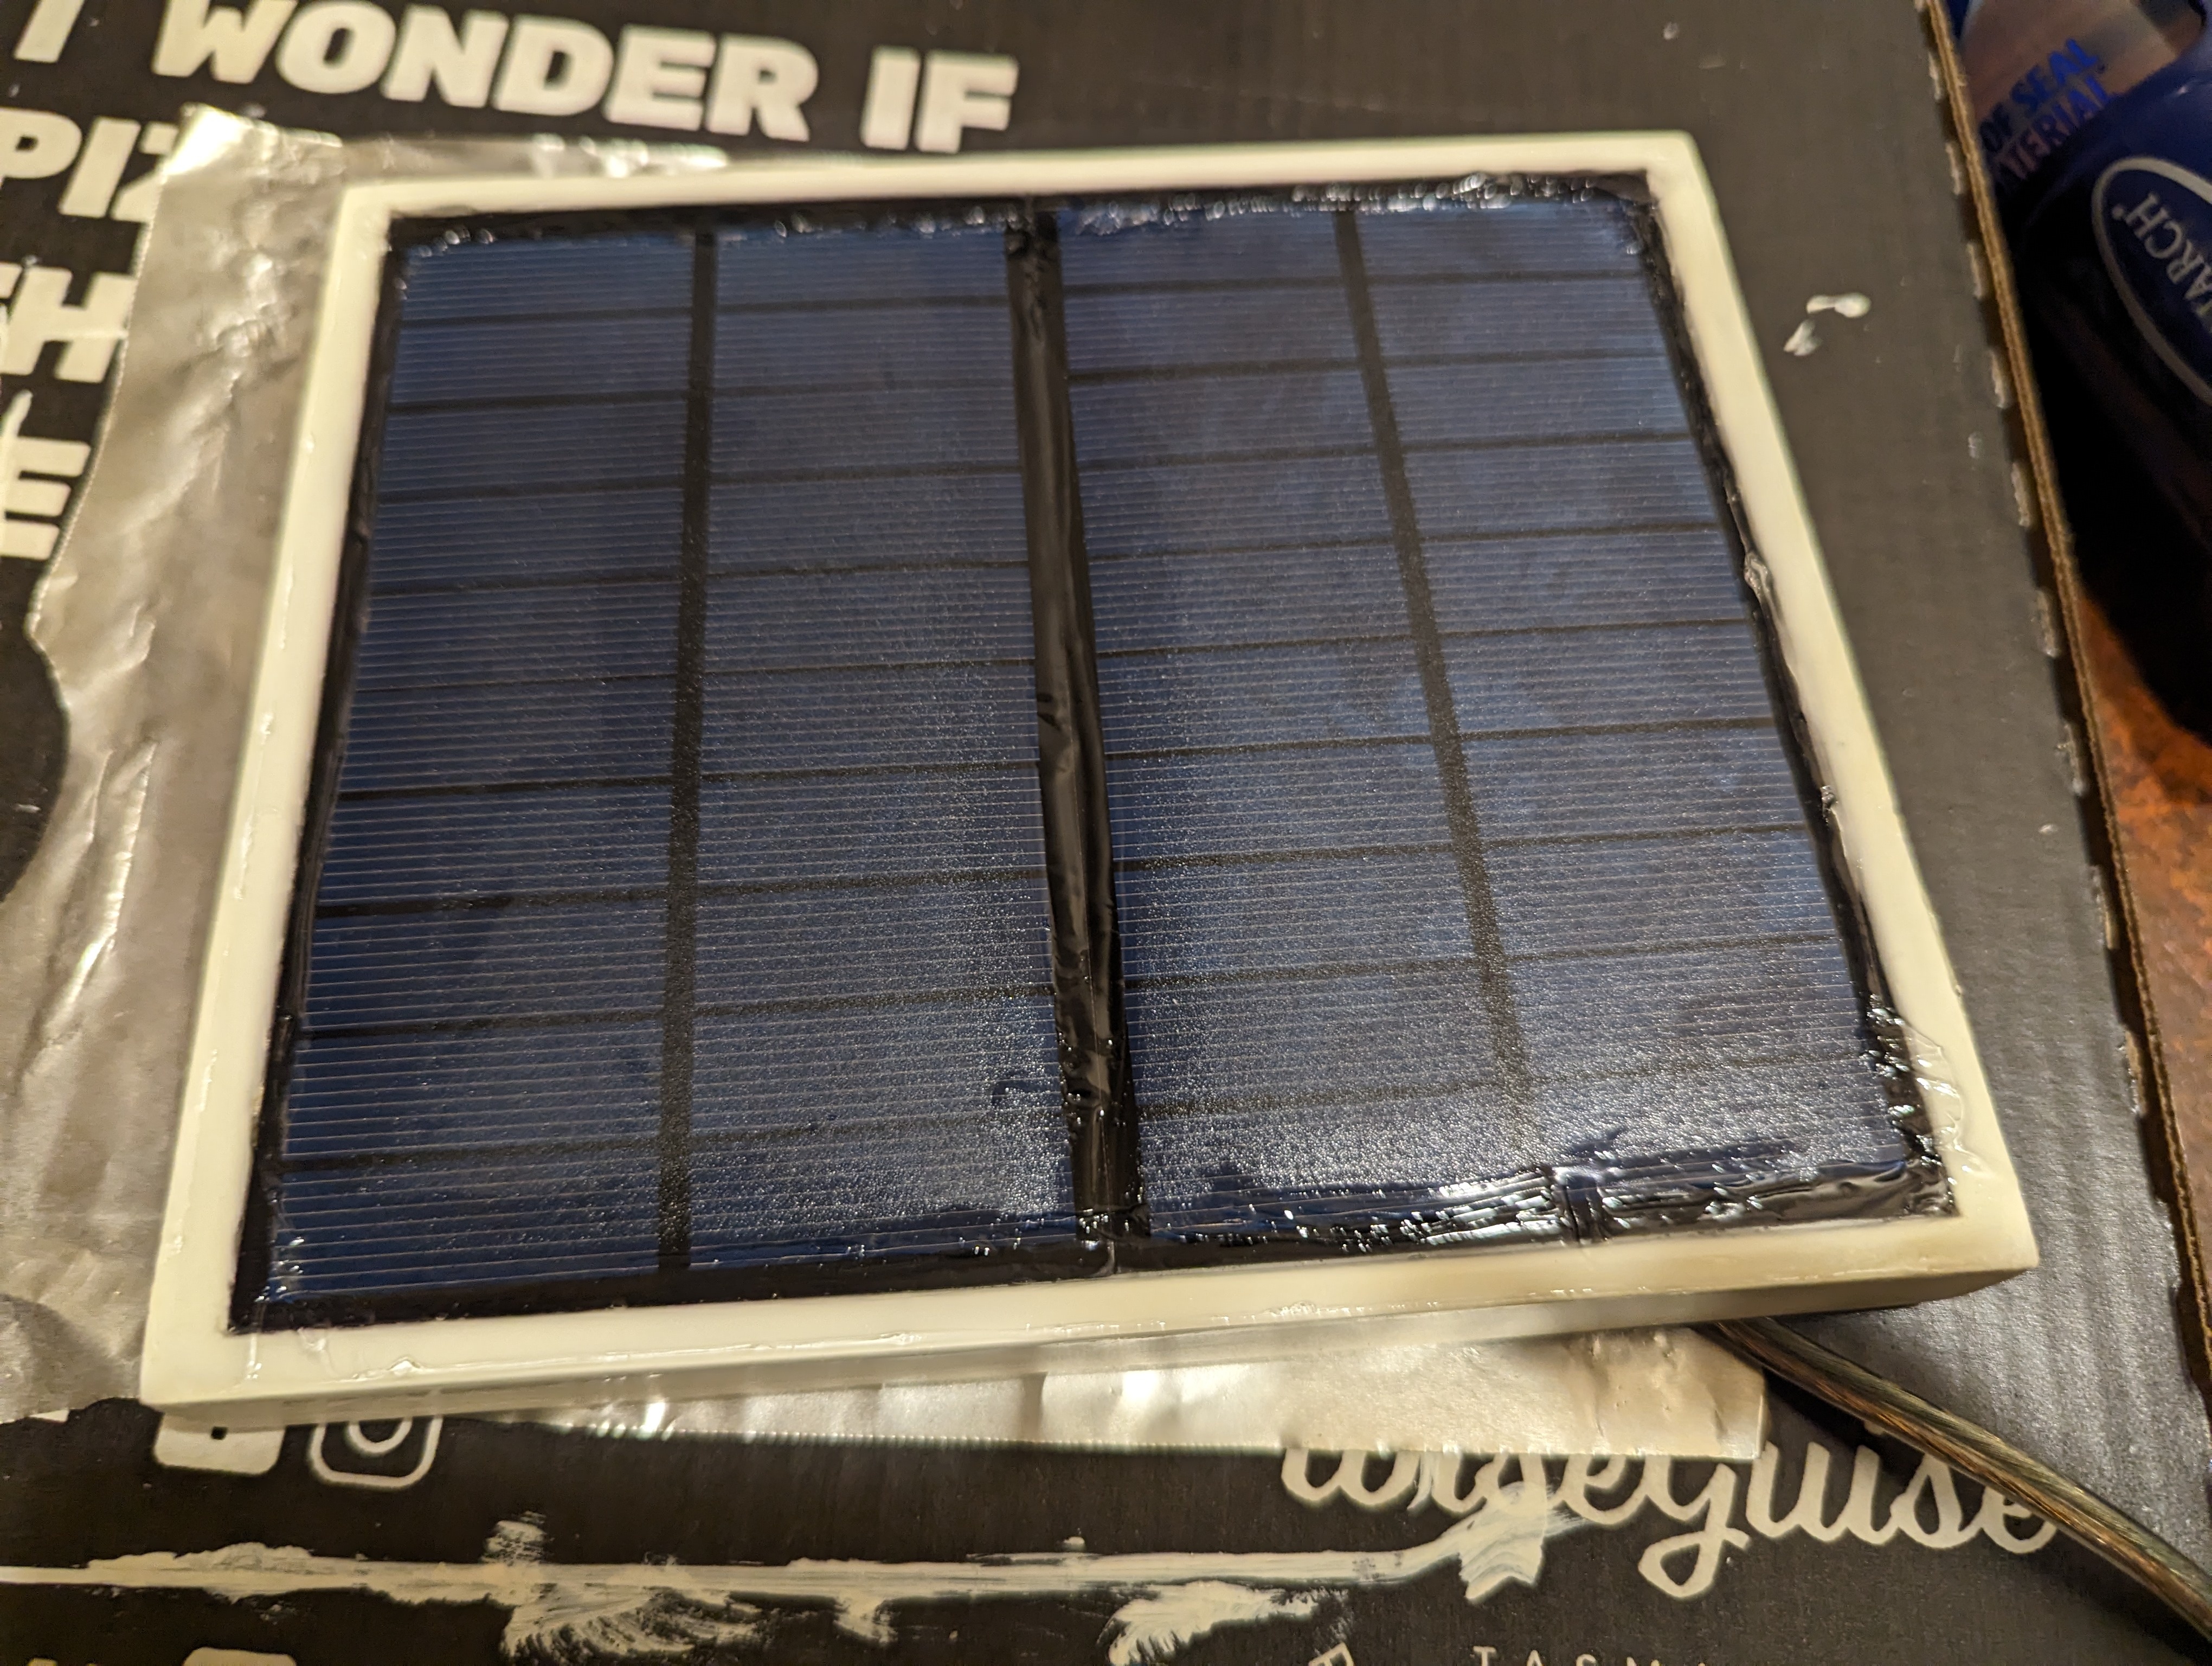
I also got started on making a housing for the solar panels. I used the router to carve out a 1-2mm area for them to sit in, and a much deeper ditch linking the two terminals, which you'll see in a later picture. For now, here's how they look sitting in it.
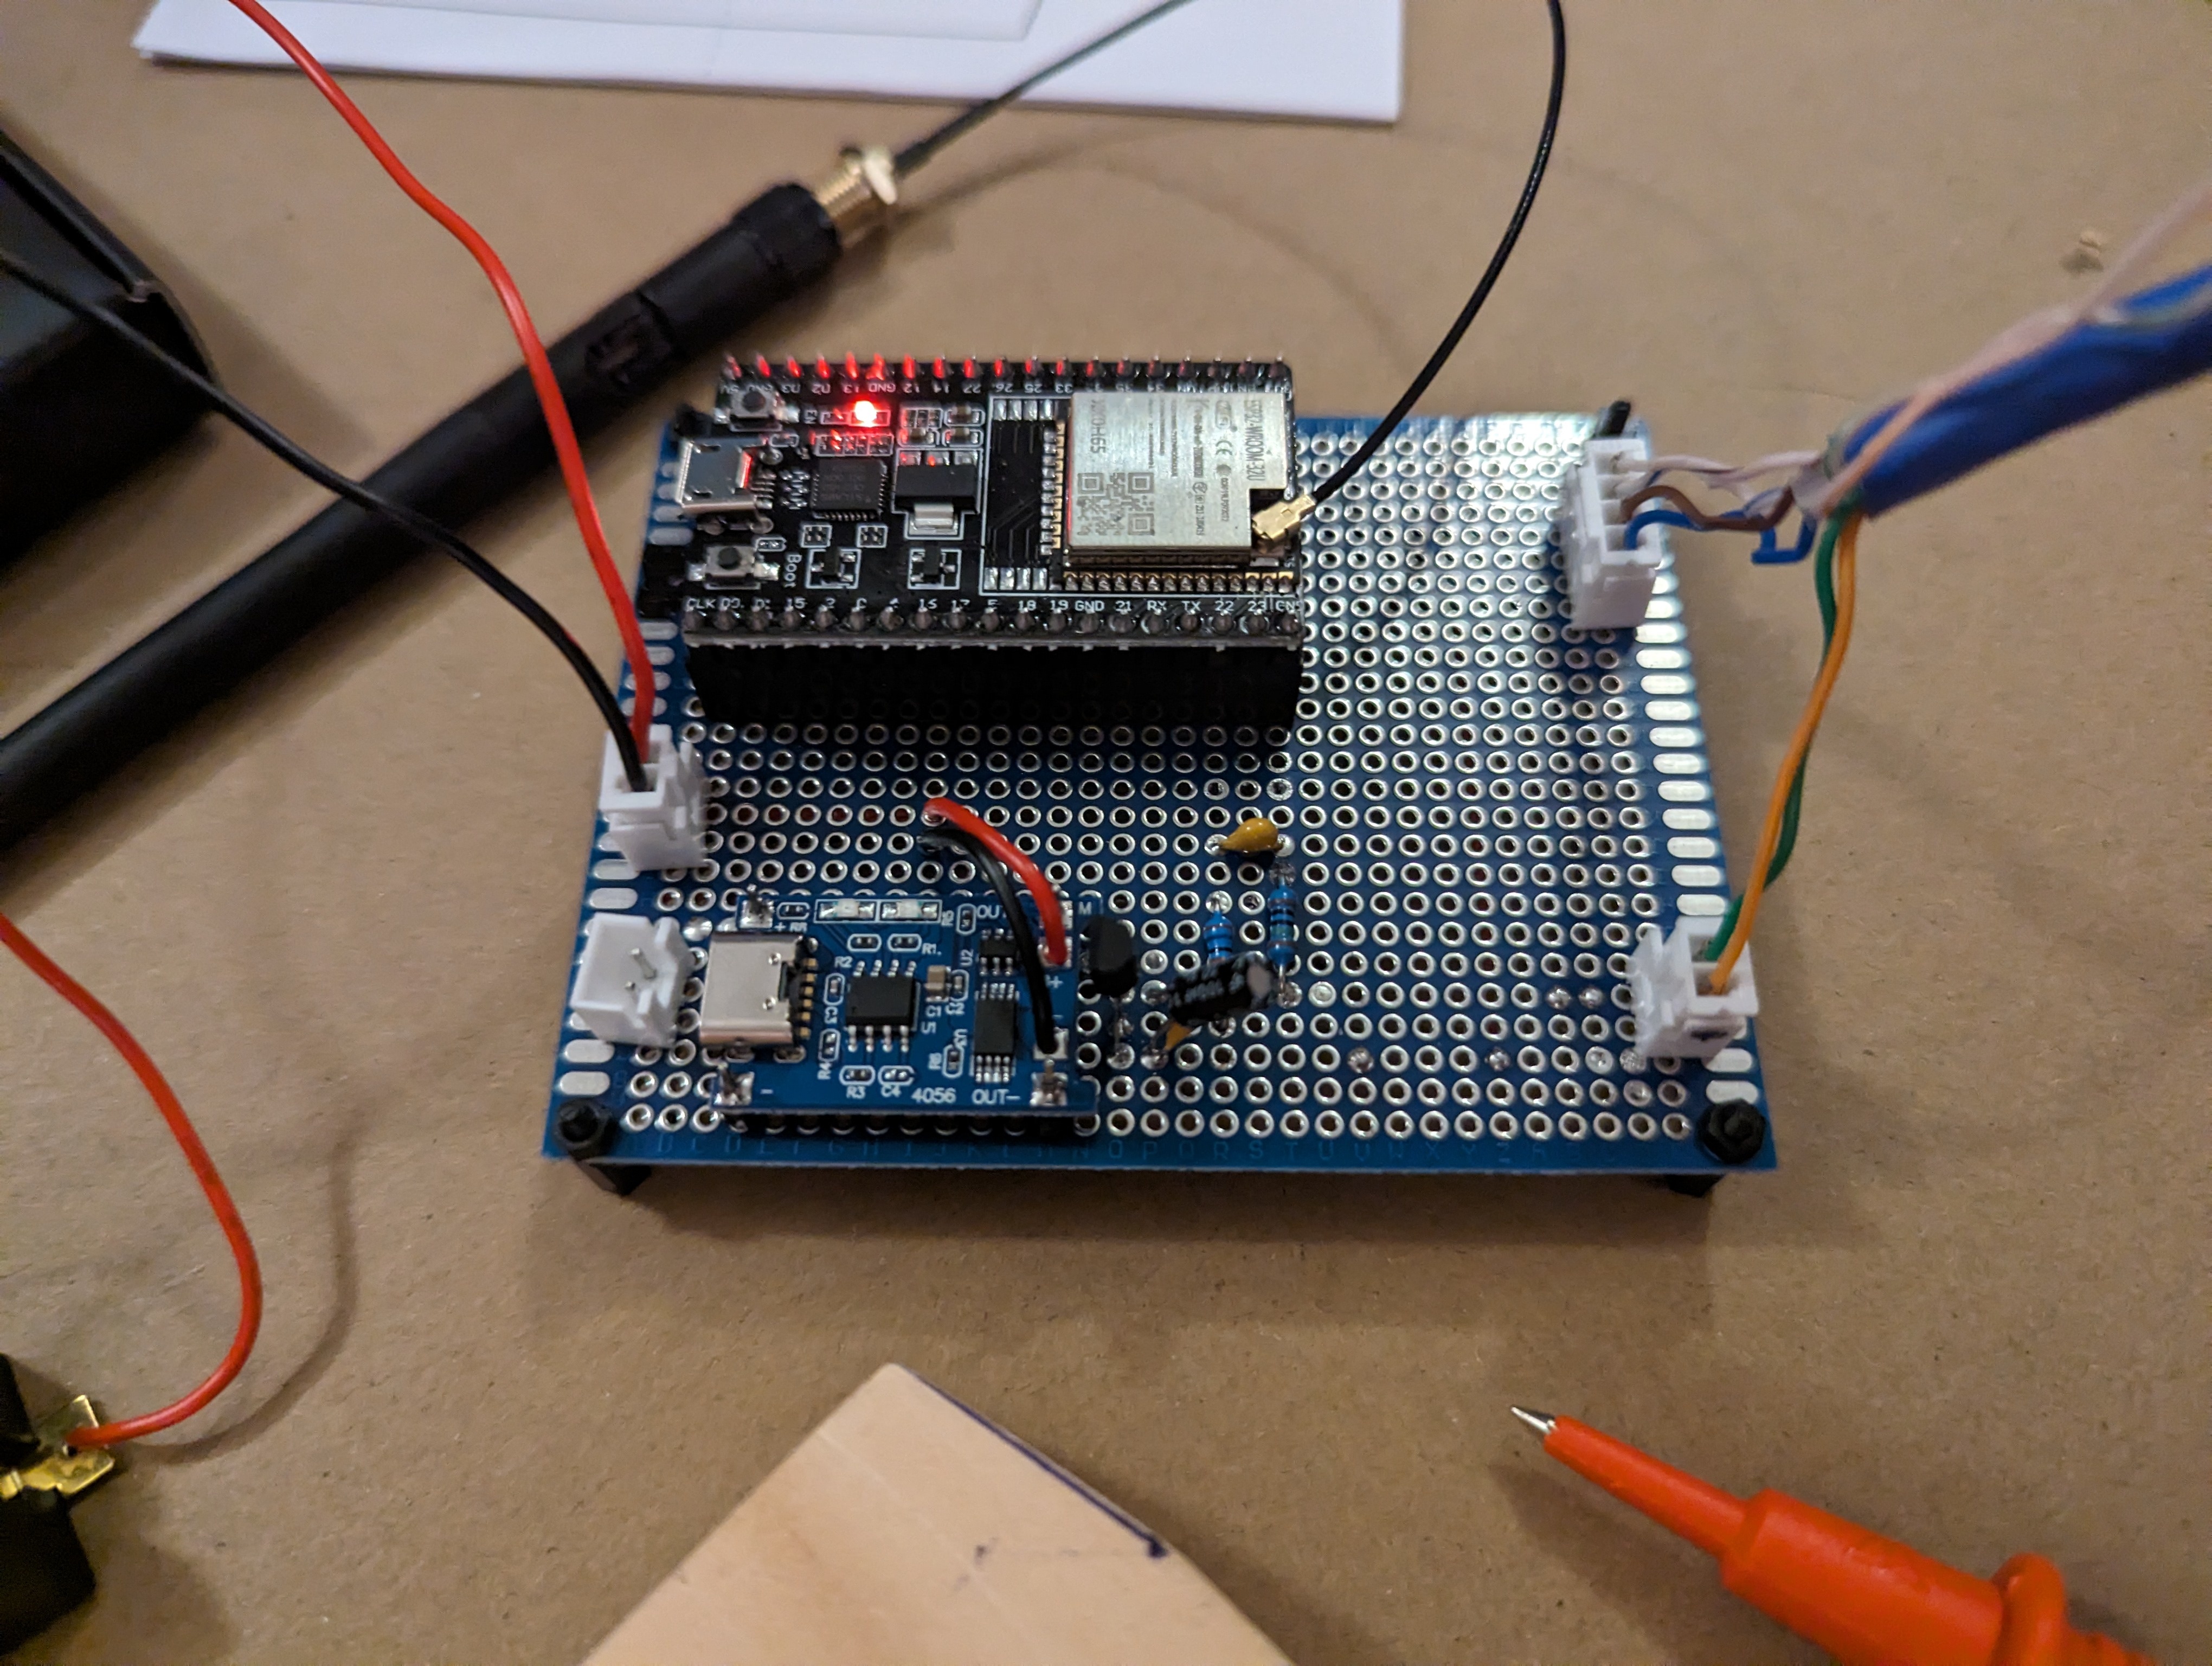
Wiring up the prototype board was next. Again, see the article I linked above for how this works. I used pin headers to allow the ESP32 dev board to be slotted in and out, just in case I ever needed to take it out for replacement or reprogramming. Also the JSTs on the prototype board are for connecting the battery (top left), connecting the solar panels (bottom left), providing power to the sensors (bottom right) and clock and data lines for the sensors (top right). Since the sensors are both using the same I2C bus address and cannot be configured otherwise, I had to run two clock and data lines, but if I'd found sensors that could have different addresses I could have just used one of each. I didn't take a photo of the board at this stage, but I later added another header to connect a button to reset the ESP32 from the outside.
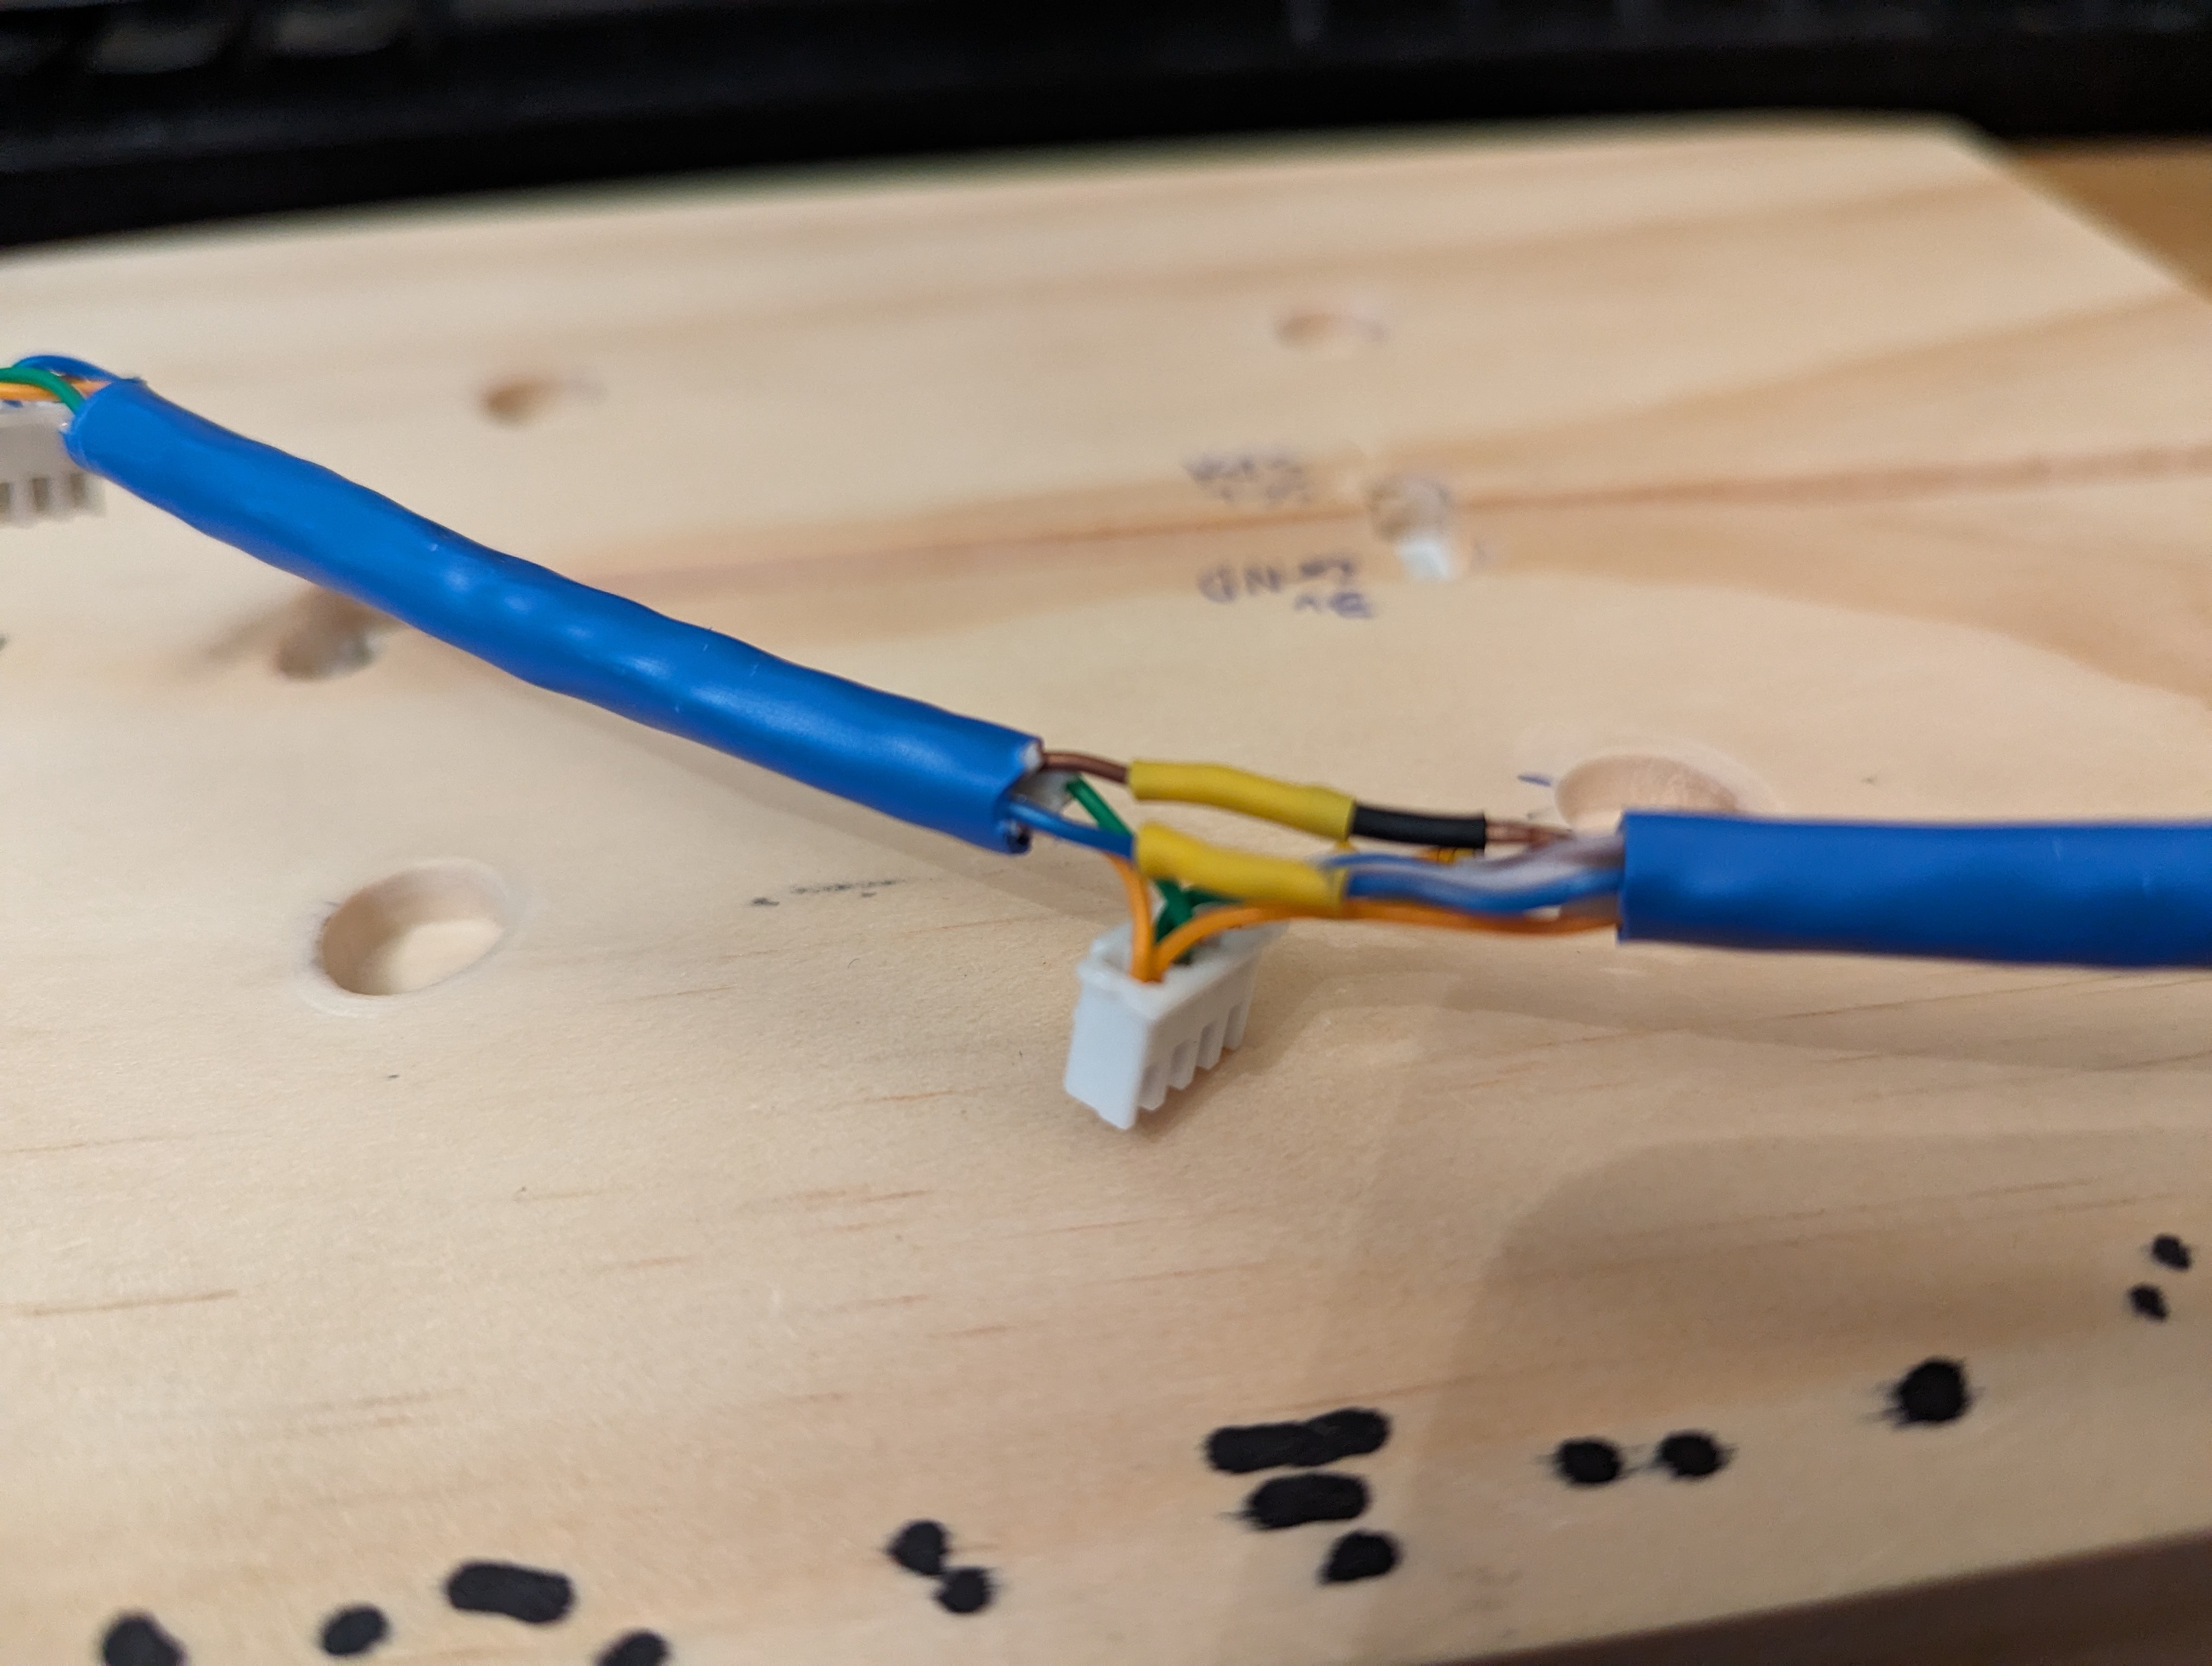
I also made the data and power cable for the sensor board.
The solar panel housing and 'sensor plate' were both painted and treated with polyurethane spray to protect them from rain and humidity.
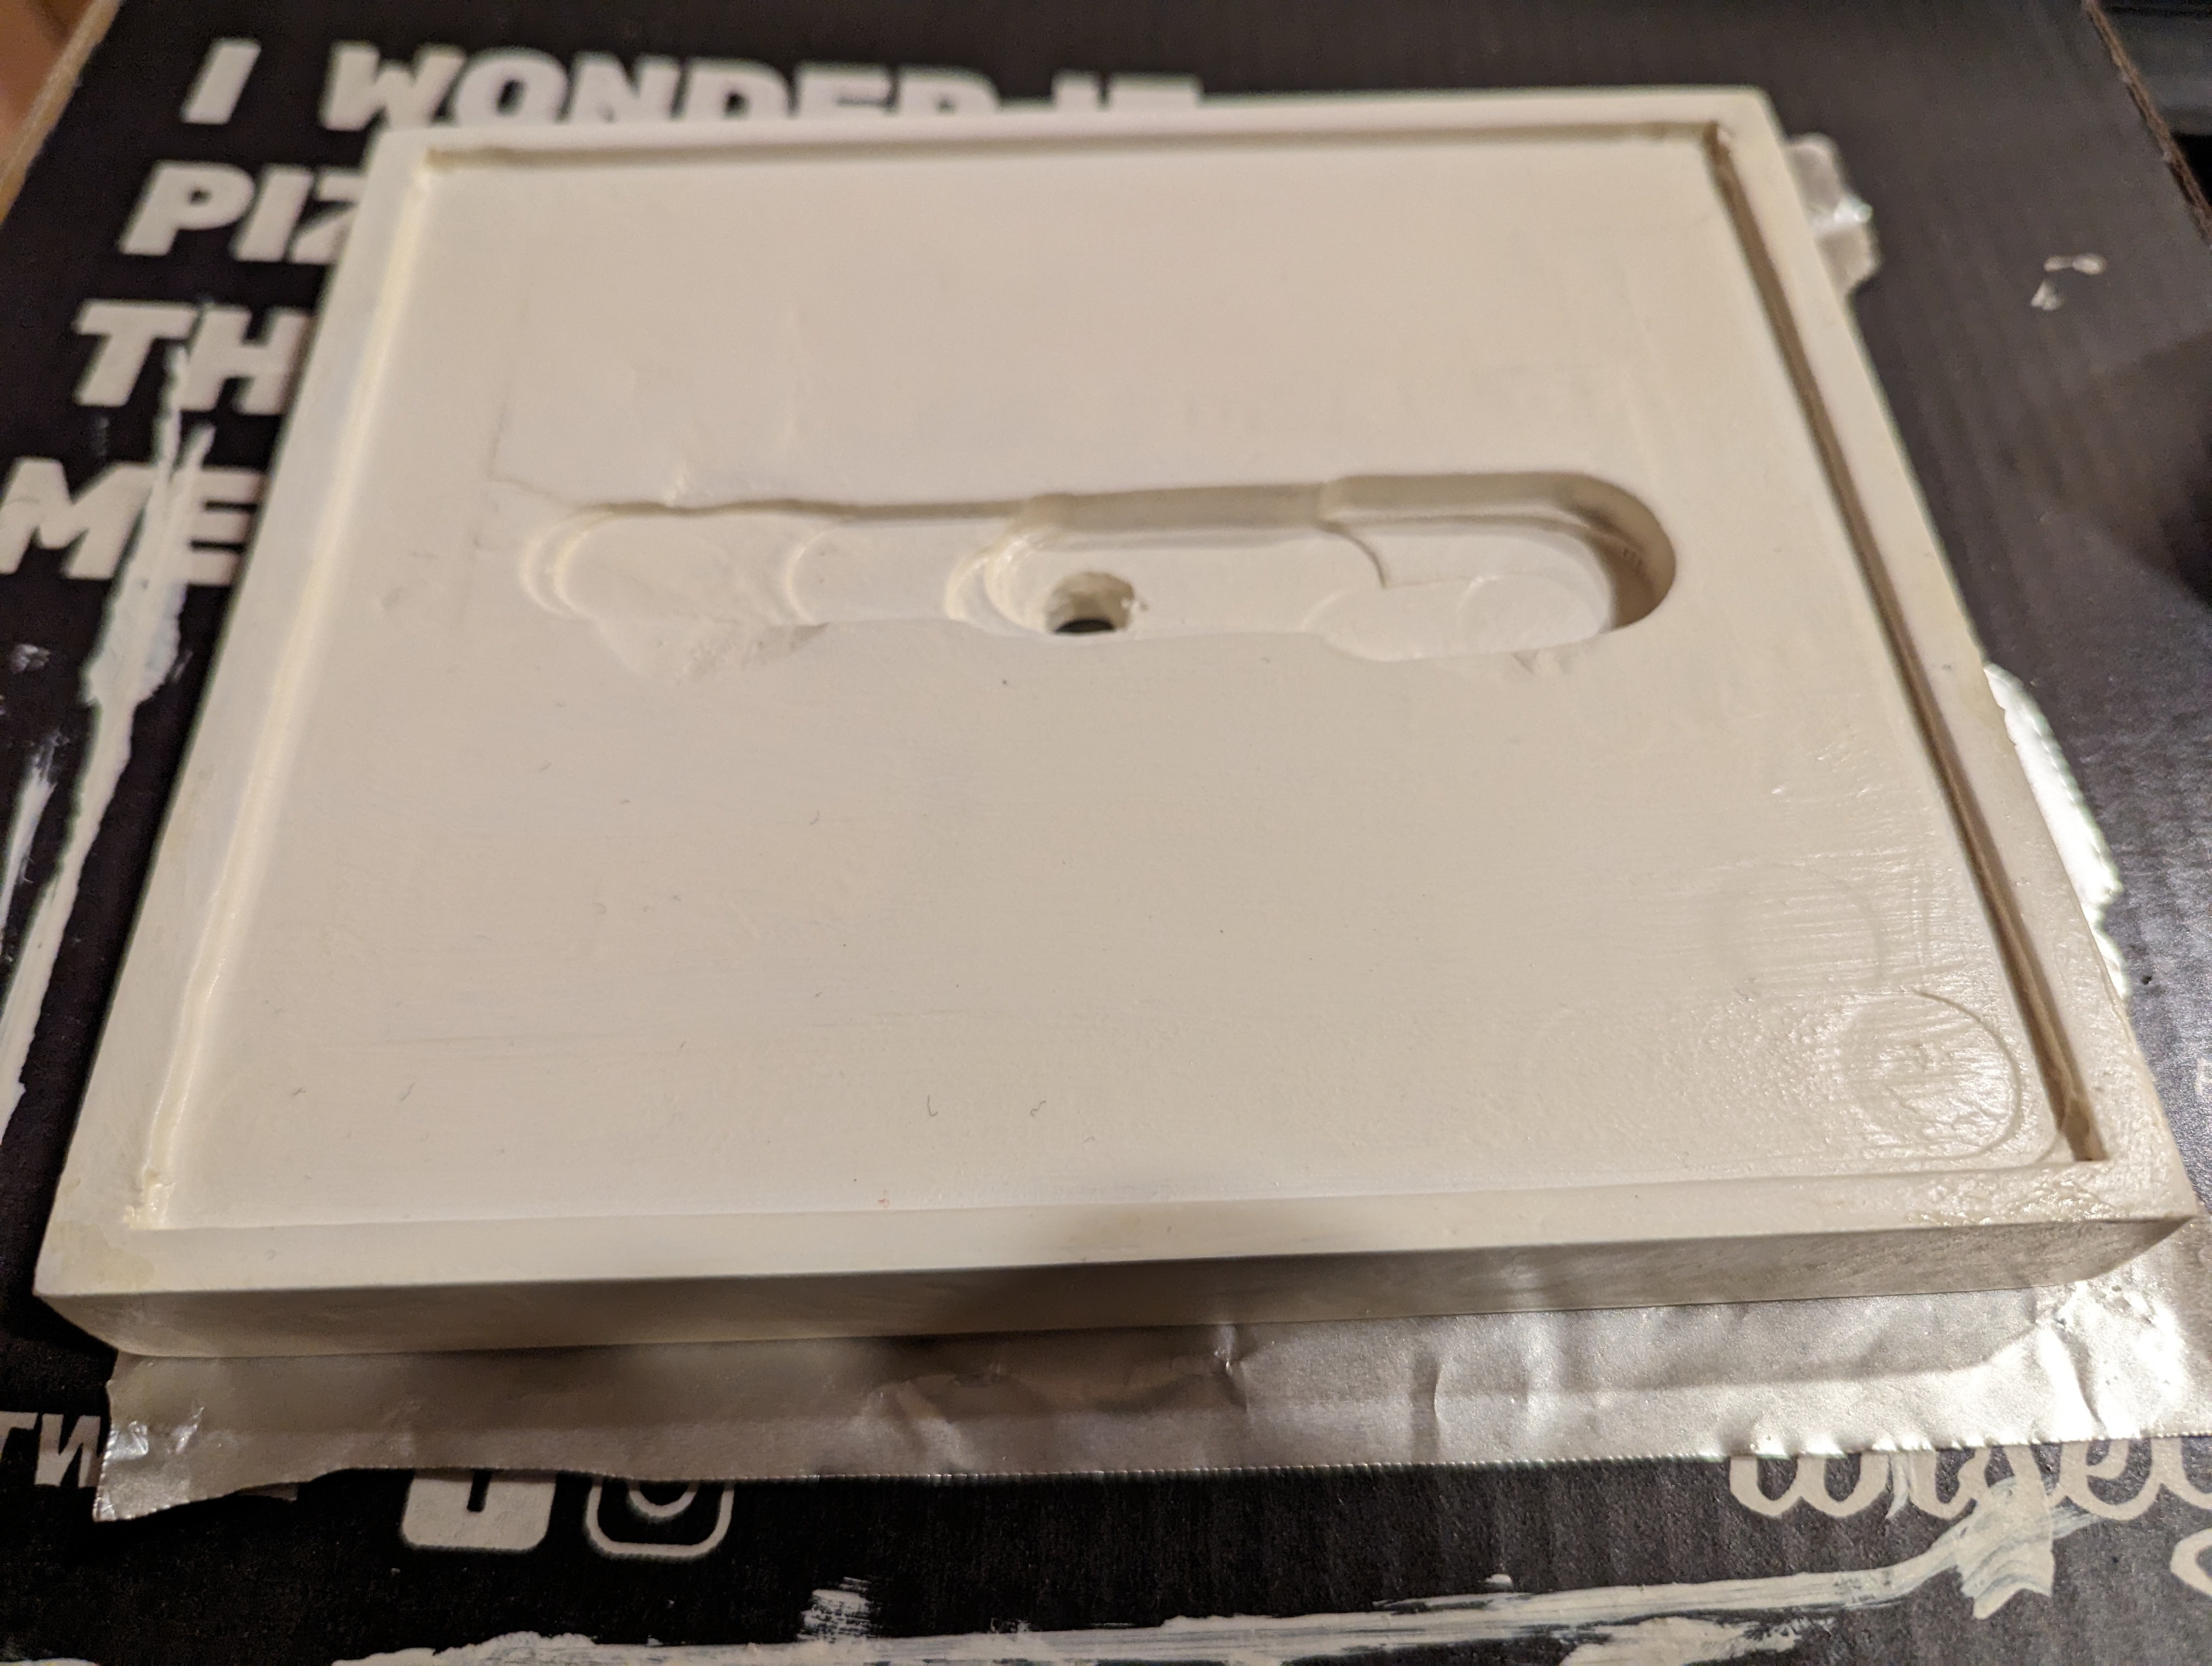
And the panels themselves were sealed in with a tonne of silicone. It made a real mess, but I'm confident no water is going to get in there.
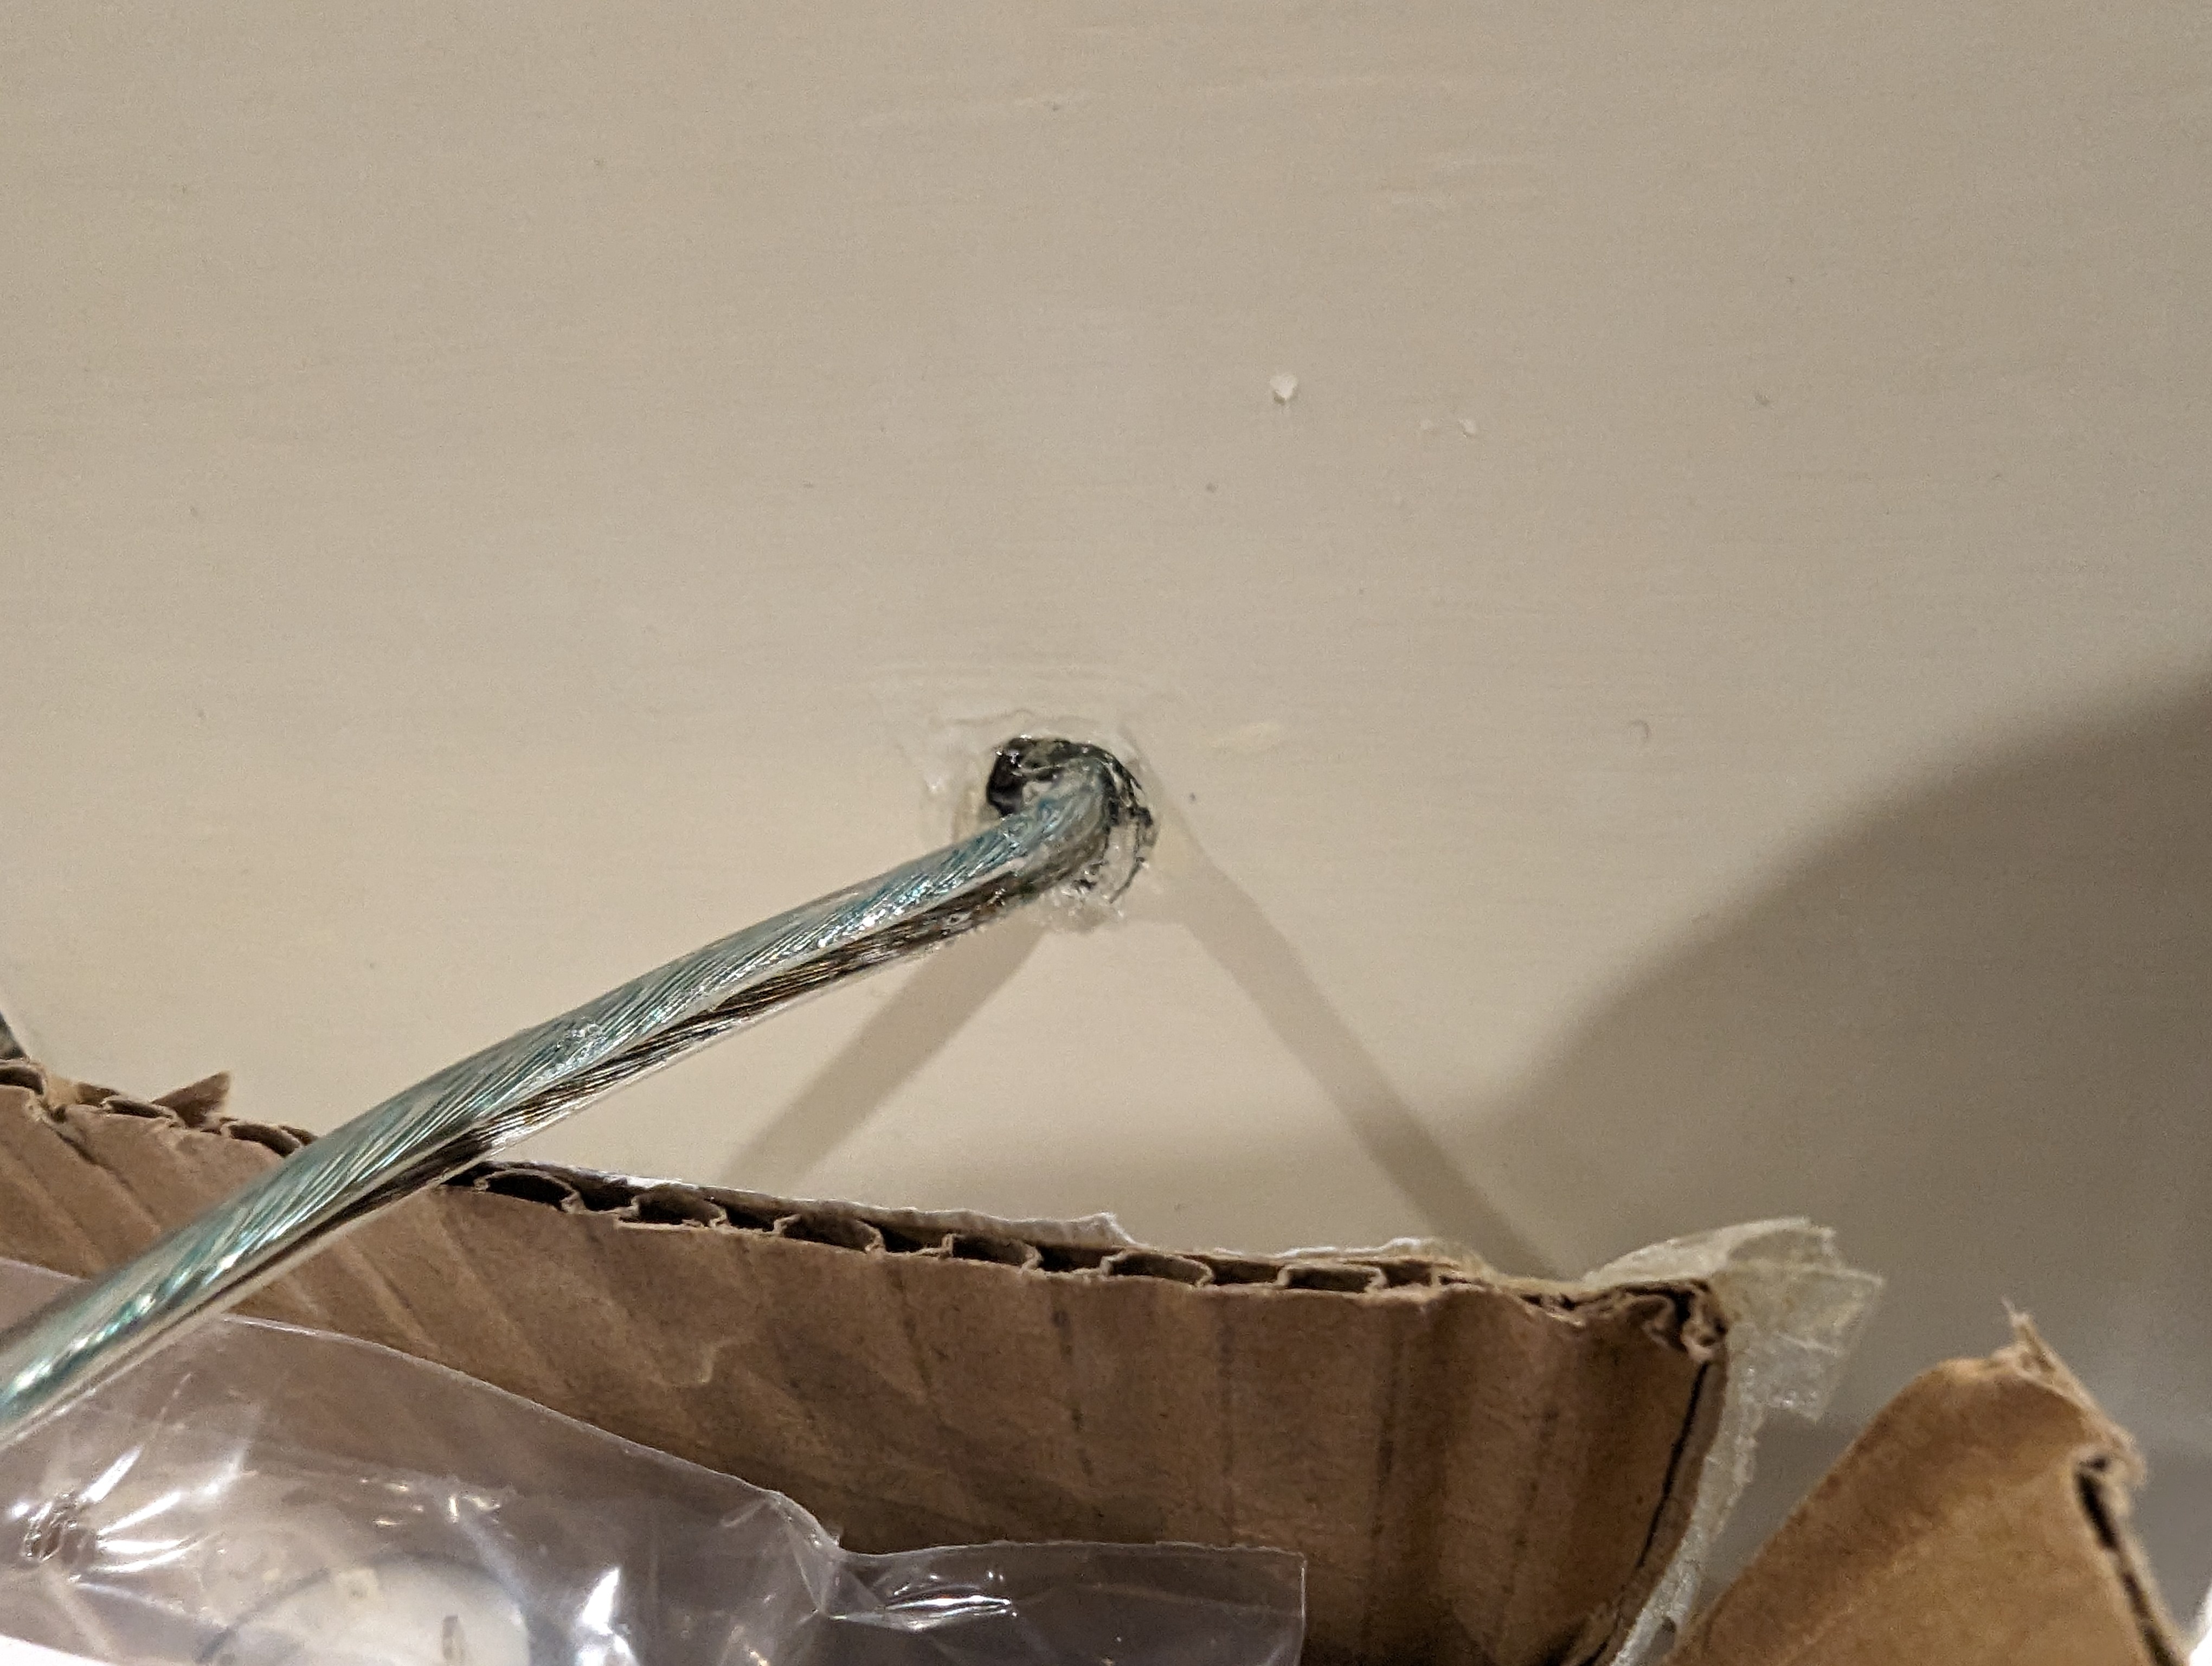
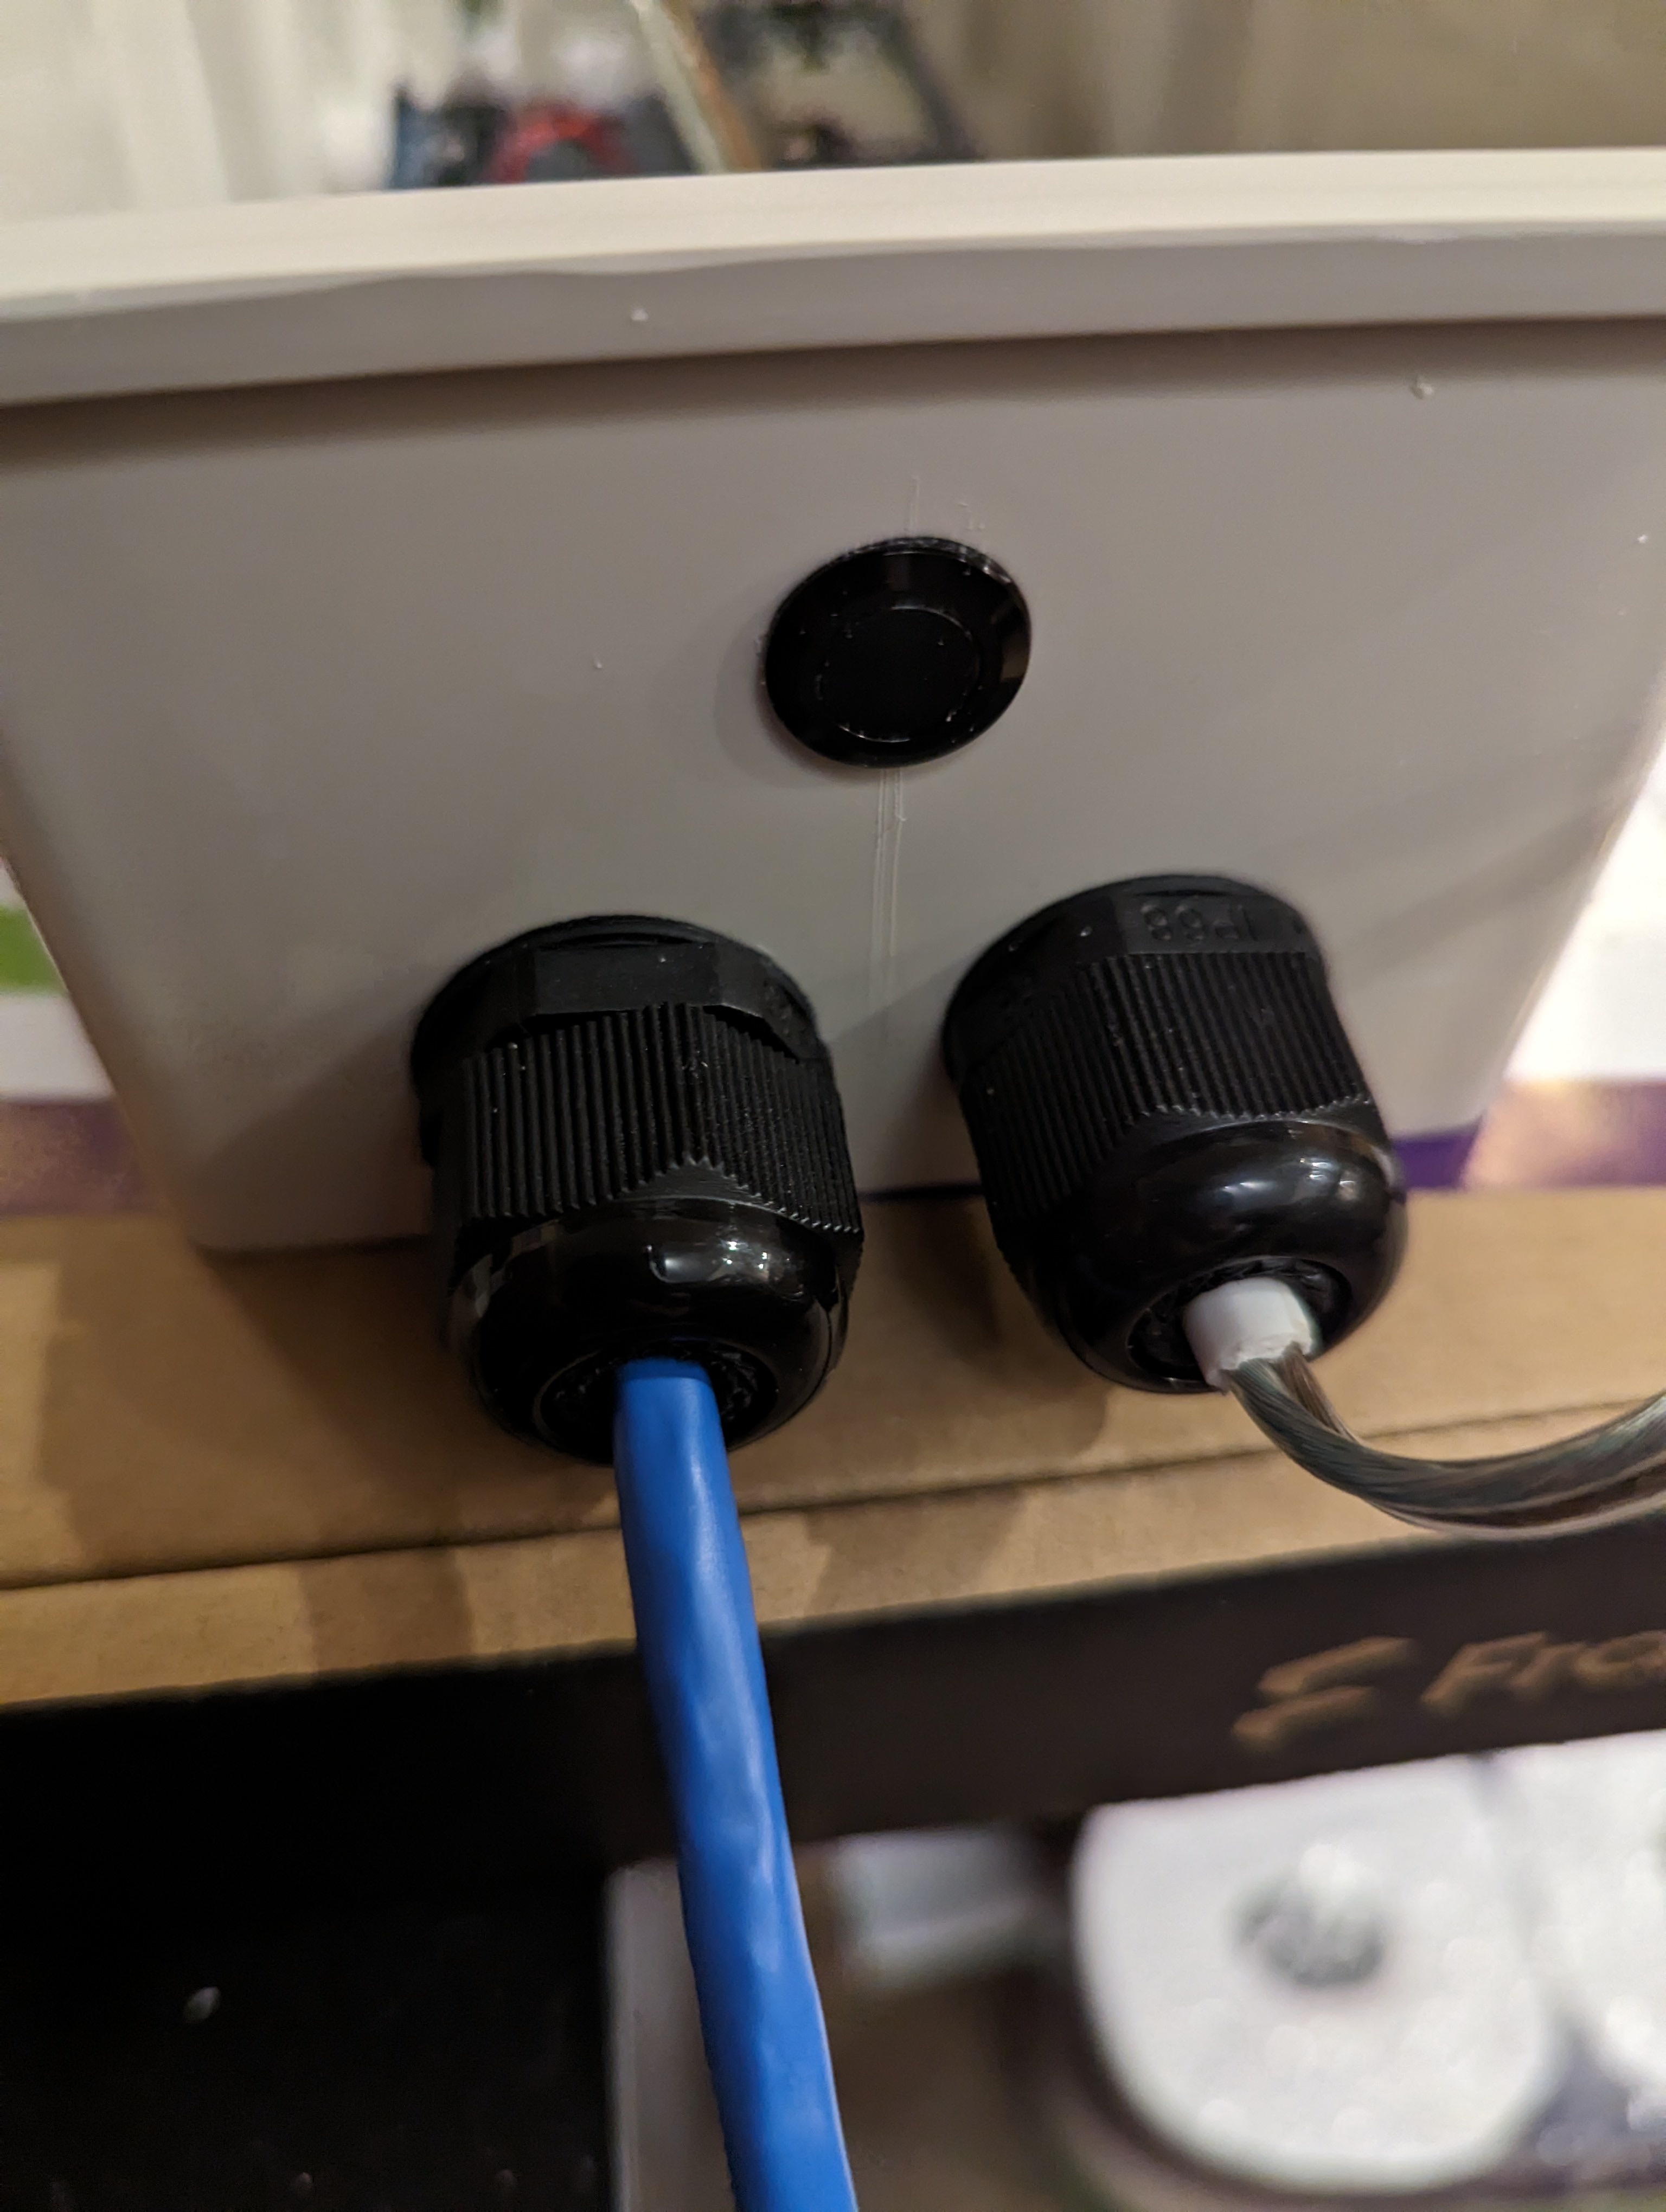
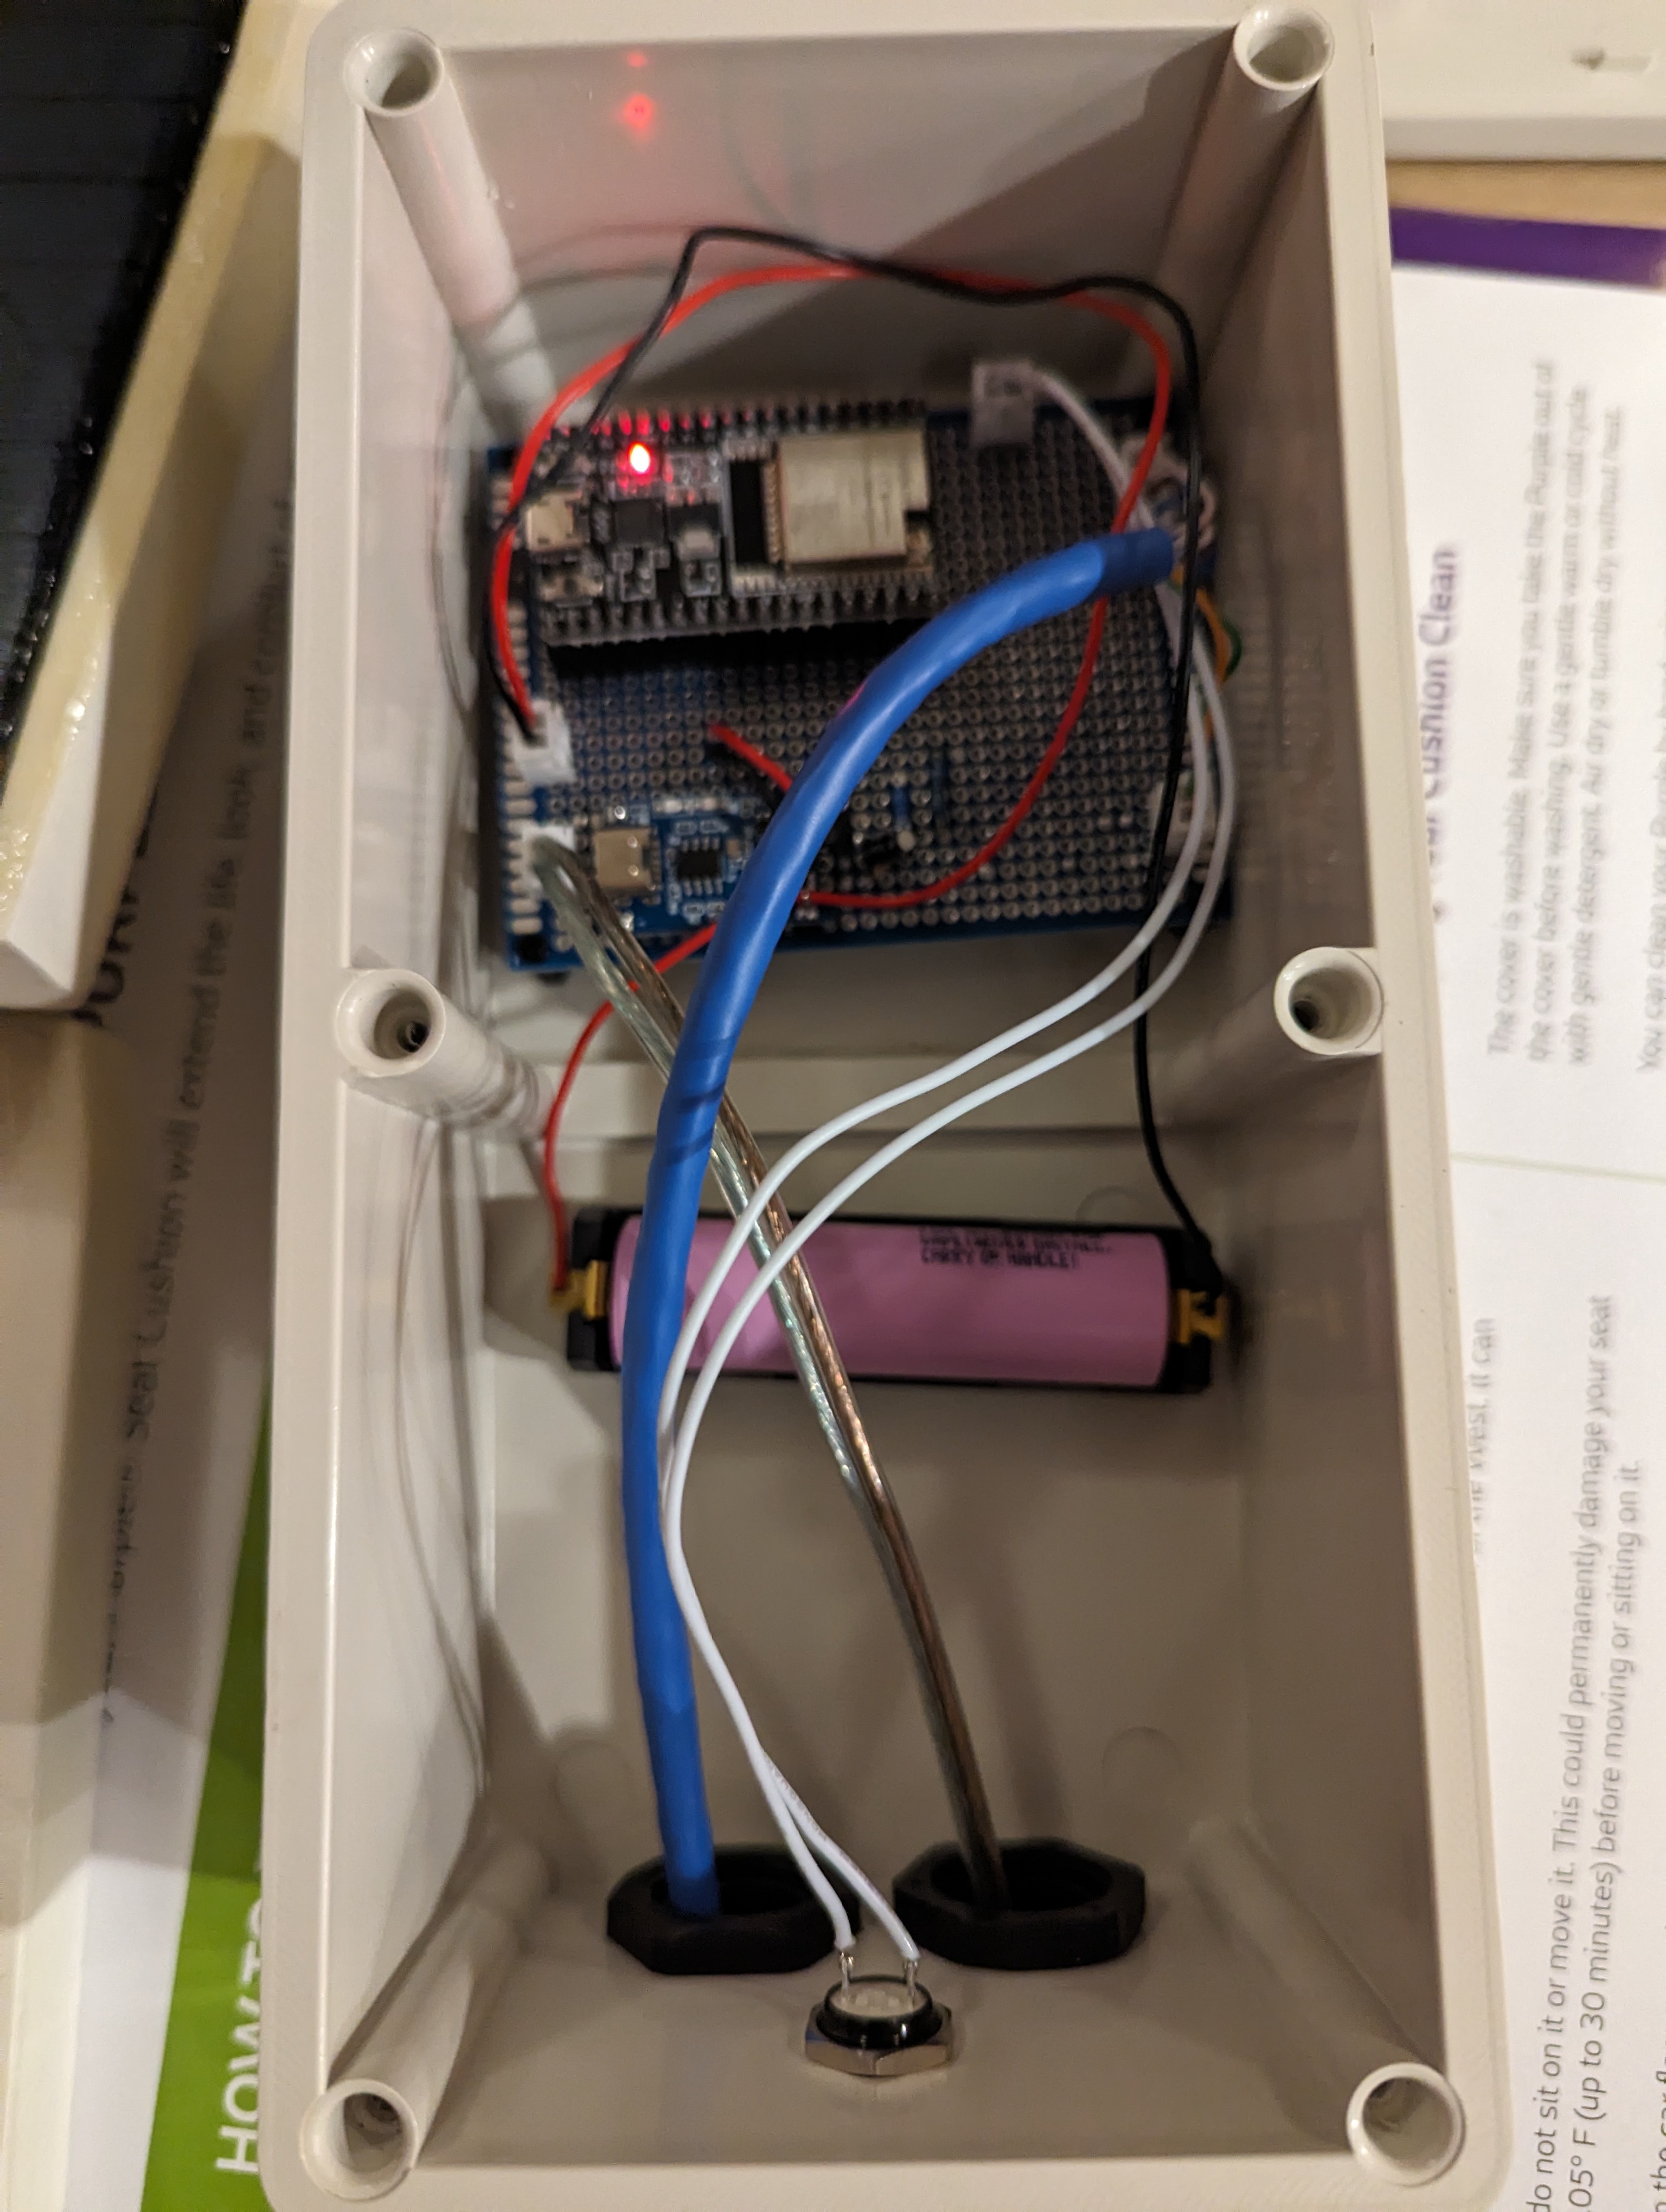
I drilled holes in the weatherproof box to fix the cable glands and the weatherproof button. In the case of the solar panel wire, I had opted to buy speaker wire since I figured it would be easier to run in the channel between the two solar panels, being flat. But that also made it not really fit the cable glands that great. I ended up stripping some of the outer sheath off some 2 wire power cable I had, and wrapping that around the part of the speaker wire that gets clamped in the glands, just to make a reasonable seal. These all were on the side I decided I would mount at the bottom, so water wouldn't be able to easily fall into the box.
Final test fit. I later used epoxy glue to glue down the nylon headers and the battery holder inside the box. This means the prototype board can also be easily removed, as can the ESP32 dev board and the battery, but the battery holder cannot. Let's hope I never have to get that thing out.
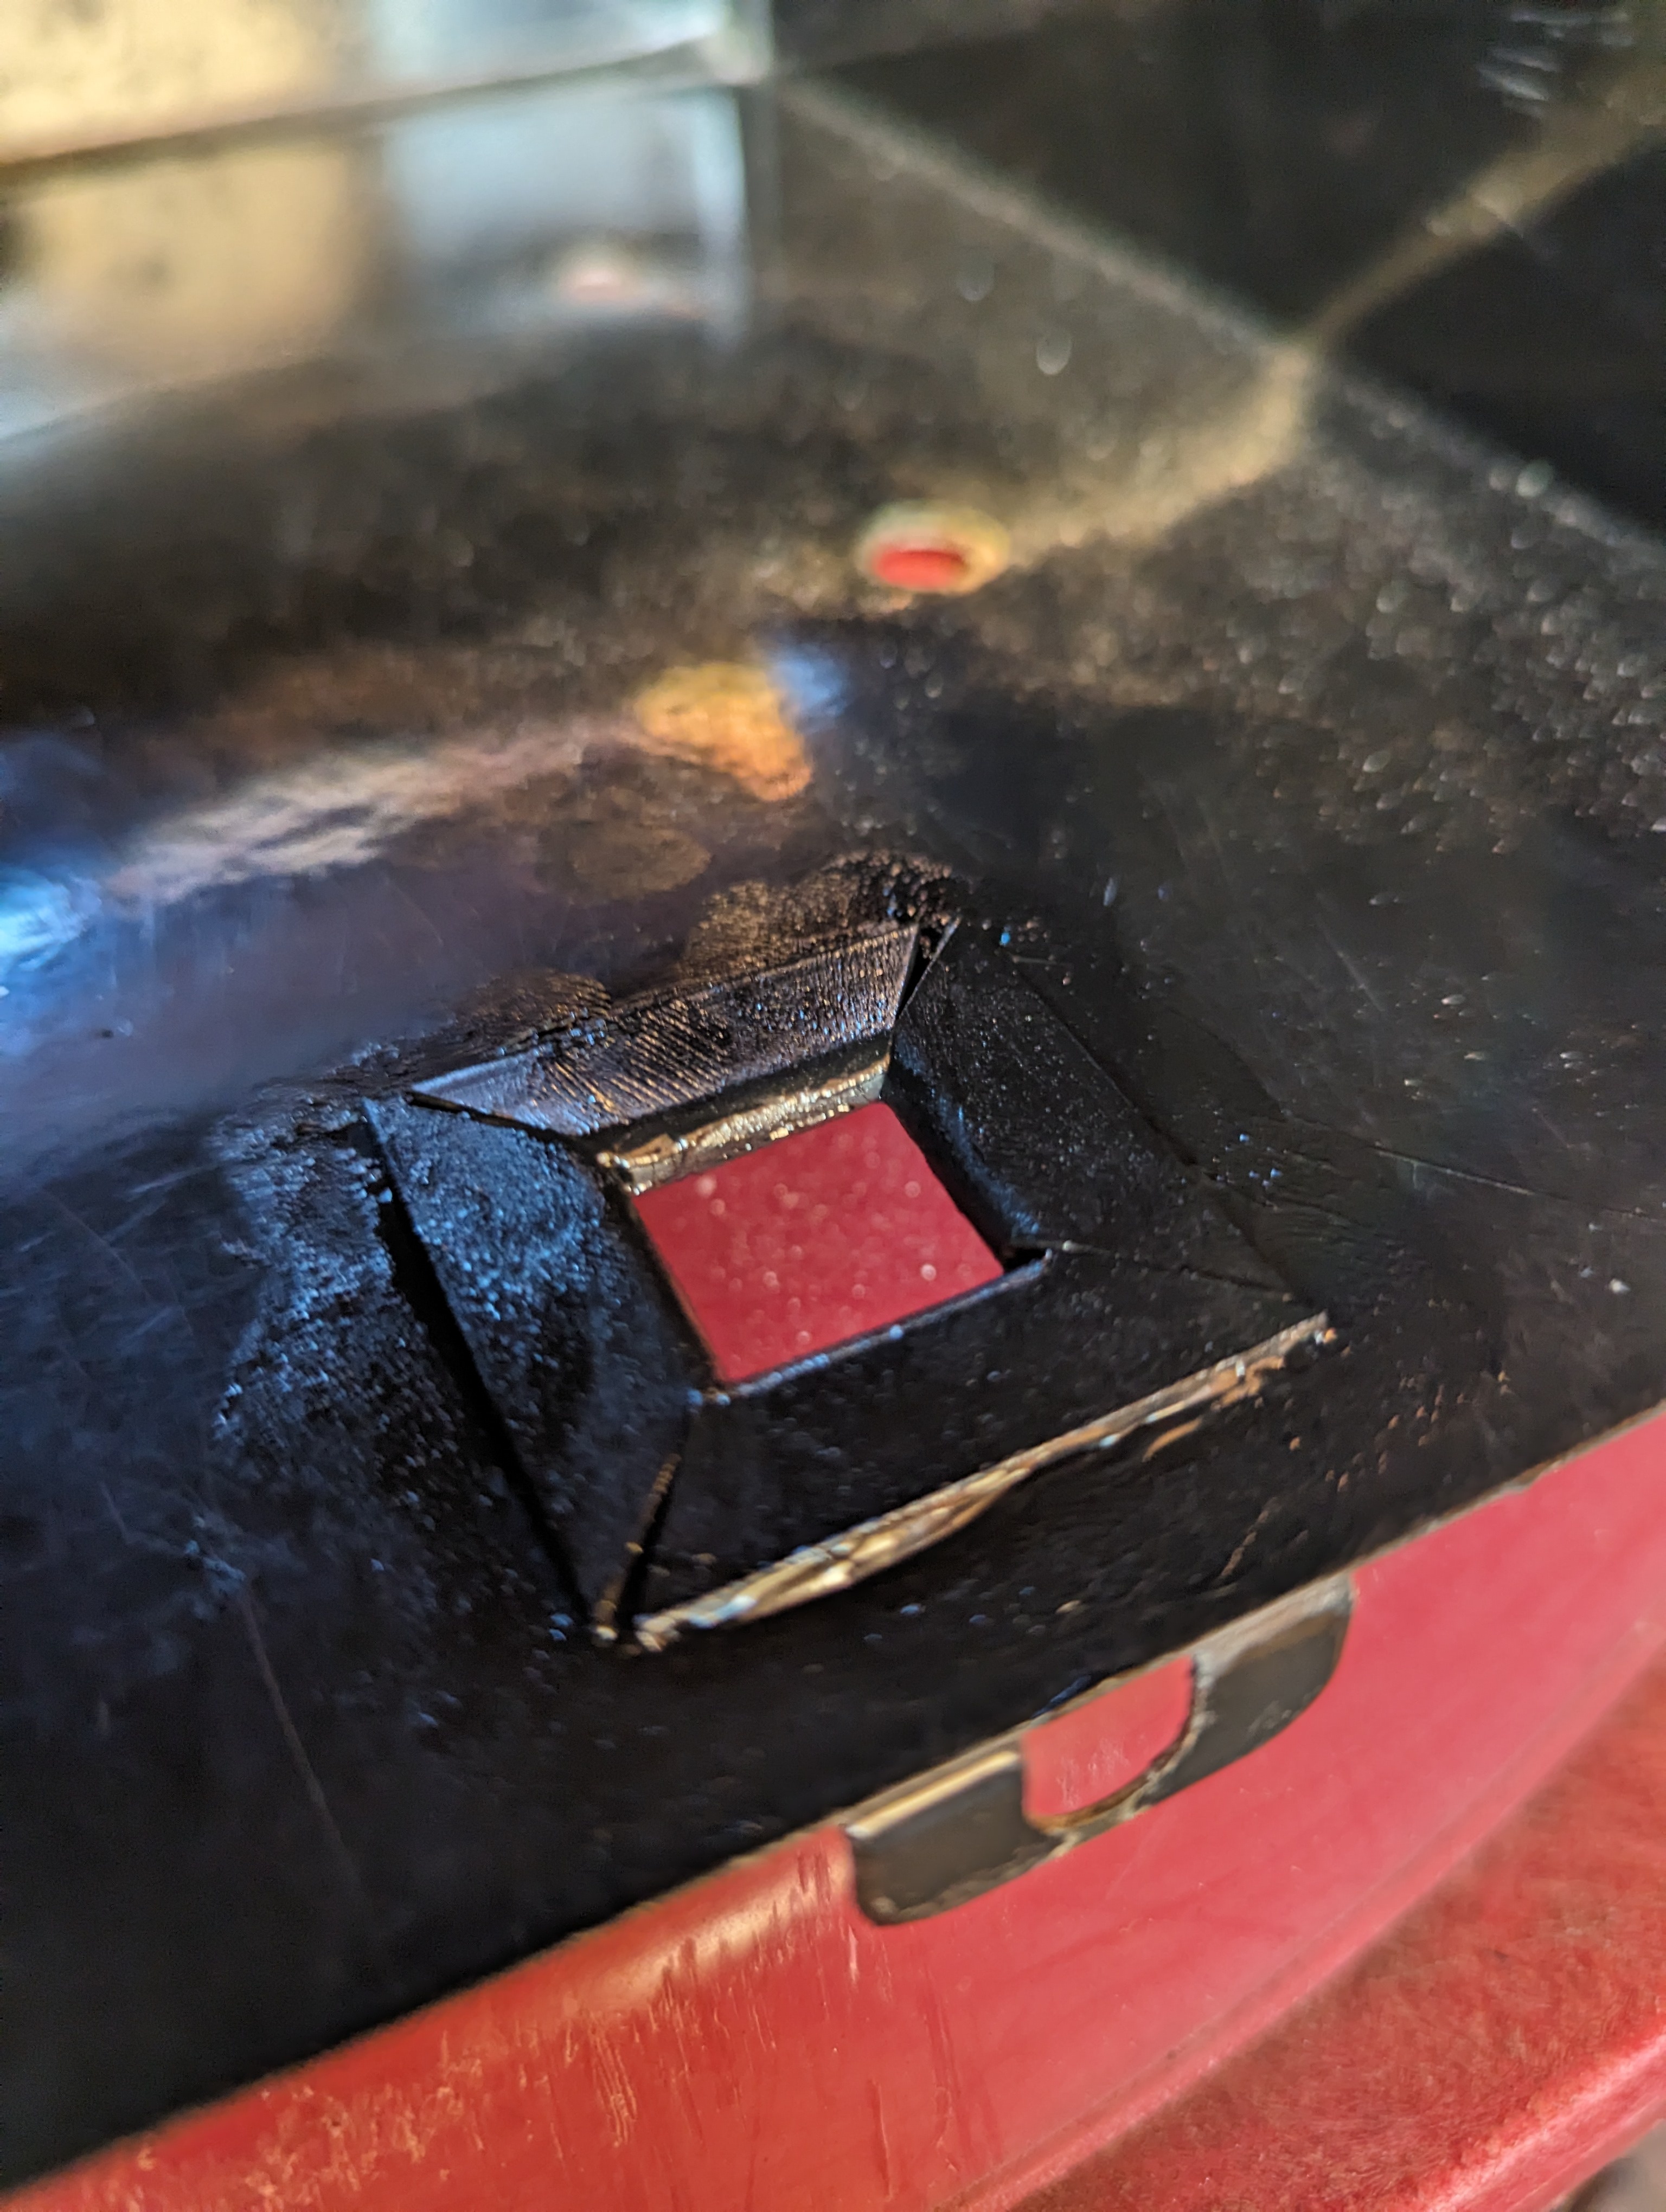
The mailbox itself also needed a hole in the bottom for the sensor cable to come out. After drilling a hole and filing it into a square shape, I cut some rubber grommet strip to size and fitted it around the hole, with some marine silicone adhesive to protect the sharp metal edges from water and to hold the grommet strip in place.
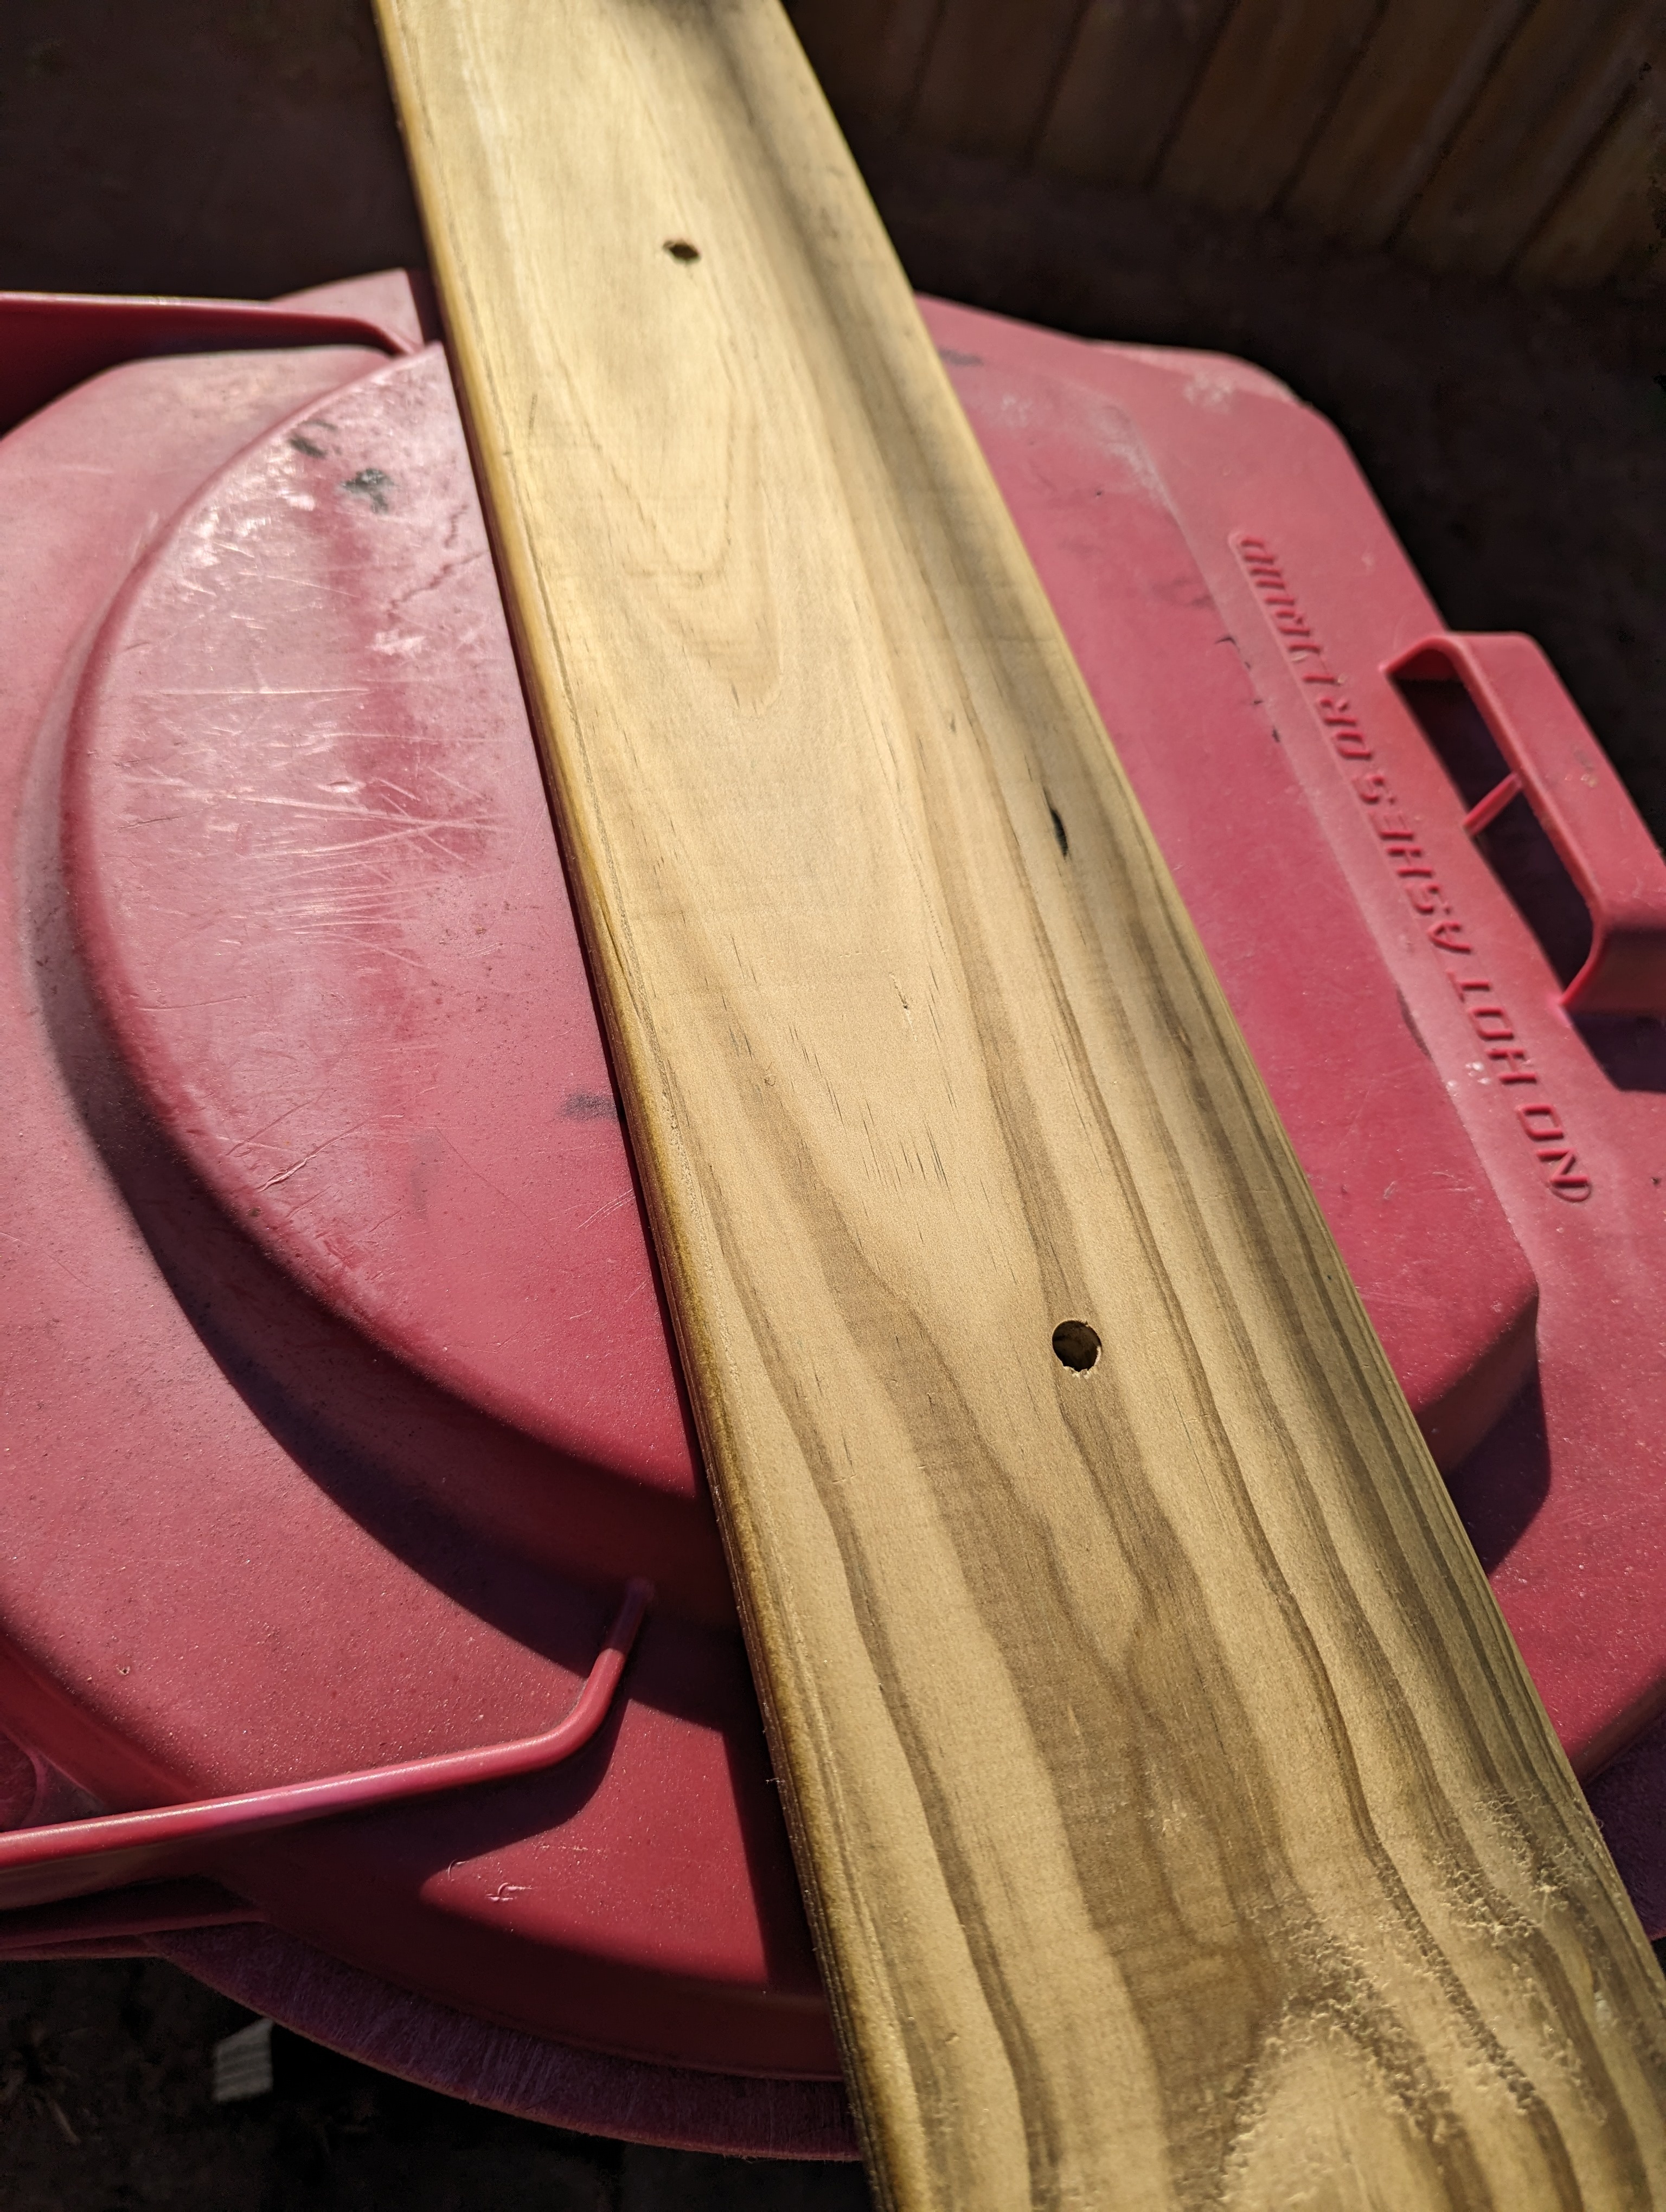
I'd drilled some holes in the brick wall my mailbox sits upon for masonry anchors, and this piece of treated pine got the last of my polyurethane spray, just in case.
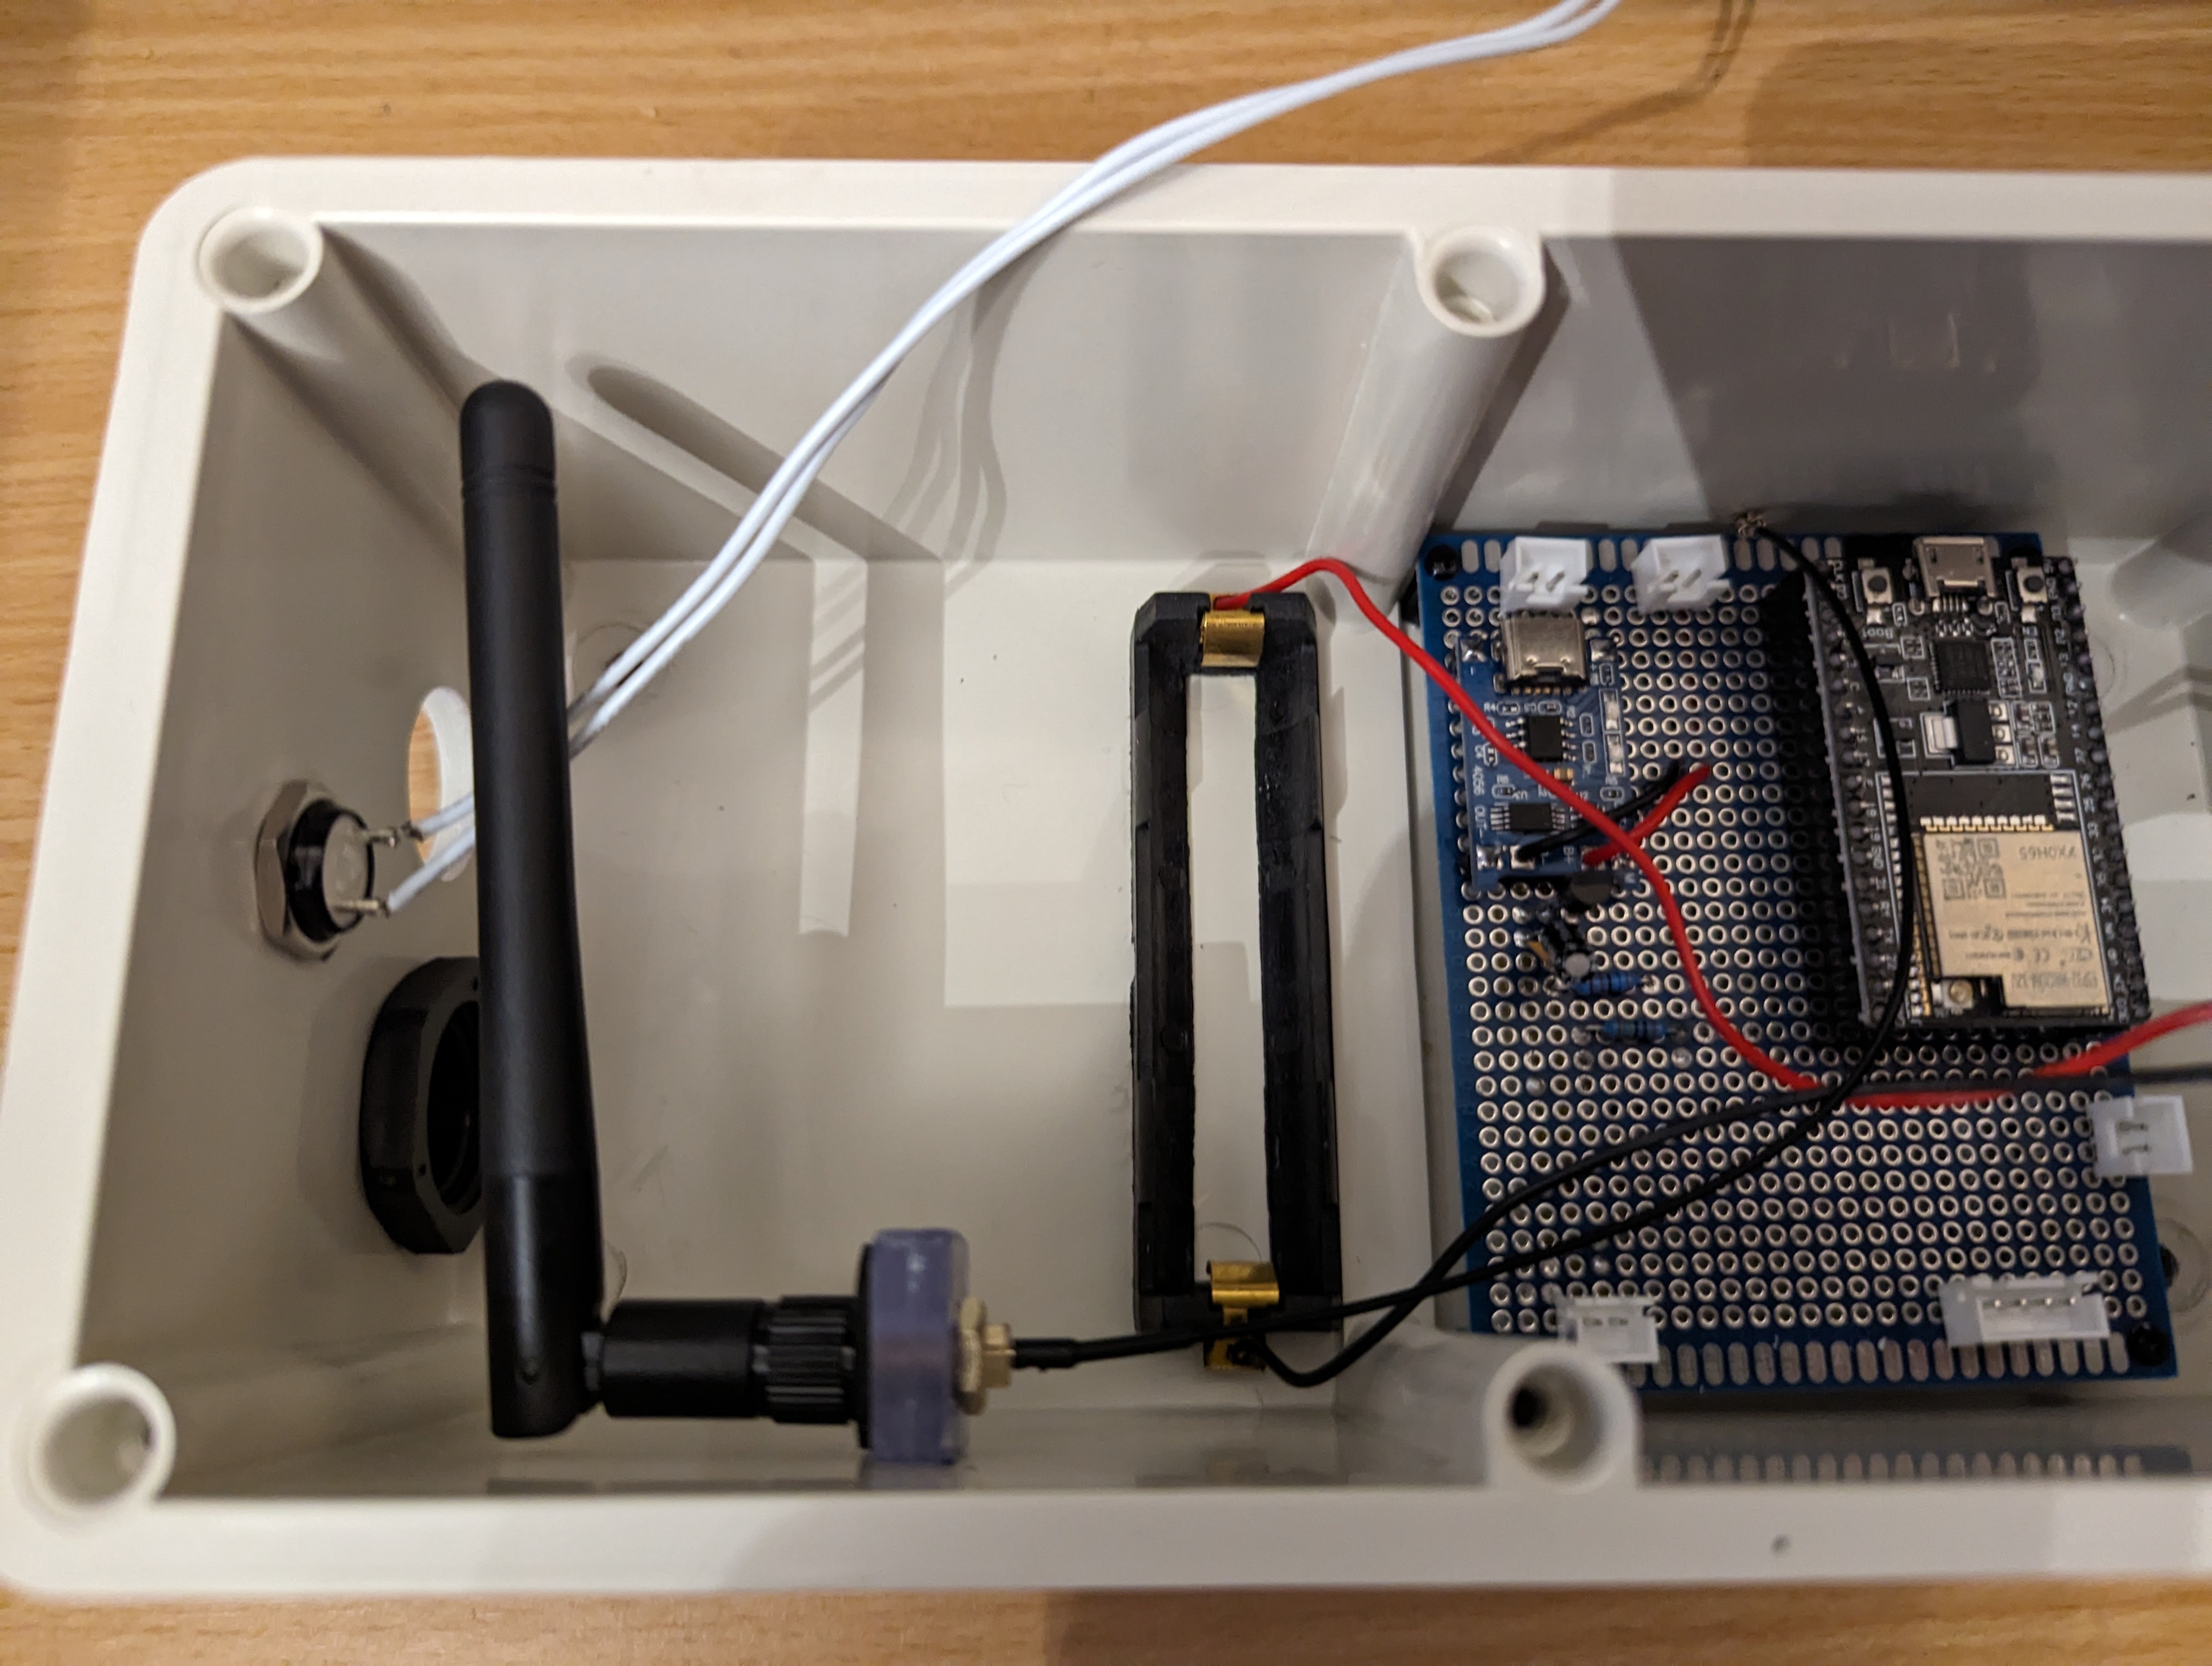
Using a two pieces of the leftover perspex glued together, I made an internal mount for the antenna, figuring it would be best to not have the thing either floating around freely inside the box or sticking out the side where people could potentially break it off.

Finally, after weeks of off and on work, it was ready to install.
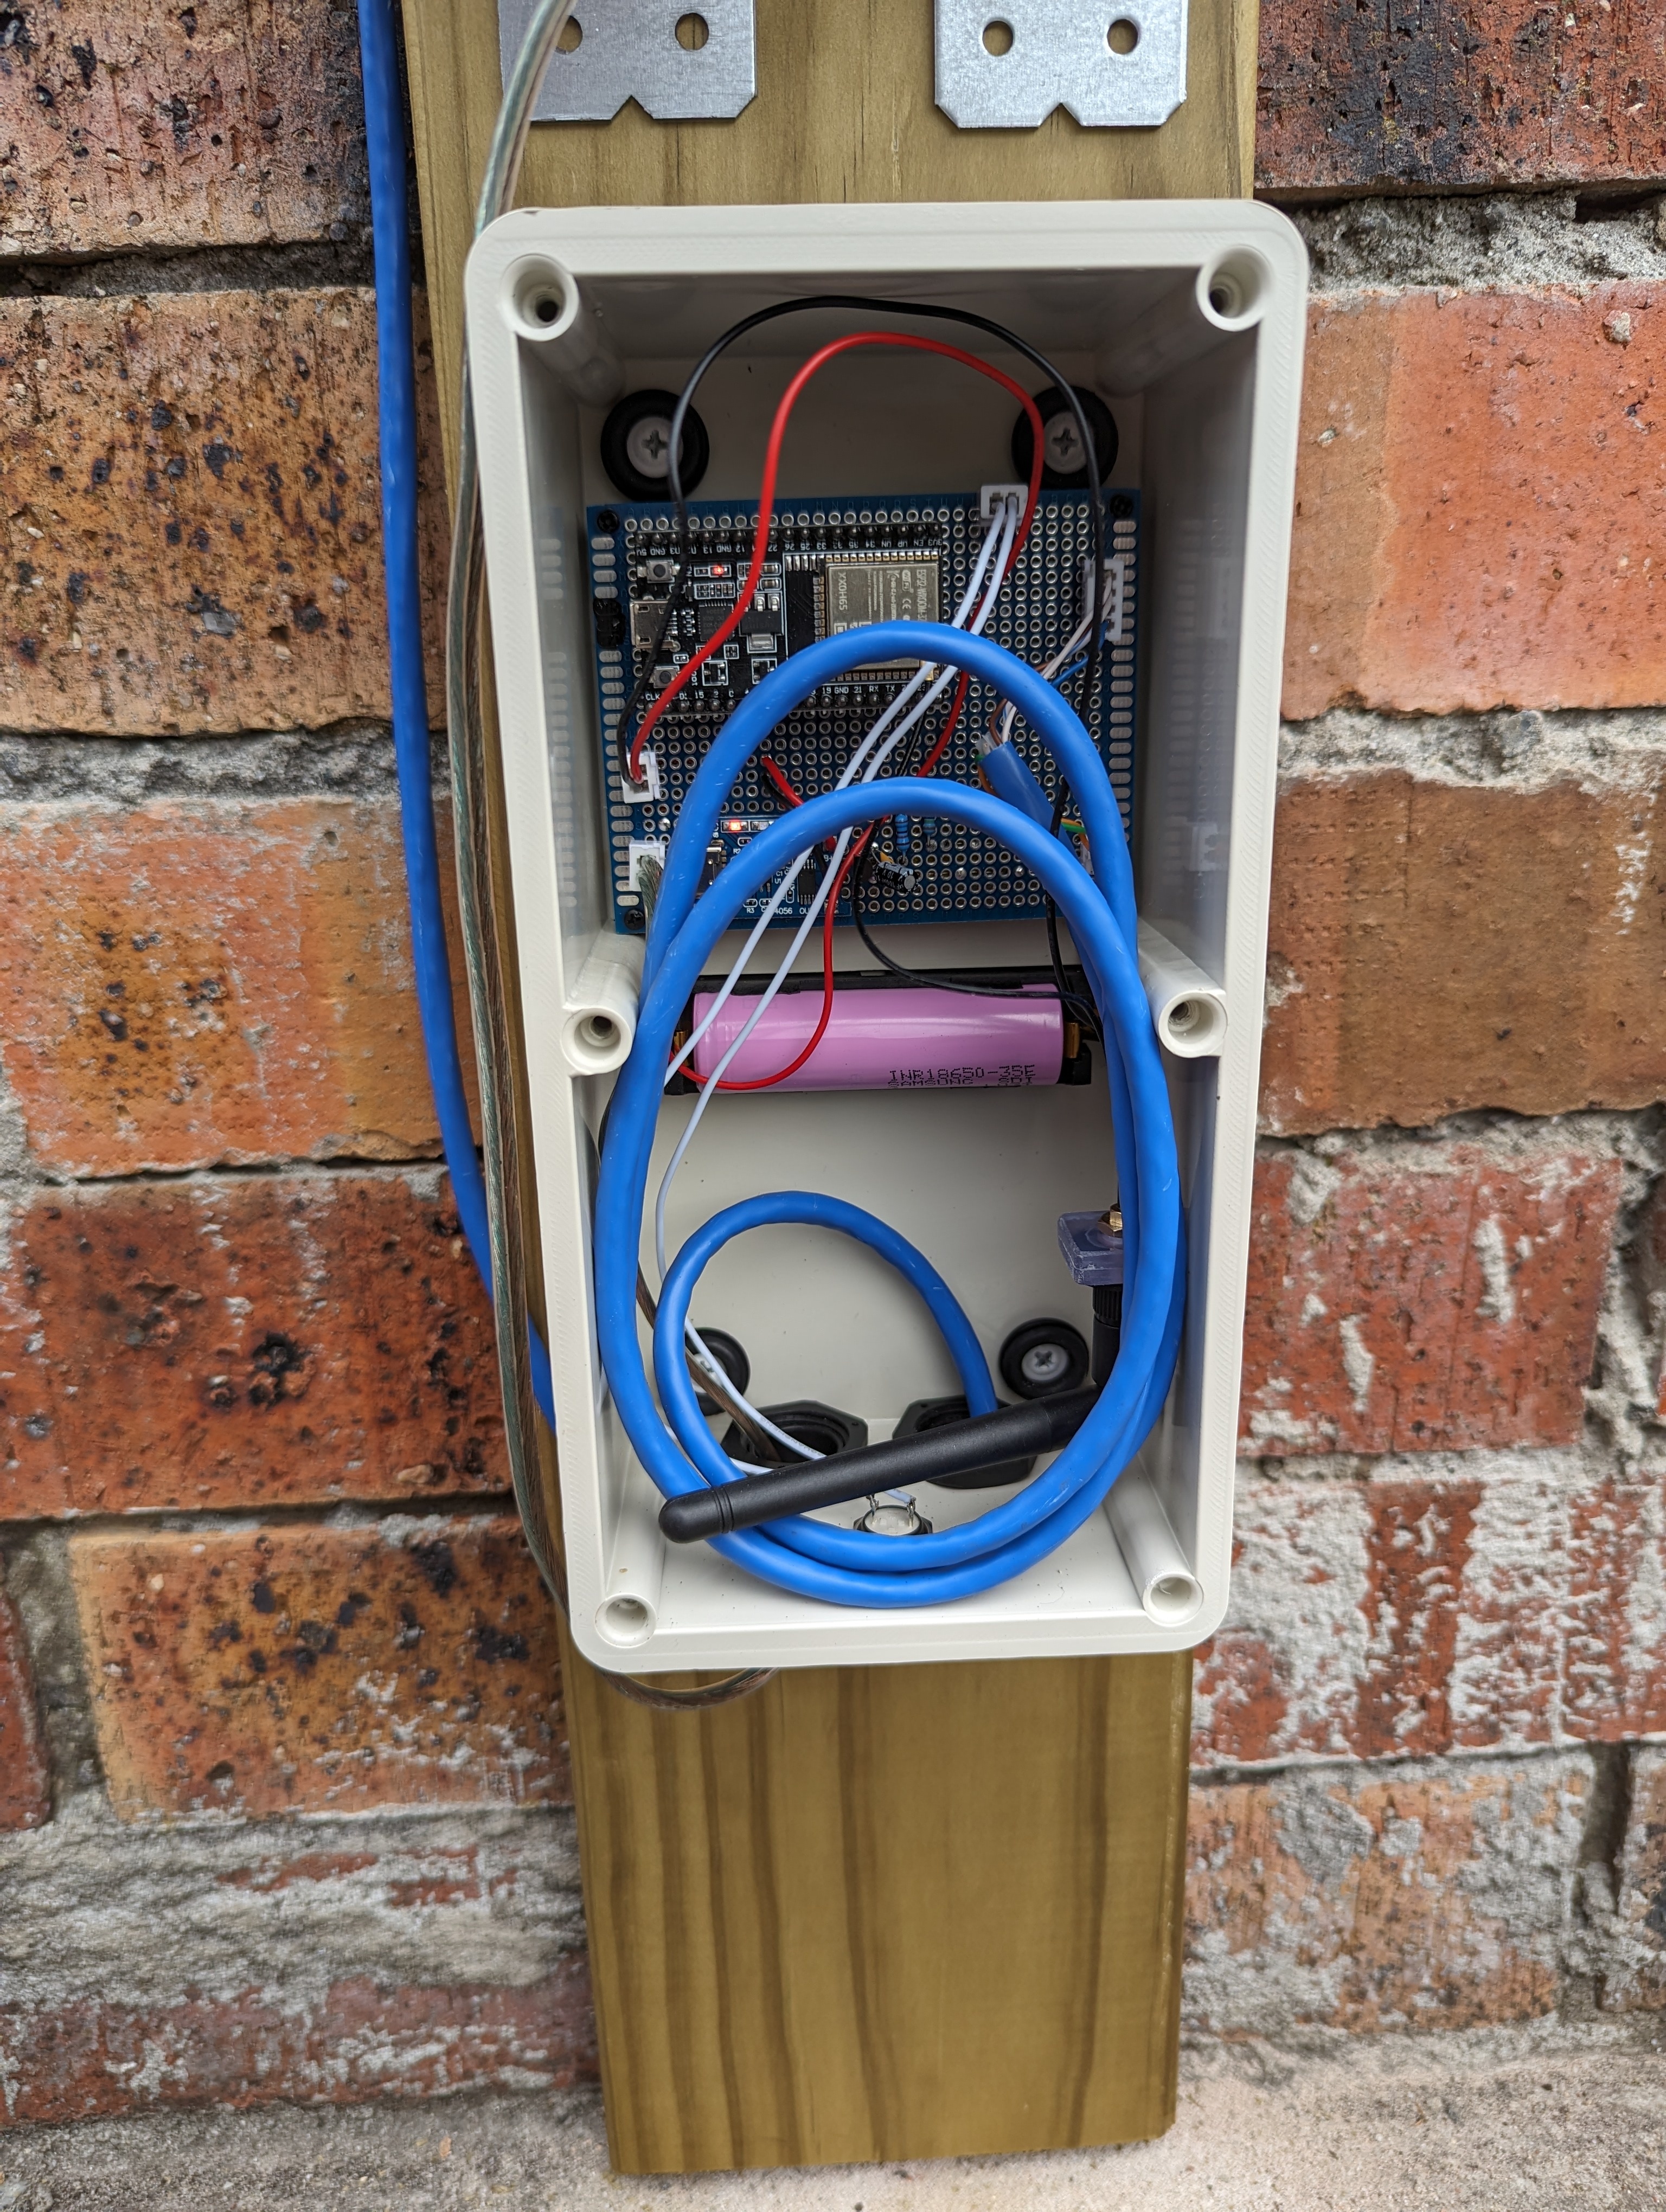
The ESPHome coding used my VCNL4010 component, and if anyone is interested I can share it but it's kinda a large file. I had originally planned to just use Arduino IDE and talk directly to MQTT, in order to keep things simple and just use the Adafruit VCNL4010 library, but in the end elected to use ESPHome. For, among other things, its support for over the air updates.

3
1
submitted 6 months ago* (last edited 6 months ago) by [email protected] to c/[email protected]


This is surely common knowledge for some of you but I thought I'd share a story, as this just made me cringe

I never understood the point in the option to "run actions in parallel" I thought if I had a list of actions to complete, HA makes it through them almost instantly, and with the varying latency of each action they wouldn't complete at the same time anyways.

Then I tested my smoke alarm notification that I have had running for over a year.

It went-

If: list of smoke alarms detects smoke Then: Turn on the lamp next to my bed, then Send a notification to my phone.

I had made an error when setting up the lamp entity. (I made it full brightness on both scales, can only use one) this stopped the automation before the notification went out to my phone.

If it's important that the automation makes it to the end, run in parallel!

Talk about a false sense of security

4
1
Smart-ening Window Blinds (sh.itjust.works)
submitted 6 months ago* (last edited 6 months ago) by [email protected] to c/[email protected]


I've got some decent window blinds at my house (tilt as well as roll-up and -down), but I didn't want to shell out another couple hundred per-window to make them "smart", let alone being tied to a cloud service that could spontaneous combust any day now...

I've done numerous searches, but have not found anything decent that I could use to retrofit to add any sort of automation to these blinds. The best I could find were purpose-built and/or roller shades.

Is anyone here aware of any projects or products that can be added to a set of blinds to locally automate any of their features? I'm running latest stable Home Assistant in a container, with HACS, if that helps.

TIA!

5
6
1
submitted 6 months ago* (last edited 6 months ago) by [email protected] to c/[email protected]


cross-posted from: https://lemmy.world/post/15144957

Can anyone help me figure out Frigate/go2rtc

I have two cameras in Frigate.

One is a Raspberry Pi 3 running Monocle server, and this stopped working in Frigate some time back (driveway). The second is a Galayou G7 (nursery). The nursery camera is the one I am concerned about with this post.

Problem: Up until a month or two ago (I must have ran an update but I don't know) the audio from the Galayou camera worked in Home Assistant. I'd like to get that working again. Some searching led me to try setting up go2rtc in my config.

Here is my config before making any changes:

mqtt:
  host: 192.168.1.10
cameras:
  nursery:
    ffmpeg:
      inputs:
        - path: rtsp://redacted:[email protected]:554/live/ch1
          roles:
            - detect
    detect:
      width: 1280
      height: 720
  driveway:
    ffmpeg:
      inputs:
        - path: rtsp://192.168.1.240:554/recording/7824851880350319106/replay?trackid=8836591
          roles:
            - detect
    detect:
      width: 1920
      height: 1080

This currently provides only jsmpeg video in Frigate. If I add something like this to the end:

go2rtc:
  streams:
    nursery:
      - rtsp://redacted:[email protected]:554/live/ch1

this adds mse and webrtc as options in Frigate. But, mse plays only video, no audio. And webrtc loads neither audio nor video. I have tried adding lines like - "ffmpeg:nursery#video=h264#audio=aac" and also with opus but to no avail.

Finally, if I ffplay rtsp://redacted:[email protected]:554/live/ch1 it loads audio/video without a problem. I'm also able to connect via ONVIF at onvif://192.168.1.241:8899 from onvif-gui.

So, something is wrong in my Frigate config, and I don't know what. I'm hoping someone here is a little more familiar and can give me a pointer or two here?

Update: Here is the fix, in case anyone comes across this later:

go2rtc:
  streams:
    nursery:
      - "ffmpeg:rtsp://[email protected]:554/live/ch1#video=copy#audio=copy#audio=opus"
  webrtc:
    candidates:
      - <server-ip>:8555

The webrtc section got webrtc to work in the Frigate and video back in HASS. The #audio=copy#audio=opus got audio working in webrtc.

7


This week I've been playing with Espresence, which for anyone that doesn't know, is a program that runs on an ESP32 and tracks Bluetooth. It then has a guess where you are based upon the strength of the signal.

So a little backstory, I recently wiped out my HA server and didn't have a backup so I've started from scratch. Since I've started from scratch I've been avoiding Node Red and just using the HA automations, but I am a NR boy at heart.

Previously my bathroom light automation in NR was a massive flow of door, motion, leak sensors.

When I added espresence I decided to reinstall NR to add these new sensors into my automations, and found the Binary Sensor node, so I had a play and managed to make a Front Room Presence binary sensor.

"This is pretty good" I thought and made another for my bathroom, taking in all the sensors I used previously. But this time they triggered a binary sensor instead of the lights.

Now I have the binary sensor triggering the light automation, with extras here and there (like guest mode being on, trigger the lights from the hallway sensor instead of the bathroom sensor. The light automation looks much cleaner and presence is all done on one page.

So I'm using the binary sensor in 2 ways here, as an addition to the motion sensor in my front room, and as a replacement for a full blown automation.

Functionally it's not really any different to using an input boolean helper, but I can make this binary in NR itself.

Edit: Gotchas

So I should probably tell you about the big Gotcha in creating a Binary in Node Red.

You need to set the msg. from string to Boolean. So for each binary you need a Boolean true and a Boolean false nose to set it off and on. Everything else was pretty simple

8
1
submitted 6 months ago* (last edited 6 months ago) by [email protected] to c/[email protected]


Next school year, my son will be left home after school for a few hours while my wife and I are at work. I'm looking for a way to detect when he's home and have the front door unlock (among other automation scripts that are in place).

I came across this post and was going to get the Tile Pro as it seemed to check off all my requirements:

  • I could put it in his backpack where it can be forgotten.
  • long battery life.
  • Through the Home Assistant integration, it can trigger when it gets in range.
  • It also has a few other beneficial things, so I was thinking of putting one on each of our bicycles in case they're ever stolen. Hell, I could look into putting one on my cat's collar in case she ever gets out.

Then I came across some concerning articles regarding data harvesting. The whole reason I started self-hosting was to prevent data harvesting, so it seems like the Tile is a non-starter for me.

Has anyone been in this (or a similar) situation? Mainly, I'm looking for a device I can put in my son's backpack that can trigger when he's within range, so the house will open for him. BLE seems like it might be a solution, though I run my server on an old Dell r720 enterprise server in my basement, so I don't currently have Bluetooth functionality (and it's pretty far away from the front door, 20+ feet), though getting that is not a dealbreaker for me.

  • Addendum: To people saying just get a key: we have a key for him. I have a monolith sized server in my basement that automates most everything in my house these days, and was curious if anyone had set up something similar to what I was thinking. Home automation is very much a hobby, and I'm using it to learn new things.
9


I tried my hand at rigging a proximity sensor to the water meter in my house. Sadly it doesn’t have the spinning magnet for the sensor to pick up.

I looked into other options for pulling data from the meter, but for each method, my very antiquated meter had a complication that would prevent it from working.

TLDR: Any recommendations for a home water meter that’s local and integrates well with home assistant?

I’m going to check with my water company first, but likely will remove the old meter and replumb a new “smart” meter and an automated shut off valve into the water supply. I believe the current meter is leftover from before the utility added new meters further upstream, so I’d rather get rid of the rusty piece of junk anyway.

10


Well I totally borked my ZigBee network, and it looks like I'll need to factory reset and re-pair everything. I ignored the warning, and attempted a channel change. Lost everything and can't get any device to connect.

So since I need to do this, what is everyone's preference of ZHA vs Z2M? I was on ZHA, but am I missing anything on the other side?

11


I've been in the HA world since the time the government placed the world under house arrest. Since then I've seen all sorts of amazing things people can do with an esp32 device.

So I'm late to the game. I always thought it may become a dangerous rabbit hole so I've just avoided it. But apparently I have 4 coming today so it's about time to ask you guys what you do.

My first project was gonna be getting some Bluetooth tracking going on around the house to get some room prescence going on.

I also read I can make some seat/bed sensors with a little wire, aluminium foil, paper and a folder-insert, that sounds like it could be fun.

I have a breadboard and a bunch of components I bought when I first got a Pi. I don't know how compatible these components are with esp32s or what the hell I can do.

I don't have a soldering iron (yet).

So basically: noob post, gimme some easy projects that don't require a lot, or wow me with your esp projects.

12


I'm struggling to find the easiest solution to connect a set of active speakers that have BT/Optical (Toslink)/Coax. I currently use a tablet to stream Deezer via BT, but I want to be able to use them in Music Assistant. I tried Bubblepnp on the tablet, but it's too slow for that, it wasn't reliable.

I don't want to spend 100s of dollars on e.g. Sonos stuff. I see Squeezelite as a good option, but I'm unsure how to connect an SPDIF speaker. The docs say you can connect to one of the pins. Do I just cut the plug of an SPDIF cable and then connect to it?

I don't have a 3D printer, ideally I want a box around it.

Ideally there's an out-of-the-box solution. Any tips or help appreciated.

13
14


This seemed more balanced and upbeat than other reporting on the topic.

I'm always happy to see support for Matter and increased awareness.

The more we expect matter devices and insist on them, the better things get for consumers.

15


I posted this issue to HA's forums and received no response, hoping someone here has some idea to help.

I have a lot of TP-Link Kasa devices in my home. When I first installed HA, it automatically discovered all of them. I was using a 4-year-old TP-Link Deco mesh system at the time.

For reasons unrelated to HA, I had to replace that system. I replaced it with a newer TP-Link Deco system, X55. Once that was installed, HA could no longer access the Kasa devices. It still sees all my other IoT devices.

First, I removed all the Kasa devices from HA and tried to rediscover them; no luck. I tried using each device’s IP address for the host to discover them. When I used 192.168.68.67, e.g., I got this error message:

Connection error: Unable to connect to the device: 192.168.68.67:9999: [Erno 113] Connect call failed (‘192.168.68.67’, 9999)

I rebooted at all places, including resetting a couple of the Kasa devices to see if that worked. My sneaking suspicion was that this new Deco system has a Smart Devices Manager in the app, which only recognizes my Kasa devices on my network (none of the other IoT devices), and somehow that’s interfering with HA’s access to these devices.

Since then, I managed to make some progress, but not much. I managed to remove my Kasa devices from the Deco app management by “removing” each one. This deleted the custom name for each so that now each shows as its generic model type on my network (e.g., KL110).

After I did that, HA found nine of the 14 devices automatically. It still won’t find the other five. Every week or so, it discovers a new one on its own, so maybe someday it’ll find all of them.

However, I still get the error “Failed setup, will retry” for all of the ones it has found. When I reload, it goes through the initializing stage, then right back to “Failed setup, will retry.” I have debug logging on, but I don’t see any logs for these devices in my logs. When I go to a specific device, it indicates “No logbook events found.”

I’m still able to control these devices via the Kasa app, but I can’t incorporate them into any HA automations.

Any help or suggestions is much appreciated. Thanks!

16


Finally we find out what the failure was

17
18


I'm following the settings on WLED's wiki for the WS2814 strip:

6-LED groups (24V) as one logical LED. Must be controlled as SK6812 type, color order: BRG, swap W and G (this option is available since WLED 0.14.0-b1)

But the lights just flicker like crazy. Switching WLED settings definitely does something, but not the intended effect.

Using the domestic automations controller. On the latest WLED firmware. LEDs are powered directly by a 24V 10A PSU. Originally I thought my data cable was too long but it still has all the issues plugged directly into the controller.

Has anybody got these strips working? Is the WLED wiki wrong?

19
20


I had to add this:

http:
  use_x_forwarded_for: true
  trusted_proxies:
    - 127.0.0.1

to config, but overall it's very useful article.

21


I am looking for a Soundbar, which I can Turn On/Off with Wifi and HA and connect via Bluetooth to Source. I wasn't able to find a list with supported devices, except a vague Statement about some types of LG Bars beeing integrated

https://www.home-assistant.io/integrations/lg_soundbar/

Does anyone know where I can find a list, or may I get some recommendations?

Thanks!

22


Try as I might, due to the abundance of various types of low voltage wire connector types, I can't seem to find exactly what I'm looking for.

I do a lot of LED strips and DC powered automations and I've used many Wagos and soldered some stuff in place. These tend to have some problems though. Wagos can take up too much space, especially when connecting power to LED strips that can't be tucked away. Soldering in place sucks and usually ends with a poor connection. LED snap on clips are ridiculously unreliable and weak connections. Barrel connectors are nice and small but the connection has the potential to pull out.

The holy grail IMO would be a very small plastic two wire housing that can clip together like a plastic belt buckle or those connectors that often come with 12V DC batteries in battery backups/motorized kids toys. I have no idea what term to search for to find these.

Anybody got any hints?

I like the idea of presoldering these onto the ends of LED strips in lieu of barrel connectors, so once you are ready to install in the location it's as easy as snapping in place. If the LEDs burn out it can be replaced easily as well.

23


We recently held our State of the Open Home 2024 live stream, where we revealed how we are thinking even bigger about securing the future of the smart home. During this stream we launched the Open Home Foundation, a new non-profit organization created to fight for the fundamental principles of the smart home — privacy, choice, and sustainability — focused on serving everyone that lives in one. To learn more about the Open Home Foundation read the full announcement.

The stream includes a deep dive into the evolution of Home Assistant and how it has now reached an estimated 1 million installations. There were other substantial updates on voice and hardware, including teasing our upcoming Z-Wave and voice assistant hardware. The first panel discussion featured the founders of Open Home Foundation collaborating projects WLED, Zigbee2MQTT, Rhasspy, and Z-Wave JS. A second panel gave a comprehensive overview of the state of open standards, featuring key open-source developers working on Zigbee, Z-Wave, Matter, and Bluetooth. The stream caps off with a look into the future of the open home, including the announcement of a roadmap full of exciting new features.

https://www.youtube.com/watch?v=oa__fLArsFk

Full list of chapters:

Introduction (0:00:11)
Announcing the Open Home Foundation - Paulus Schoutsen (0:02:36)
Panel with Open Home Foundation collaborators - WLED, Zigbee2MQTT, Rhasspy, Z-Wave JS (0:18:31)
Voice - Michael Hansen (0:36:31)
Home Assistant - Franck Nijhof (0:53:08)
Hardware - Uwe Bernitt (1:21:37)
Panel on Open Standards - Zigbee, Z-Wave, Matter, Bluetooth (1:40:21)
Future - Madelena Mak (2:07:29)
Closing (2:37:33)

The Open Home Foundation now owns and governs over 240 open-source projects, standards, drivers, and libraries, including Home Assistant - protecting these projects from buy-out or becoming abandoned. To learn more about the Open Home Foundation, visit: www.openhomefoundation.org

Btw you can follow the Open Home Foundation on Mastodon: @openhomefoundation

24


But I’ve been getting this error:

[supervisor.docker.interface] Can't install ghcr.io/home-assistant/generic-x86-64-homeassistant:2024.4.4: 500 Server Error for http+docker://localhost/v1.44/images/create?tag=2024.4.4&fromImage=ghcr.io%2Fhome-assistant%2Fgeneric-x86-64-homeassistant&platform=linux%2Famd64: Internal Server Error ("Get "https://ghcr.io/v2/": net/http: request canceled while waiting for connection (Client.Timeout exceeded while awaiting headers)") [supervisor.homeassistant.core] Error on Home Assistant installation. Retrying in 30sec

I’ve tried changing DNS, but it didn’t help and I seem to get no other helpful results from searching. If anyone has any suggestions I’d appreciate it as this seems to be something my home could benefit from but it’s just not loading beyond the CLI

25


Hello all,

What do I actually do when I finally have a running instance (of containerised HA on a Raspberry Pi)? Delete all the toys from Alexa and Smart Life and start again in Home Assistant?

Is deleting everything the intelligent way to go rather than trying to transition?

My Google-foo is failing I did try to find an answer in Lemmy/Reddit/HA. Apologies if I miss an obvious place.

Thank-you in advance.

view more: next ›